OAuth 2.0 is used to authenticate users with DocuSign. With OAuth2.0, users will no longer need to save their password to CMiC. You will authenticate with DocuSign when they need to send documents for ESigning, and this in turn will send a token back that will allow them to stay logged in with DocuSign.
DocuSign will send two types of tokens when you log in:
-
An access token that is valid for up to eight hours.
-
A refresh token that is valid for up to 30 days.
When the access token is expired after eight hours, the refresh token will be available to step in and generate a new access token. This means that you will not need to sign in again for 30 days.
NOTE: Before beginning the steps below to send documents, ensure you have completed the setup process in DocuSign Integration - DocuSign OAuth2.0 Setup Guide for DEMO.
Setting Up DocuSign Authentication to Send Documents for ESigning with OAuth2.0
-
Set up the user account in CMiC Field > User Profile
Click on the User Profile icon on the top right corner:

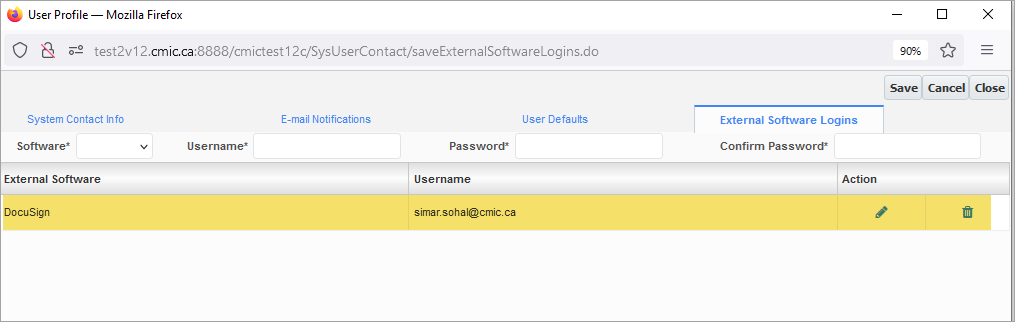
Go to the External Software Logins tab and select the DocuSign option for the Software field. Enter your DocuSign username and password.
NOTE: Users do not need to enter the correct password here if they are using OAuth2.0. This field is used for basic authentication and will be deprecated once basic authentication is phased out.
-
While the correct password is not needed for Oauth2.0, the Password field still needs to be filled (any set of characters can be used).
-
This set up will be compatible with clients who have Azure AD integration with DocuSign.
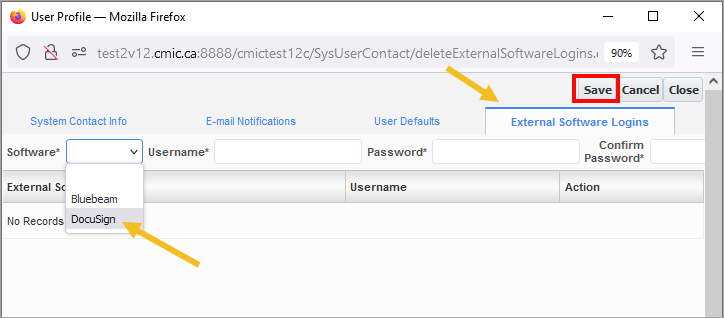
Click [Save]:
-
-
Set up DocuSign settings for OAuth2.0 in Project System Options
If the integration key and secret key are not already set up, go to the Project System Options screen, add the four settings for DocuSign, then click [Save].
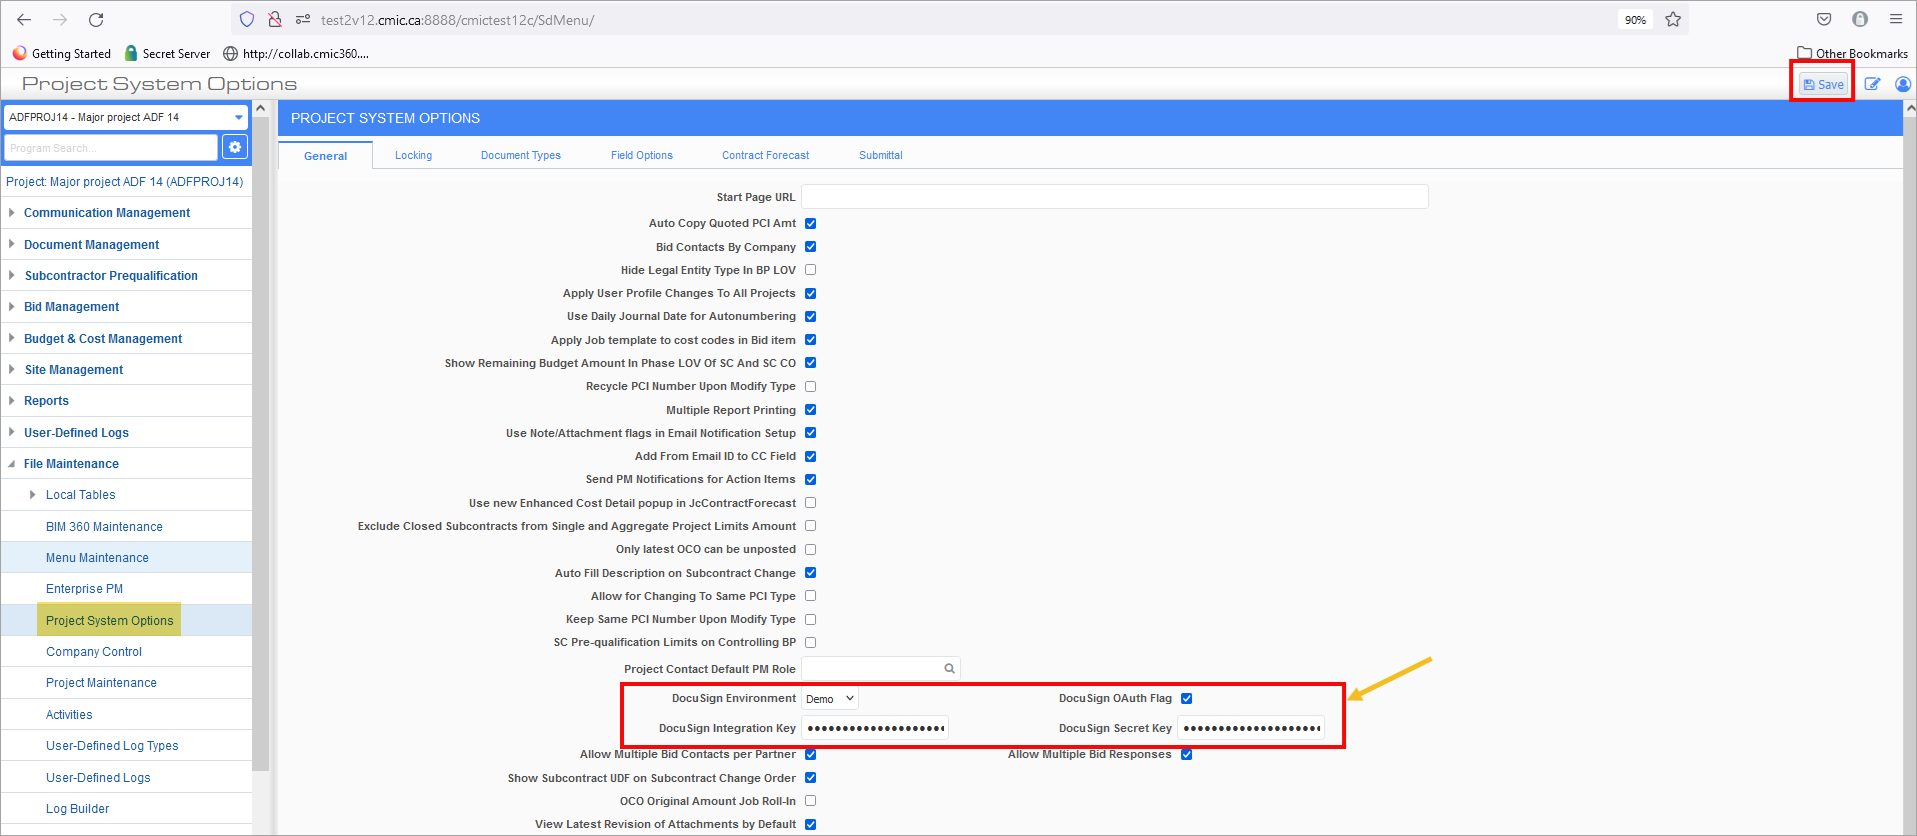
Once saved, the user’s settings will be applied.
-
Authenticate with DocuSign on OAuth2.0 before sending a document for ESigning
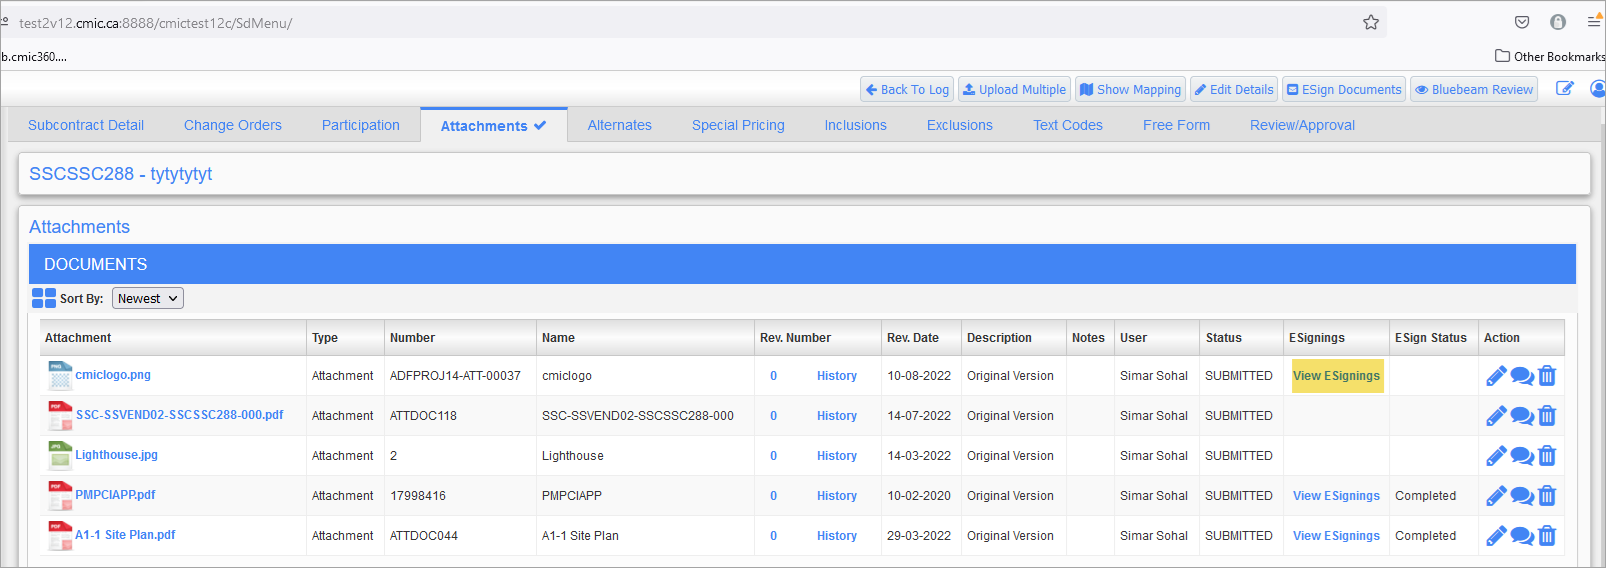
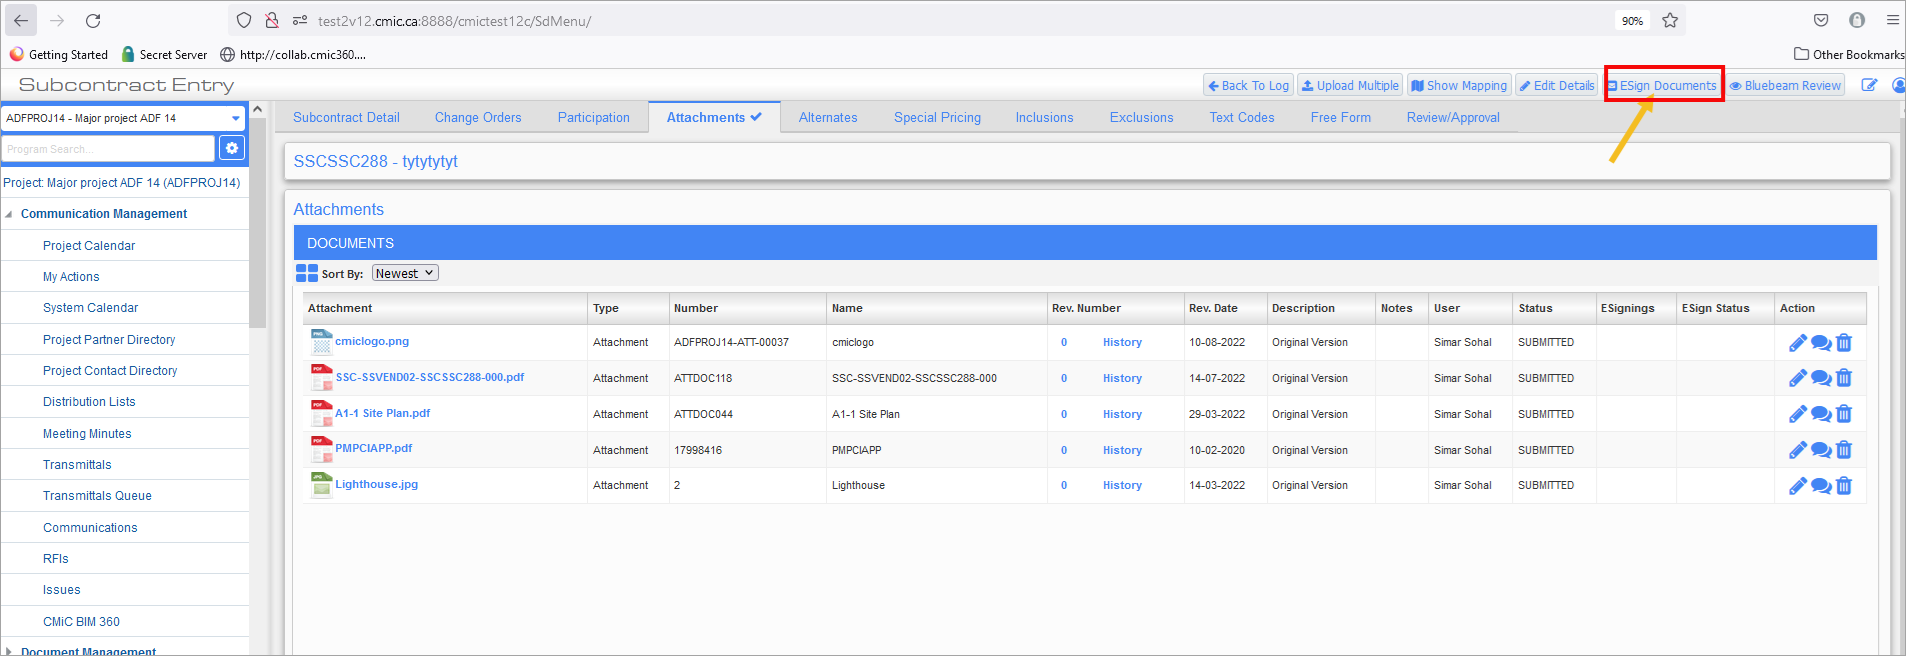
For any PM object (Subcontracts, RFIs, etc.), go to the Attachments tab and click on [ESign Documents]. This example is using a subcontract:
When the user clicks on [ESign Documents], two pop-up windows will appear:
-
The Send for ESigning page
-
DocuSign Authentication page for OAuth2.0
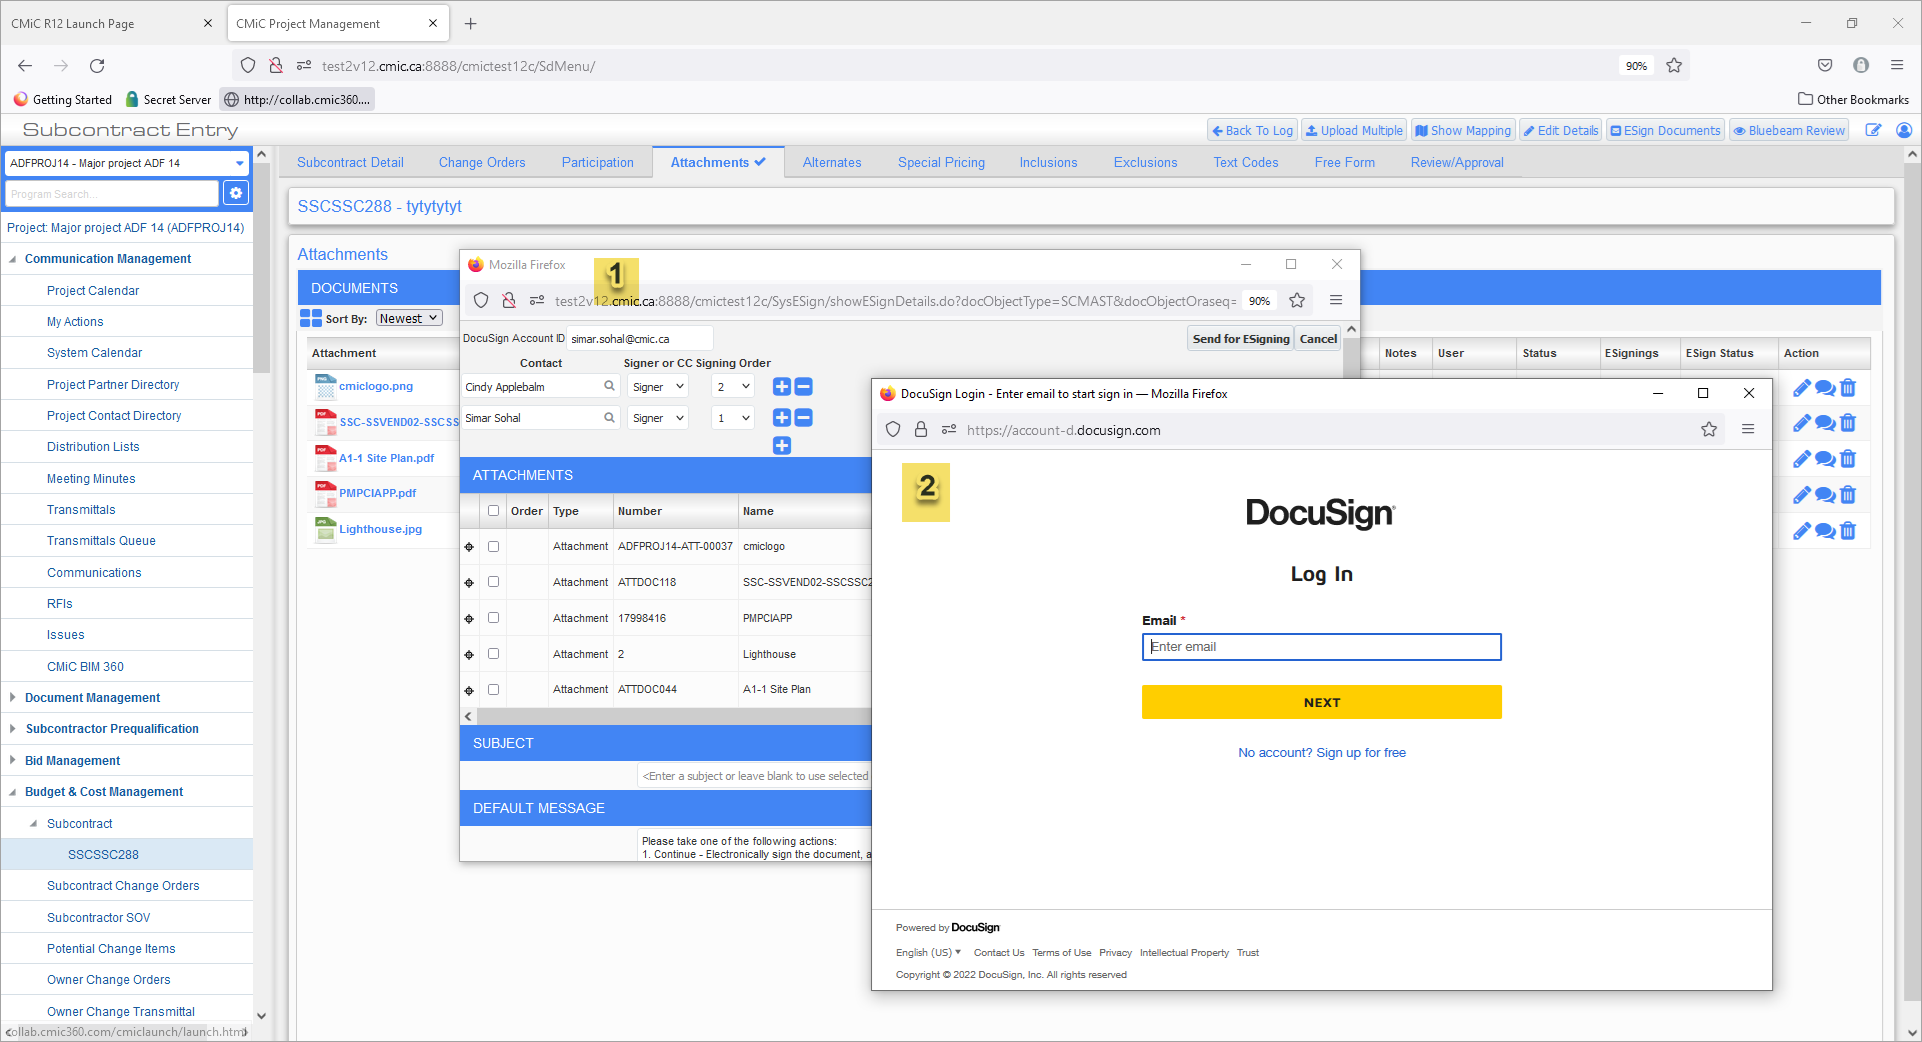
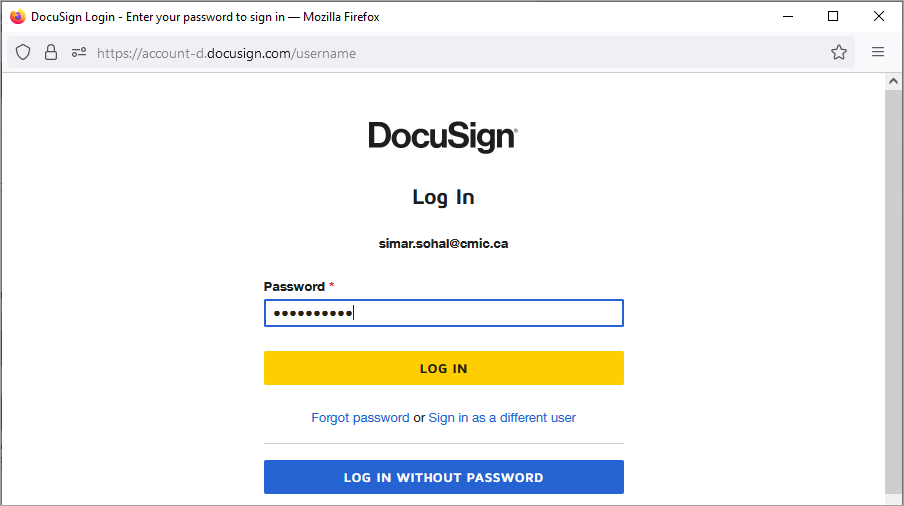
On the DocuSign Authentication page (2) – enter the email address and click [Next].
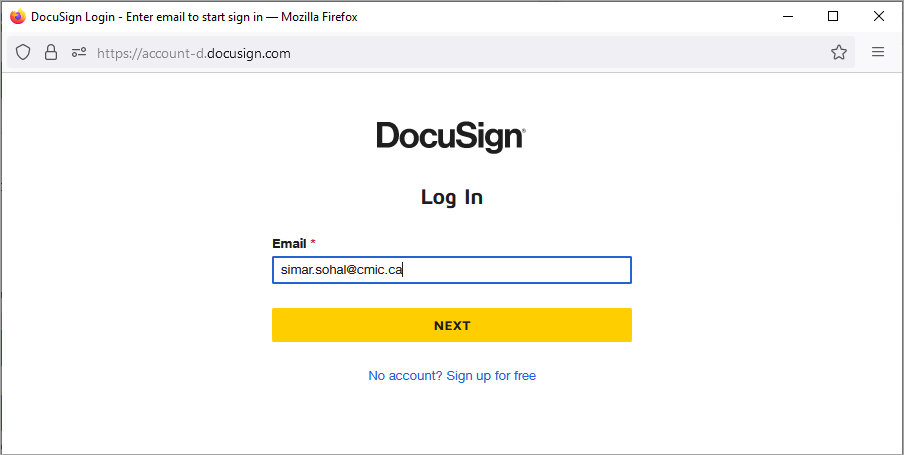
Enter the password and click on [Log In].
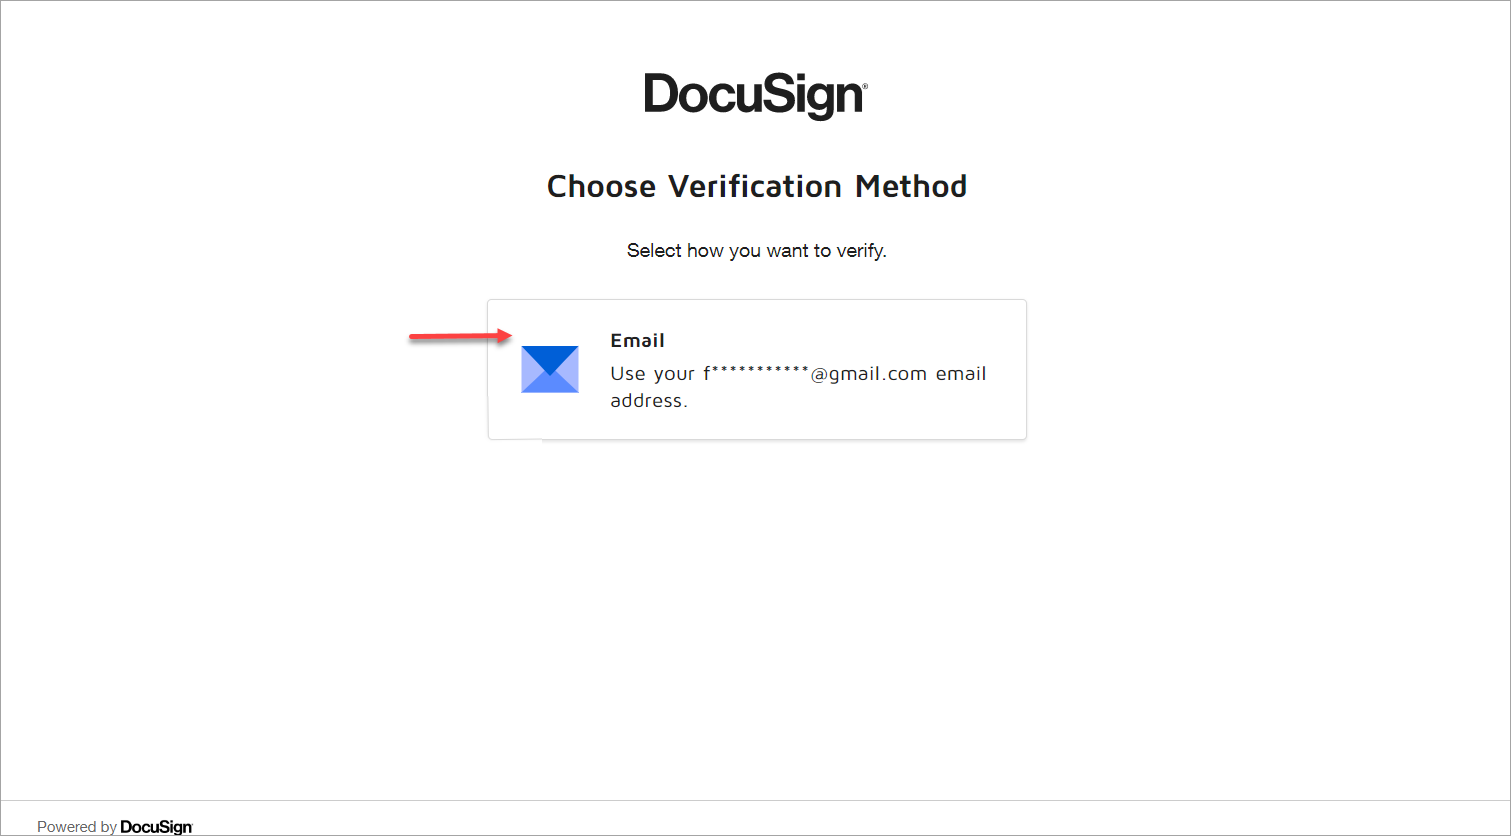
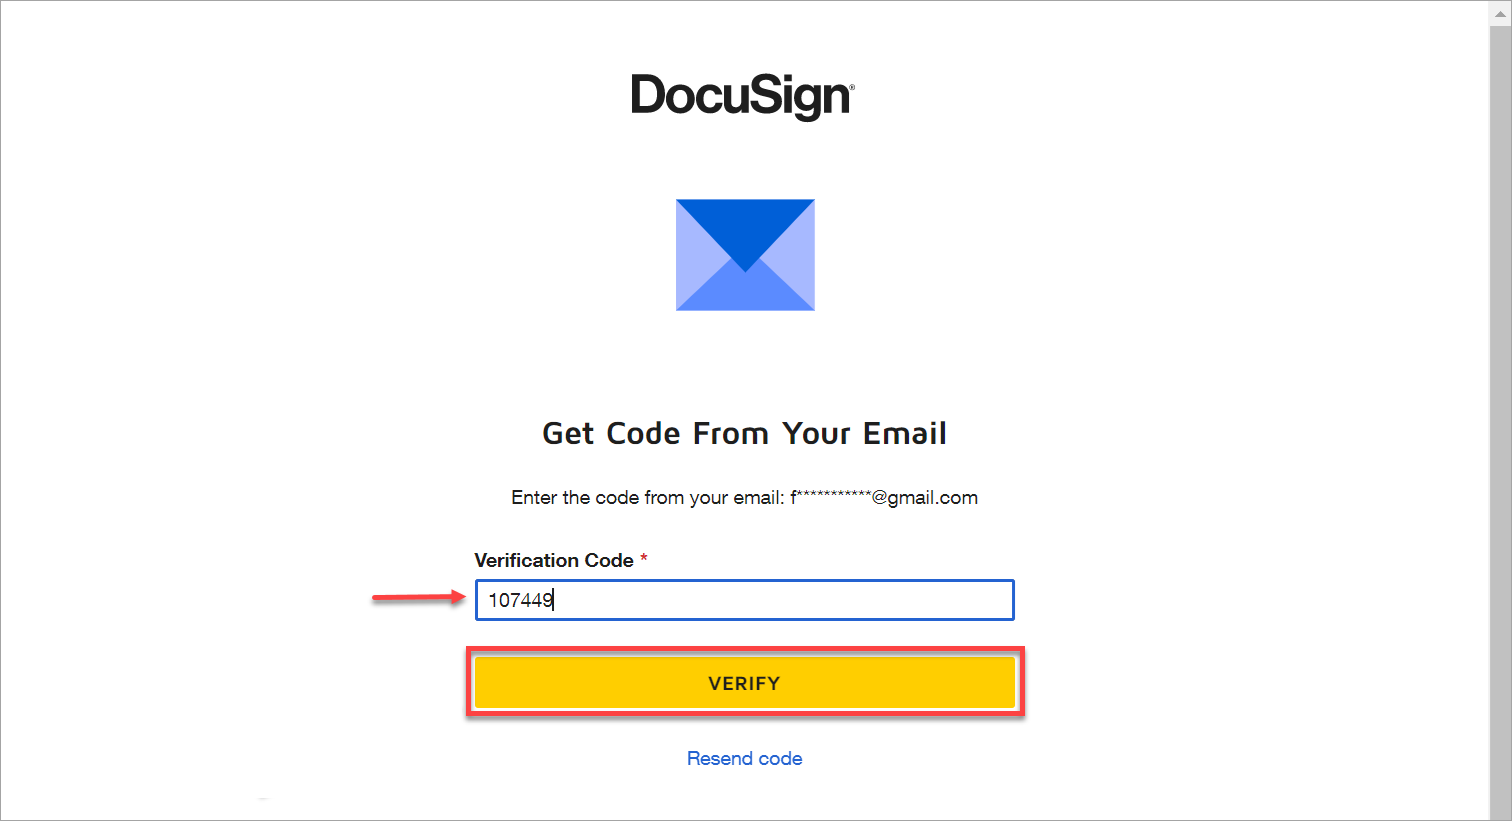
Choose a verification method in the options listed. Only the email option is available here. Click on it:
This will send a verification code to your email that you will need to enter below:
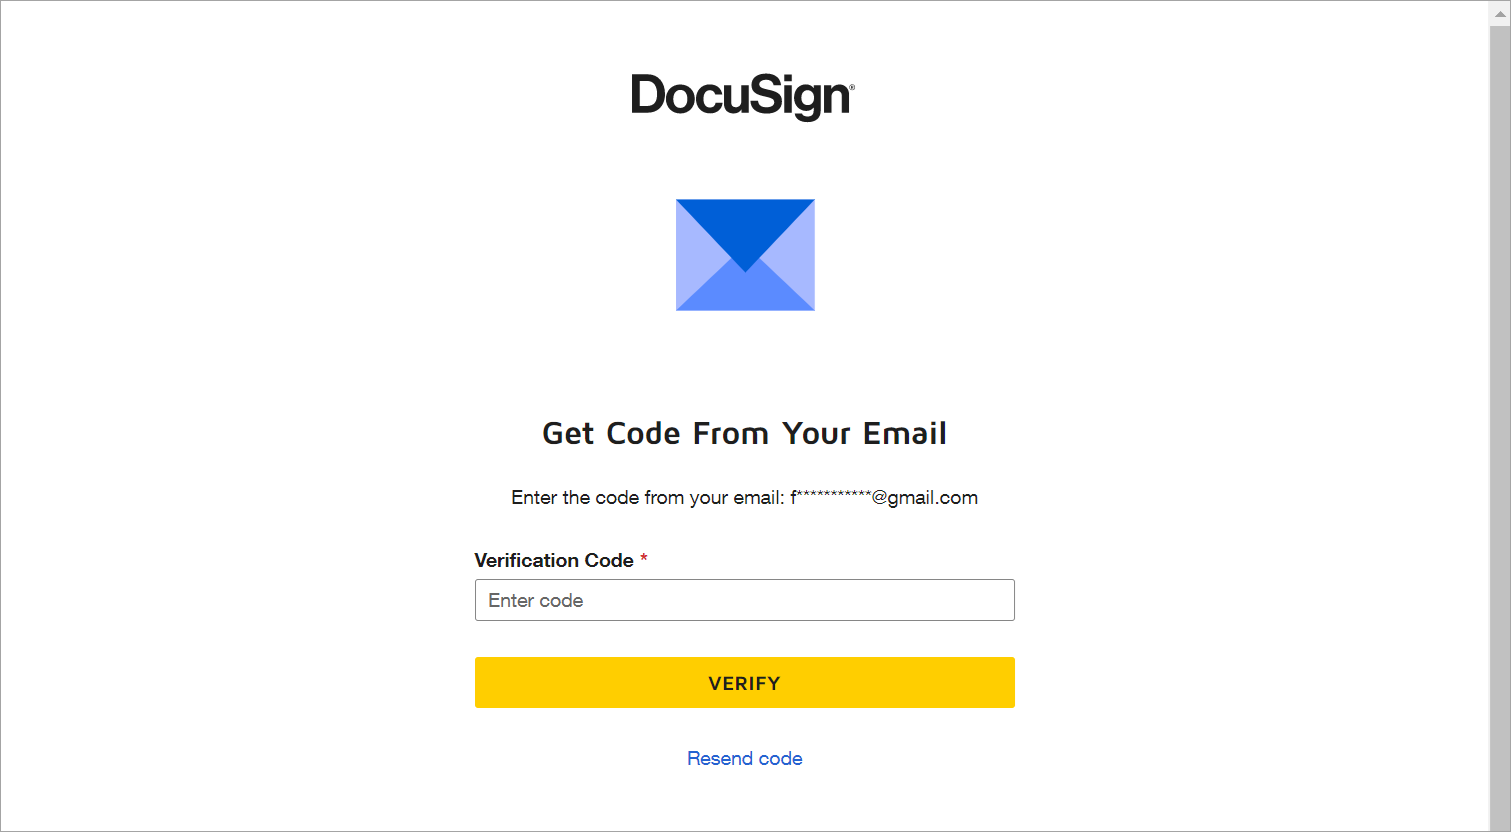
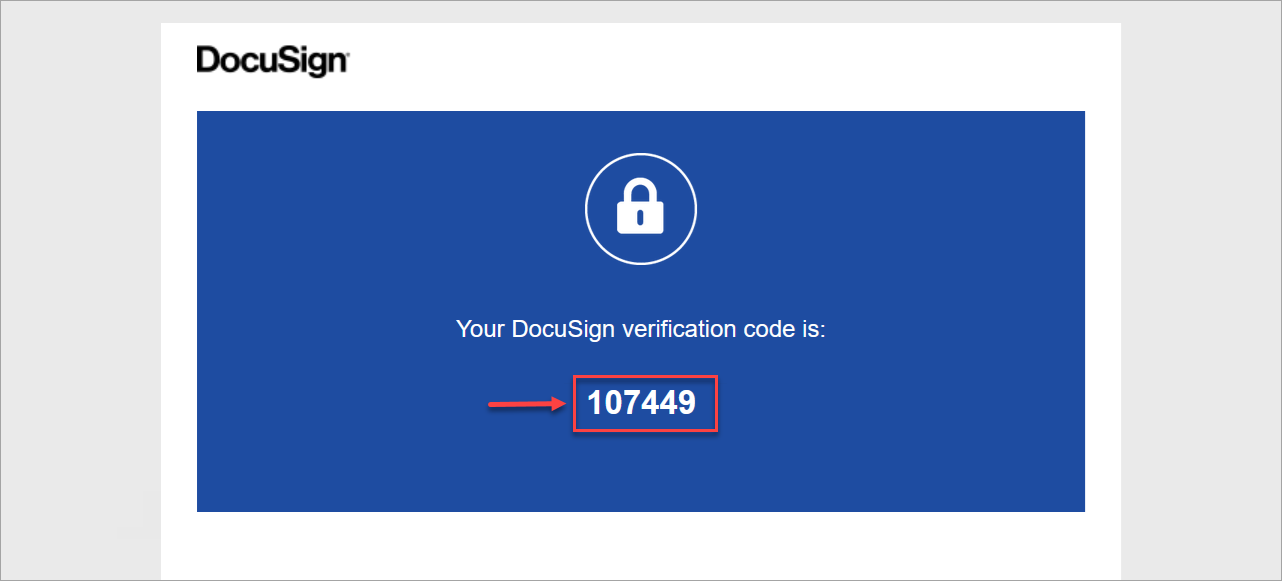
Check your inbox for an email from DocuSign with the subject title “Verify a New Device”, and copy the verification code from the email.
Paste the verification code and click on [Verify]:
If this is the first time you are logging in to send documents, it will ask for your permission to create and send envelopes. Click on [Allow Access]:
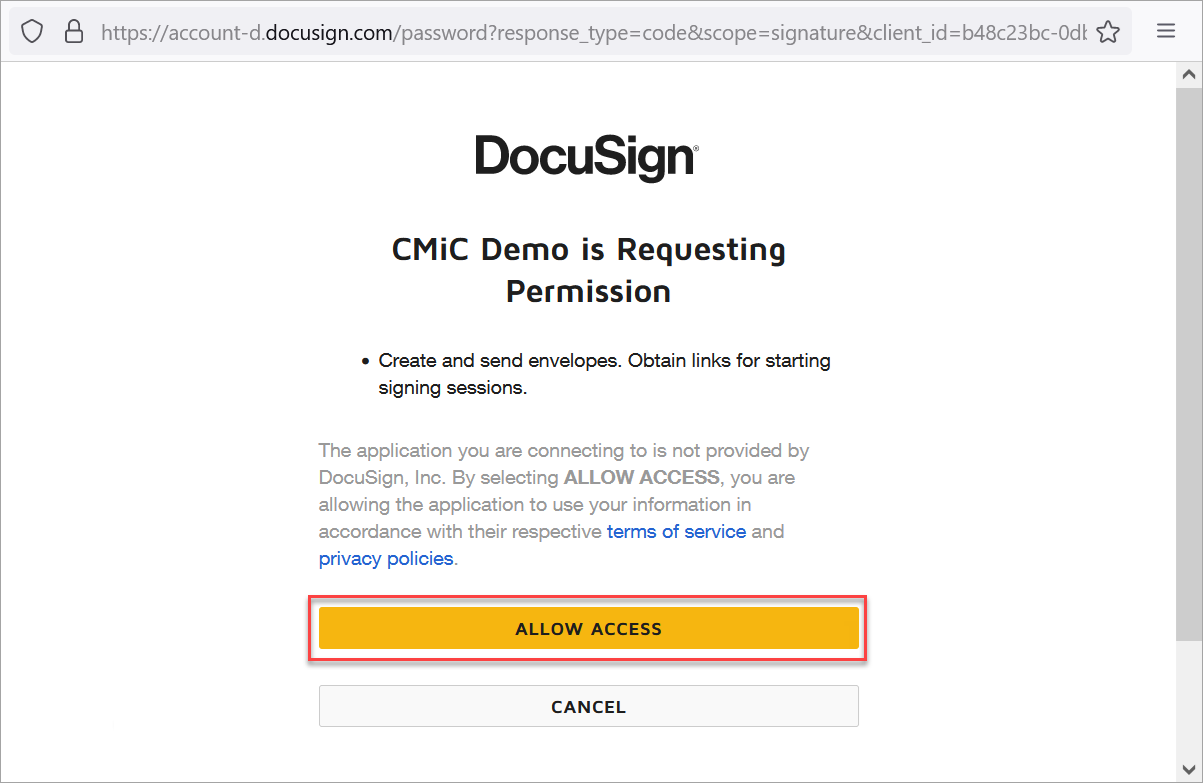
Once you allow access, the authentication steps for OAuth 2.0 is complete and the window will automatically close.
This will allow the user to login to his/her DocuSign demo account through OAuth Authentication and can ESign the sent documents.
-
-
Send Documents for ESigning
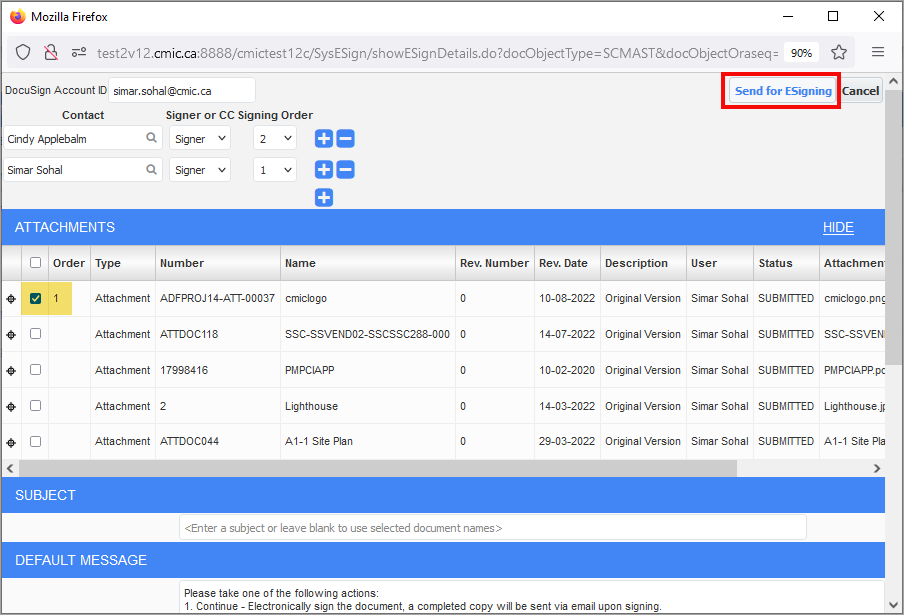
In the ESign Document page, the user can select the document(s) that they would like to send and click on [Send for ESigning].
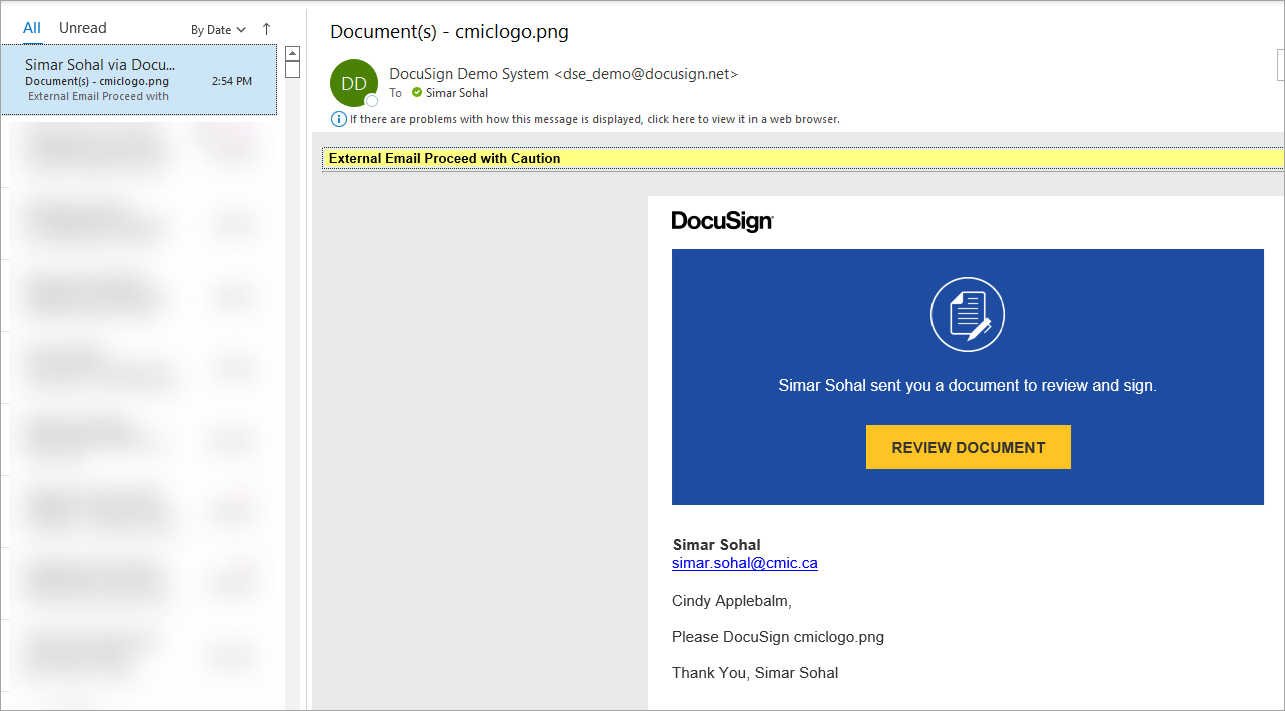
The document has now been sent. The user will receive an email notification to review the document.
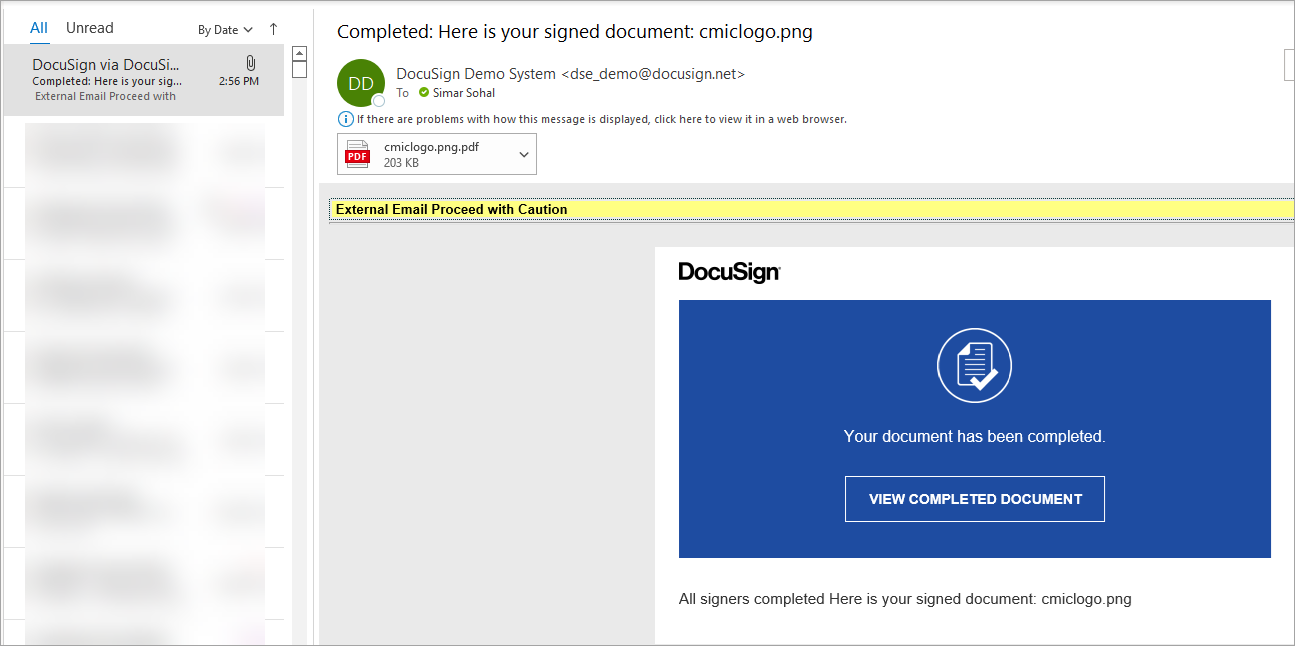
After the document is signed and completed, the user will receive an email notification to view the completed document.
The Esignings and Esign Status columns for the sent document record will get updated in the Attachments tab of the PM Object.
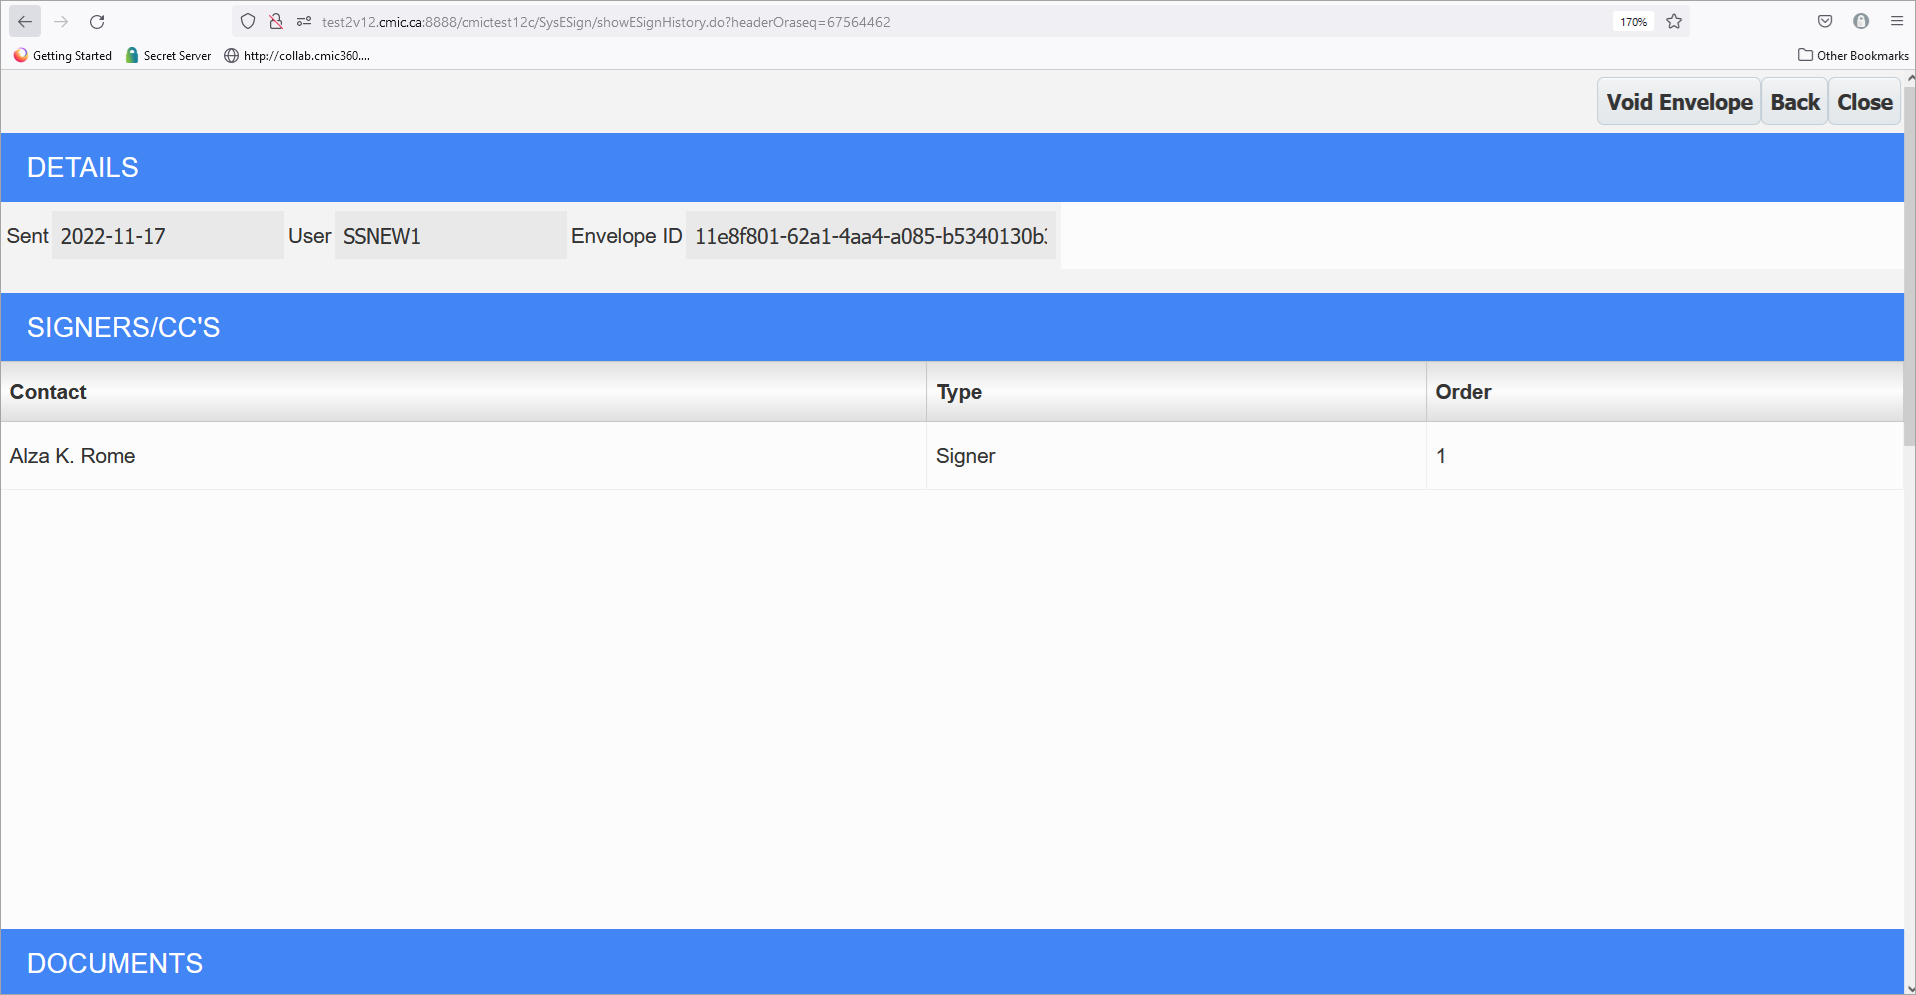
Users can click on the View ESignings link to check the history of the document.