Set Up EFT File Format
Pgm: APEFTFM – EFT File Format; standard Treeview path: Accounts Payable > Setup > Global Tables > EFT Formats
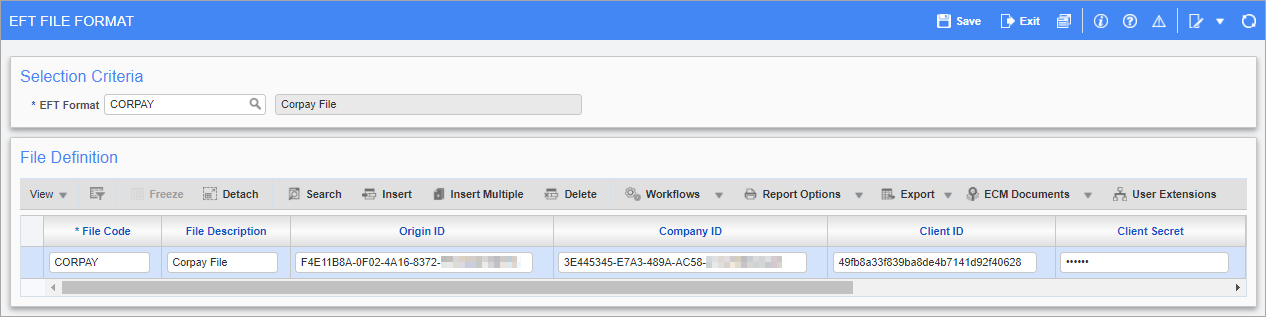
Use the EFT File Format screen to set up the Electronic File Transfer (EFT) format for the banks from which EFT payments will be made.
Selection Criteria
EFT Format
Select “CORPAY” in the EFT Format drop-down menu.
File Definition
NOTE: The code and ID fields in this section are used to enter Corpay-specific account details. Entering values other than those provided by Corpay will result in an error.
File Code, File Description
Enter "CORPAY" in the File Code field in the pre-defined format and then provide a user-defined description in the File Description field (e.g., Corpay File).
The File Code and File Description fields are used to enter the bank-specific EFT file format details specifying the record layout required by the bank.
NOTE The File Code field is not a user-defined field.
Origin ID (or Organization ID)
Enter the Origin ID, which will be in a format similar to the one shown below:
F4E11B8A-0F02-4A16-8372-FFFFFFFFFFFF
Company ID
Enter the Company ID, which will be in a format similar to the one shown below:
3E445345-E7A3-489A-AC58-444444444444
Client ID
Enter the Client ID provided by Corpay.
Client Secret
Enter the passcode provided by Corpay.
Connection URL
Enter the following URL:
https://identity.nvoicepay.com/connect/token
Service URL1
Enter the following URL:
https://api-customer.nvoicepay.com/api/invoice/
uploadCompleteInvoiceBatchFromFile?api-version=2.0
Service URL2
Enter the following URL:
https://api-customer.nvoicepay.com/api/invoice/getInvoiceBatch?api-version=2.0
Display [Corpay] Button on Prepare Checks Screen using Lite Editor
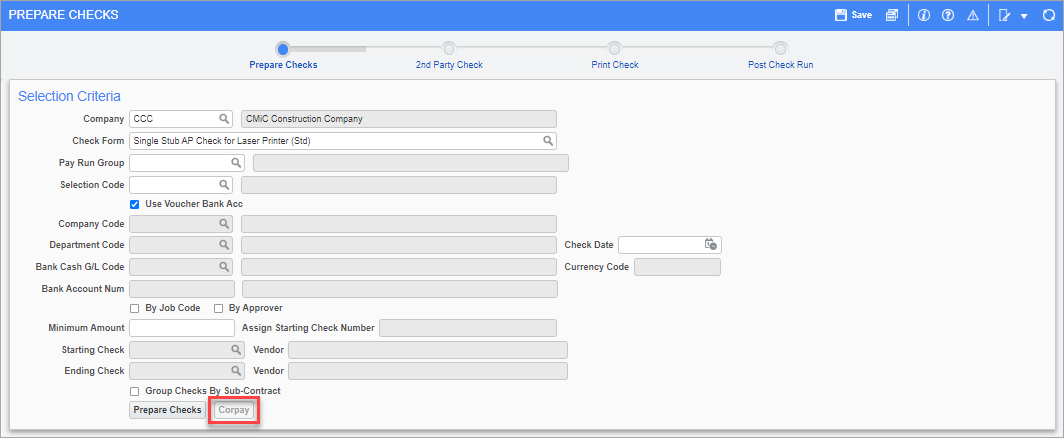
Pgm: APCHQPRE – Prepare Checks; standard Treeview path: Accounts Payable > Check > Print Checks – [Corpay] button
The Corpay button is located on the Prepare Checks screen in the Accounts Payable module and by default it is hidden. This button is made visible using Lite Editor.

Displaying the [Corpay] button on the Prepare Checks screen using Lite Editor
Maintain Vendors
Mandatory information must be entered for vendors in the Vendors tab and the Accounting tab of the Maintain Vendors screen.
The mandatory fields to be completed in the Vendors tab are shown in the screenshot below.
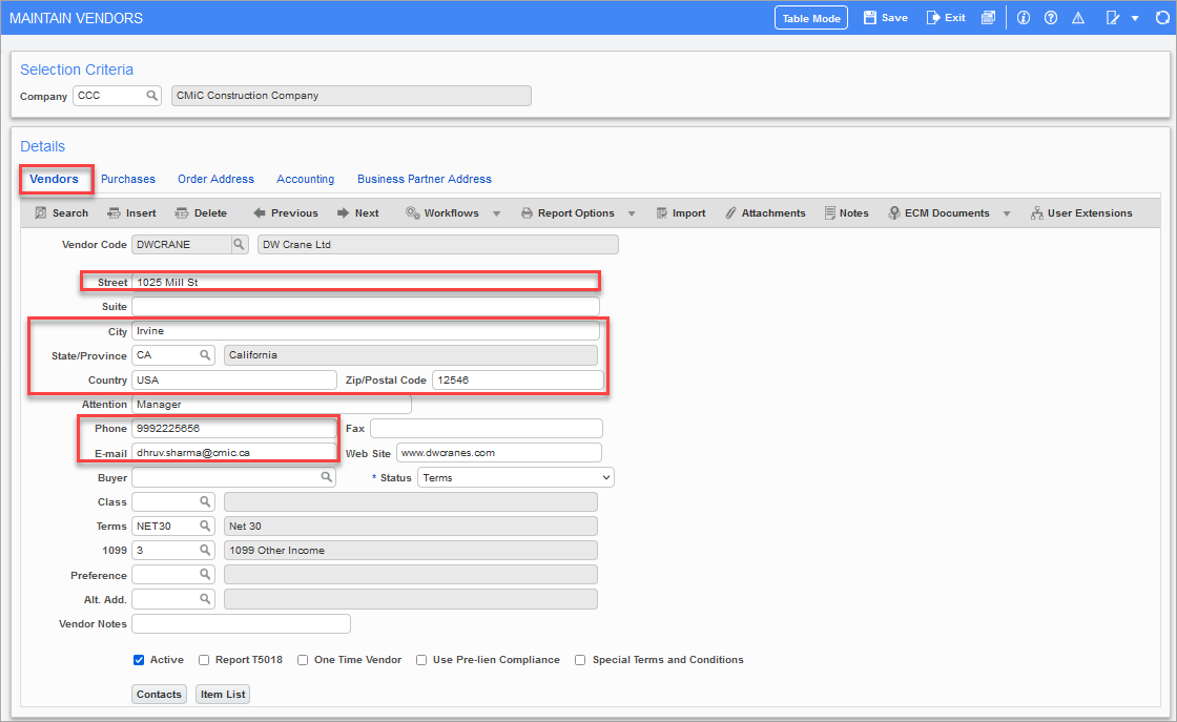
Pgm: BPVENFM – Maintain Vendors; standard Treeview path: Accounts Payable > Setup > Maintain Vendors – Vendors tab
The mandatory fields to be completed in the Accounting tab are shown in the screenshot below.

Pgm: BPVENFM – Maintain Vendors; standard Treeview path: Accounts Payable > Setup > Maintain Vendors – Accounting tab
Although banking details are not requested or processed by Corpay, when the ‘EFT Payments’ radio button is selected on the Select Payments screen, a vendor’s bank account details must also be completed in the Maintain Vendors screen. A valid bank account number can be entered in the Account Number field, or a dummy account number can be entered (e.g. #999999).
NOTE: BI Dashboard Builder can be used for building custom dashboard AP Vendor Comdata BI tables. For more information, refer to Creating Comdata Vendor Report Using CMiC BI.
Log Into AP Gateway
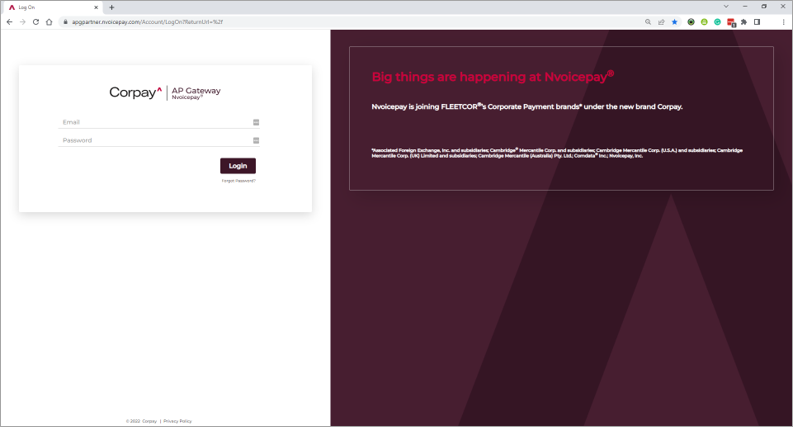
AP Gateway Login Screen
Corpay users can log into AP Gateway using the following link: