NOTE: PM Exchange will be fully deprecated by September 1, 2026.
Overview
When a user logs in to Collaborate, they will see the Collaborate console screen, listing the projects to which they have already been invited to join.
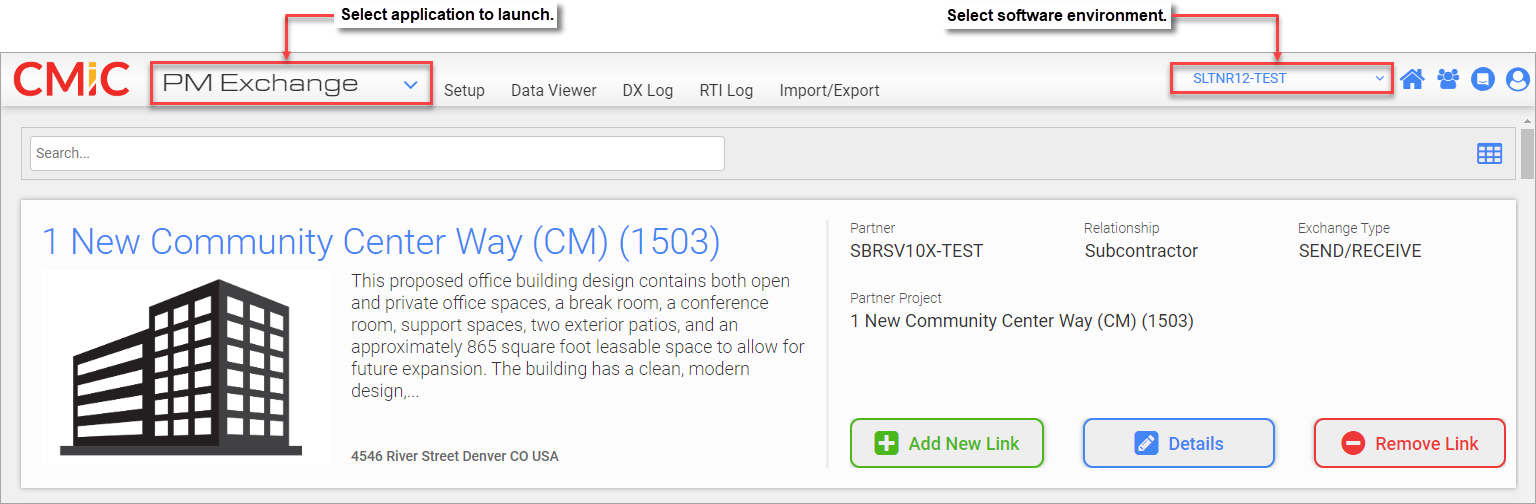
Initial DX Screen (Card Mode View)
The drop-down menu in the top portion of the Collaborate console allows the user to select an application to launch. Depending on the user’s security privileges, available options are “PM Exchange”, “Project Gateway”, and “Pay Request”. By default, “PM Exchange” should be selected. If it is not, select it from the drop-down menu.
A drop-down menu also exists beside the Home icon ( ) on the Collaborate console screen. Select the desired software environment from the list of environments available for the current user.
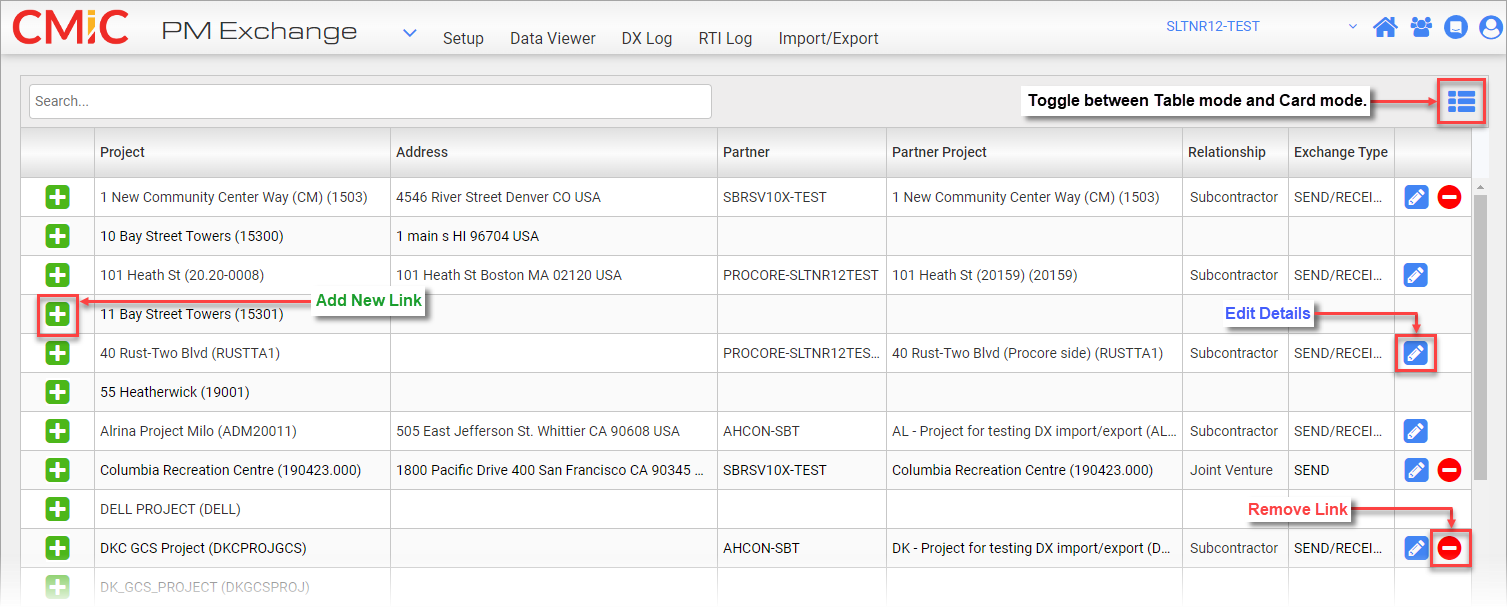
Table Mode (Log Mode View)
The Table icon ( ) is used to toggle between Table mode and Card mode. Users can add, edit, and remove DX links in both modes.

DX Link Search Field
The Search field can be used to search records by project, partner, partner project, relationship, and exchange type and is also available in both modes.
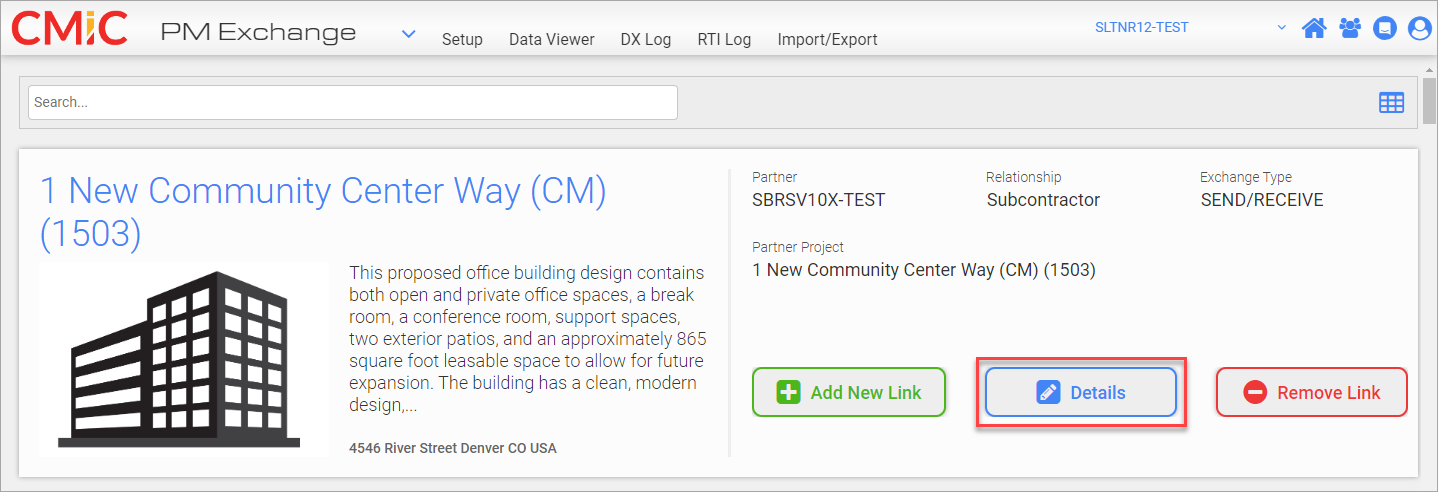
Locate a project for which the user has been assigned privileges and click on the [Details] button to open the Link Setup screen.
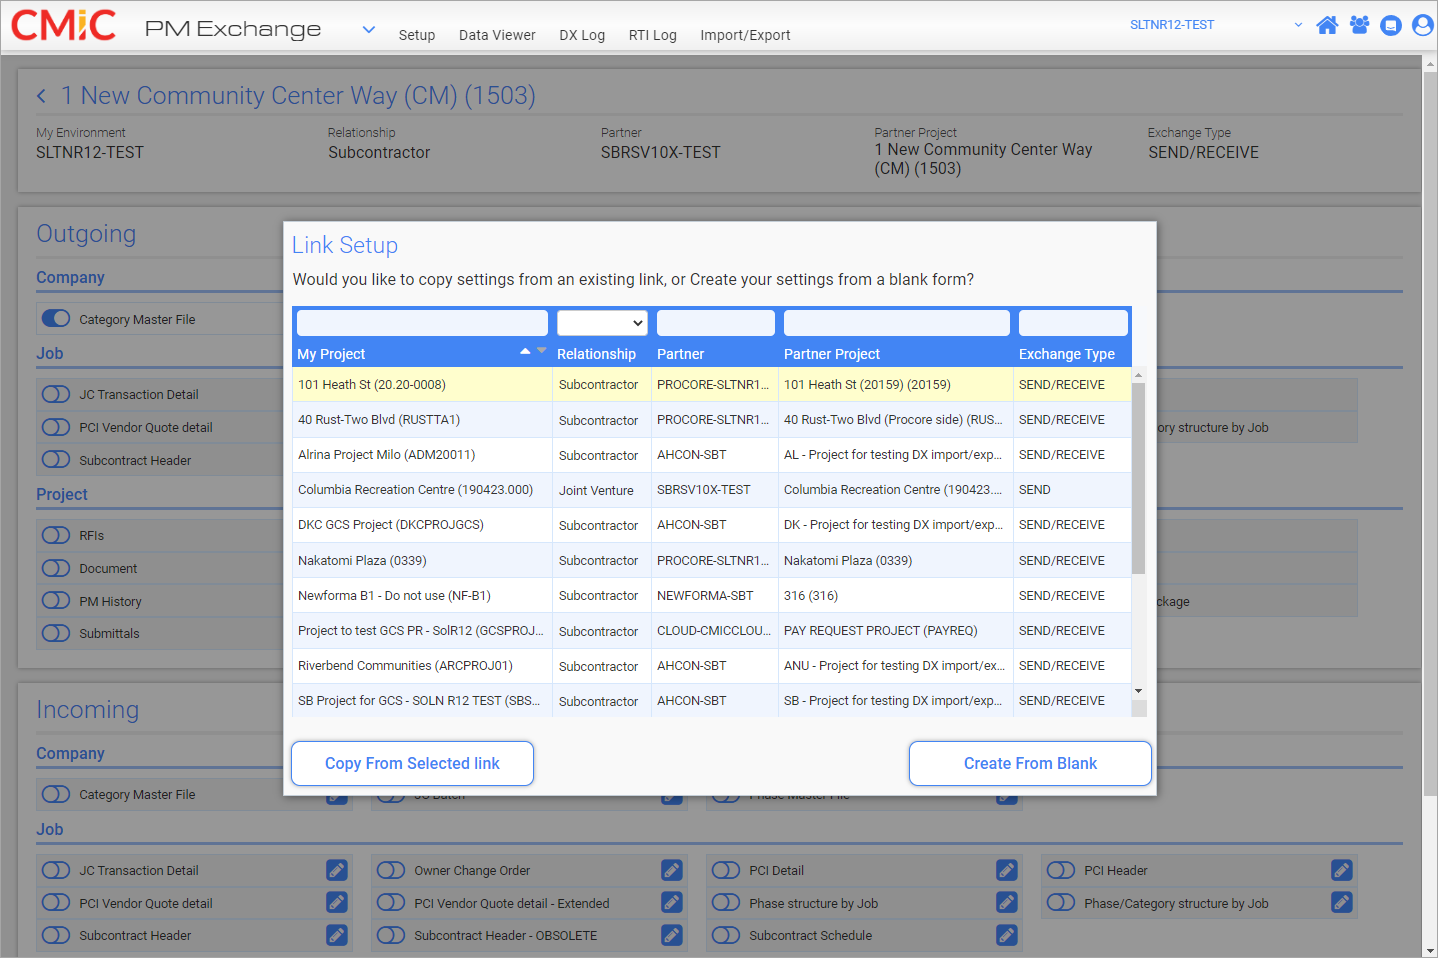
Link Setup pop-up window launched from [Details] button on the Initial DX Screen
The Link Setup pop-up window is launched from the project's [Details] button and this window provides two options for creating object mappings.
-
Copy From Selected Link - This is an efficient way to quickly copy link settings from an existing project. In the Link Setup pop-up window, select a project from which to copy the link settings and click the [Copy From Selected Link] button. The Link Setup pop-up window will close and the DX Setup screen will be displayed with incoming and outgoing mappings copied from the selected project. Adjustments can be made to the settings as required.
-
Create From Blank - This method provides a blank form where incoming and outgoing object mappings can be manually set as desired. Click the [Create From Blank] button to close the Link Setup pop-up window and display the DX Setup window where settings can be completed as desired.
Setup Screen

DX Setup Screen
The DX Setup screen is used to establish the relationship between projects and to map out the necessary fields on the objects being translated.
A data object is enabled or disabled by switching its toggle on or off. If a toggle is switched on, the data object will be shared, and if it’s switched off, the data object will not be shared.
This screen is divided into two sections: Outgoing and Incoming. The Outgoing section is for mapping outgoing data objects and the Incoming section is for mapping incoming data objects.
Outgoing
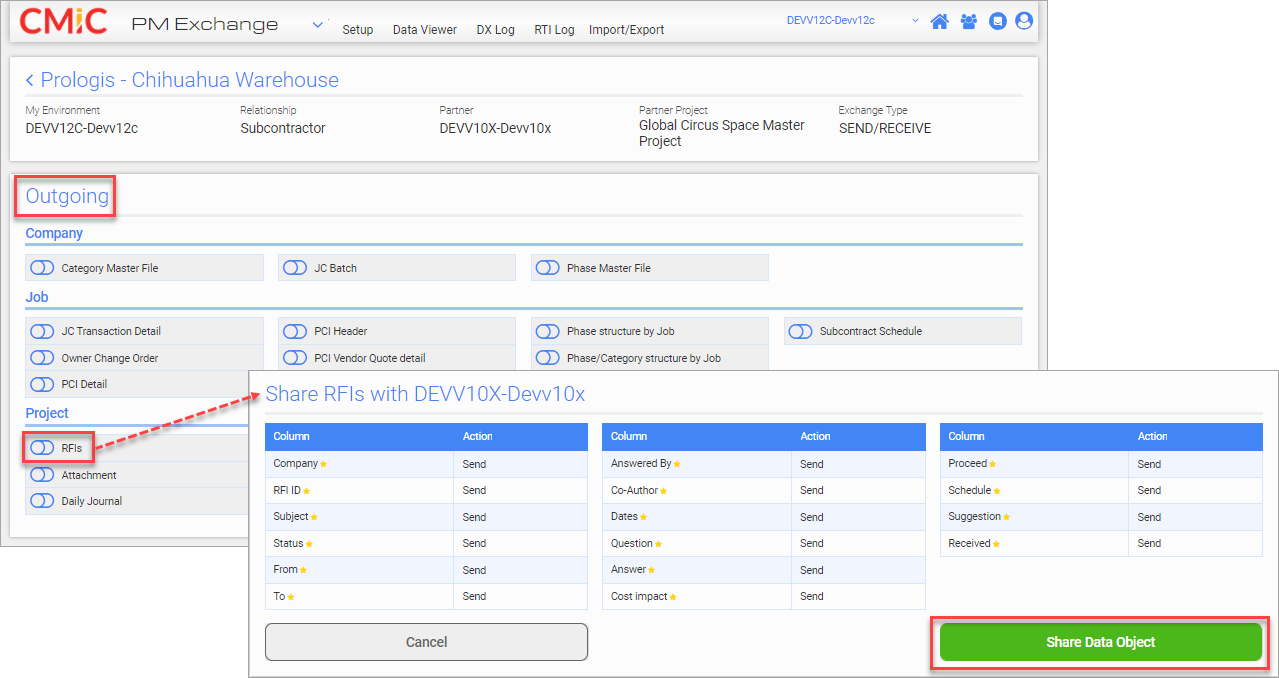
Sharing Outgoing Data Objects
The Outgoing section of the screen is used to map which of the project’s data objects will be shared with its partner.
To share a data object, click on the object to launch a pop-up window where the object’s fields are displayed, as shown in the screenshot above. To share this object’s data, click on the [Share Data Object] button.
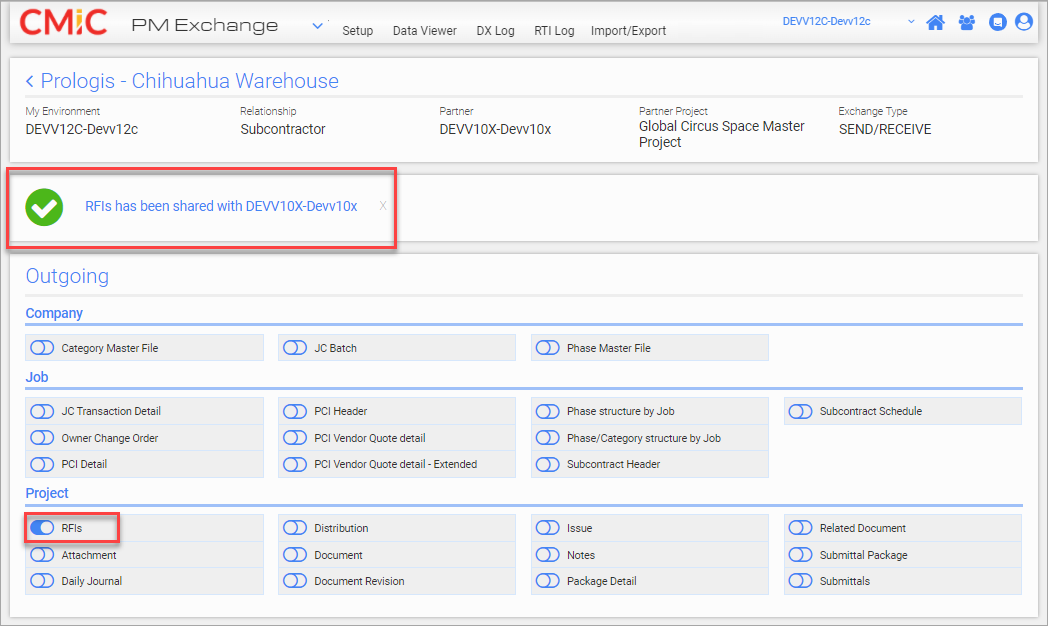
The DX Setup screen shows the Outgoing object’s toggle, in this case RFIs, switched on and a confirmation message at the top of the screen indicating that the outgoing object is now being shared.
Incoming
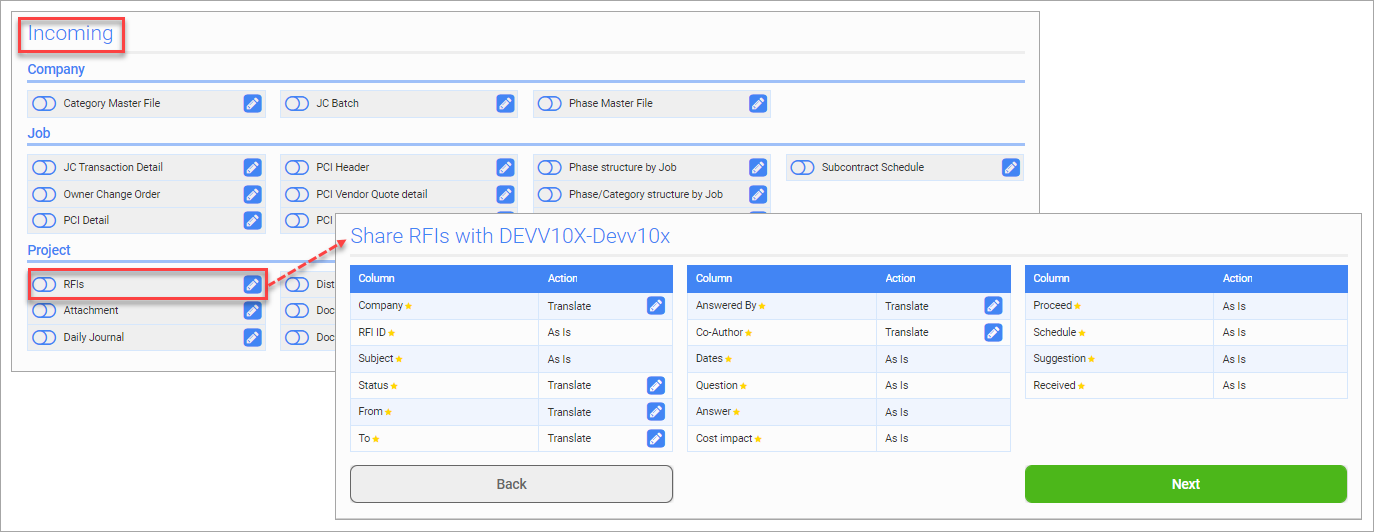
The incoming section of the screen is used to map which of the partner’s data objects will be received.
To set a data object to be received, click on the data object to launch a pop-up window where the object’s fields are displayed, as shown in the screenshot above. The data objects in this section of the screen contain Edit icons ( ), which are used for translation purposes to accommodate for variations in field naming conventions between companies.
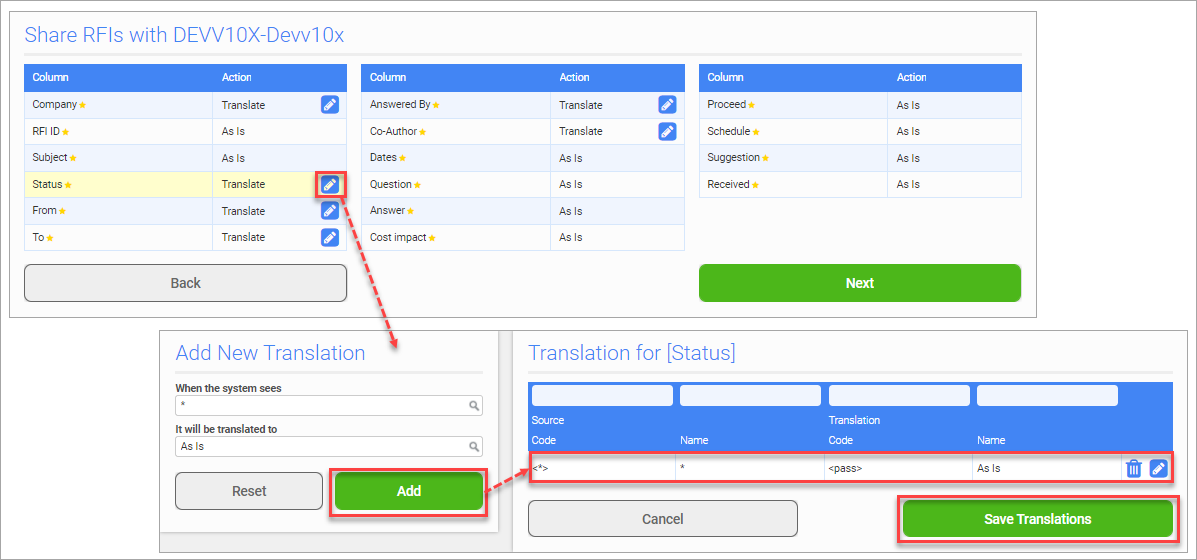
Adding a translation for an object’s field when sharing objects between companies
Clicking on the Edit icon () in an object’s field launches an additional window where a translation is entered. Enter/select a code in the When the system sees field and then enter/select what that code should be translated to in the It will be translated to field. Click on the [Add] button to add the translation. When finished, click on [Save Translations] to return to the previous screen.
The example in the screenshot above shows a translation being configured for the Status field of an RFI. In this case, the status is set to be translated and passed “As Is”.
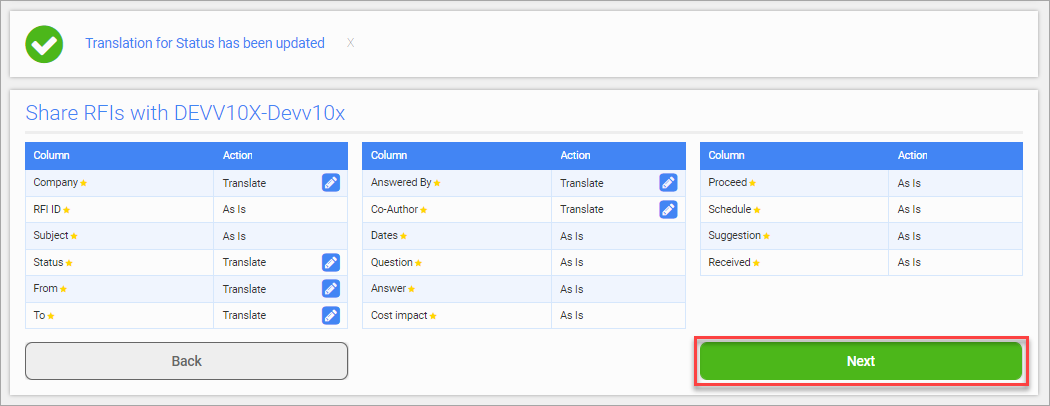
Enter any additional required field translations for the shared object and then click on [Next].
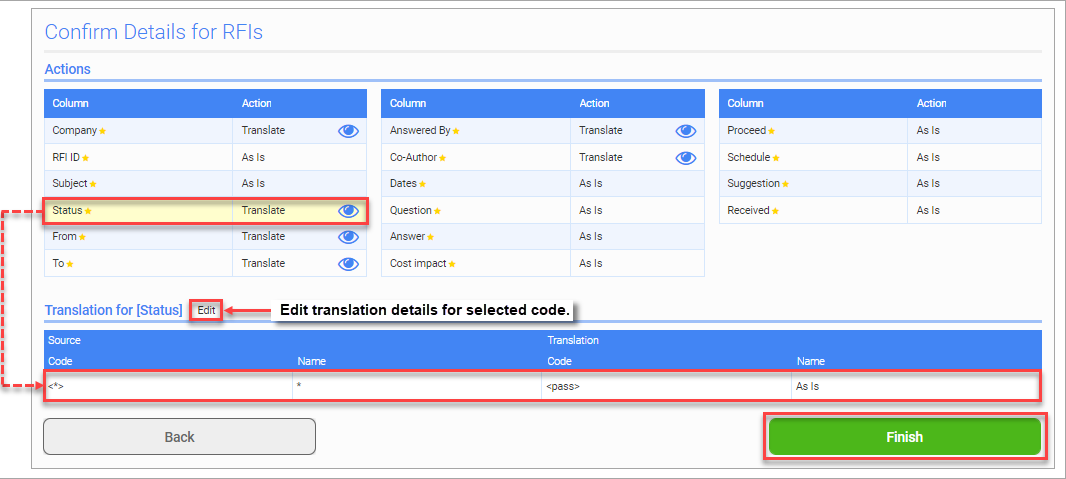
Confirming an object’s translation details
A confirmation window opens for the selected object, displaying an overview of its translation details for review purposes. Click on a field in the Actions section of the screen to display its translation in the section below. To edit the translation details, click on the Edit link.
When all the object’s translation details are confirmed, click on [Finish] to return to the DX Setup screen.
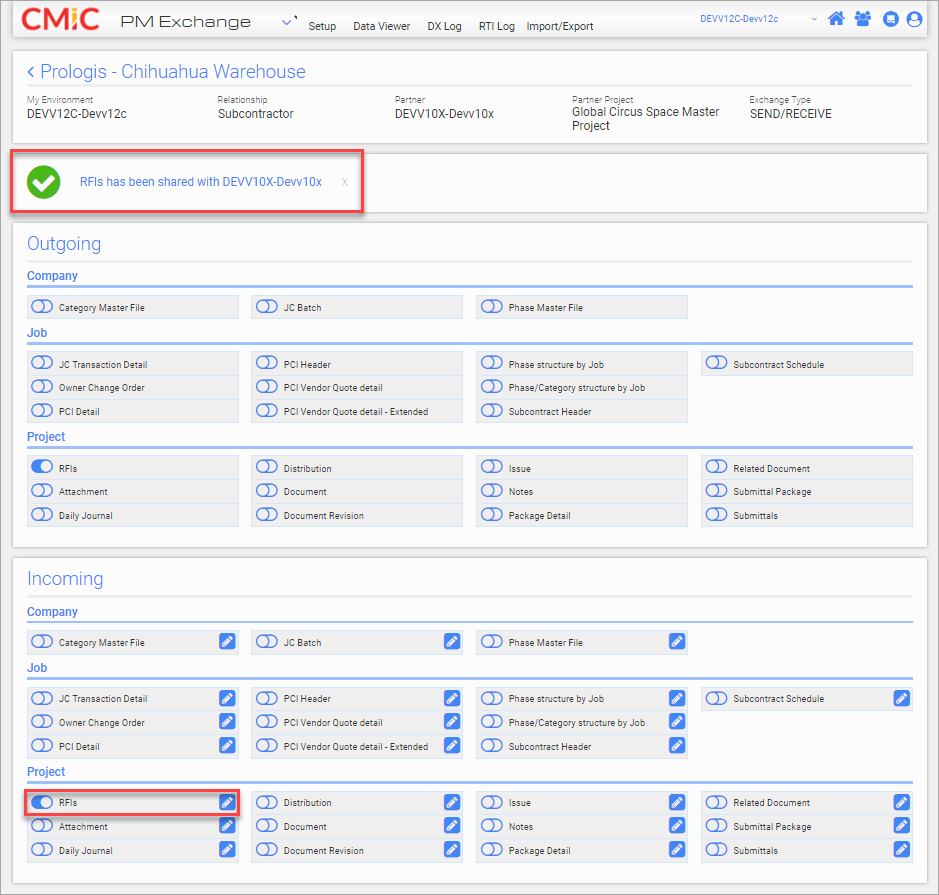
The DX Setup screen shows the Incoming object’s toggle, in this case RFIs, switched on and a confirmation message at the top of the screen indicating that the incoming object is now being shared.