Creating New Folders
To create a new folder, complete the following steps:
-
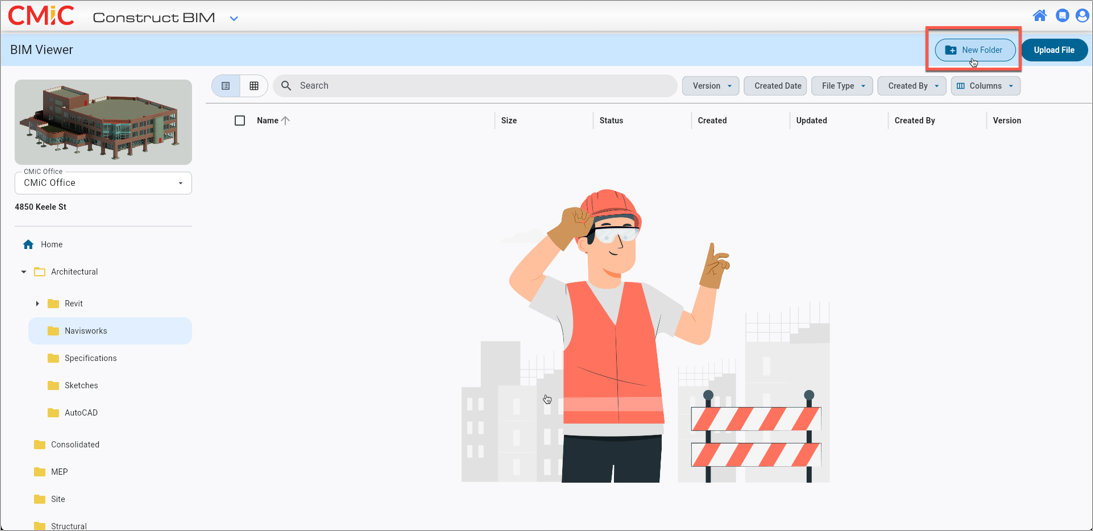
Click on the [New Folder] button.
-
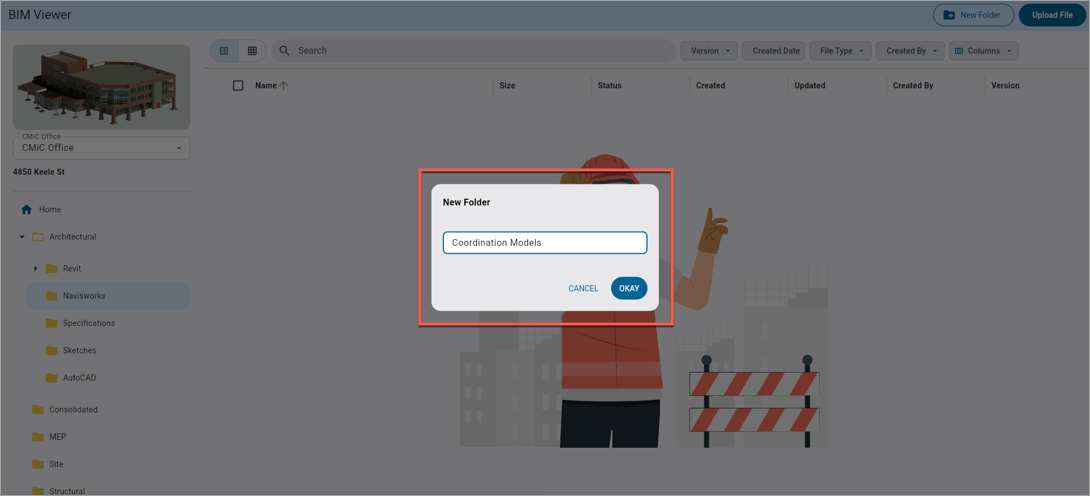
In the New Folder pop-up window, enter a folder name and press [Okay].
-
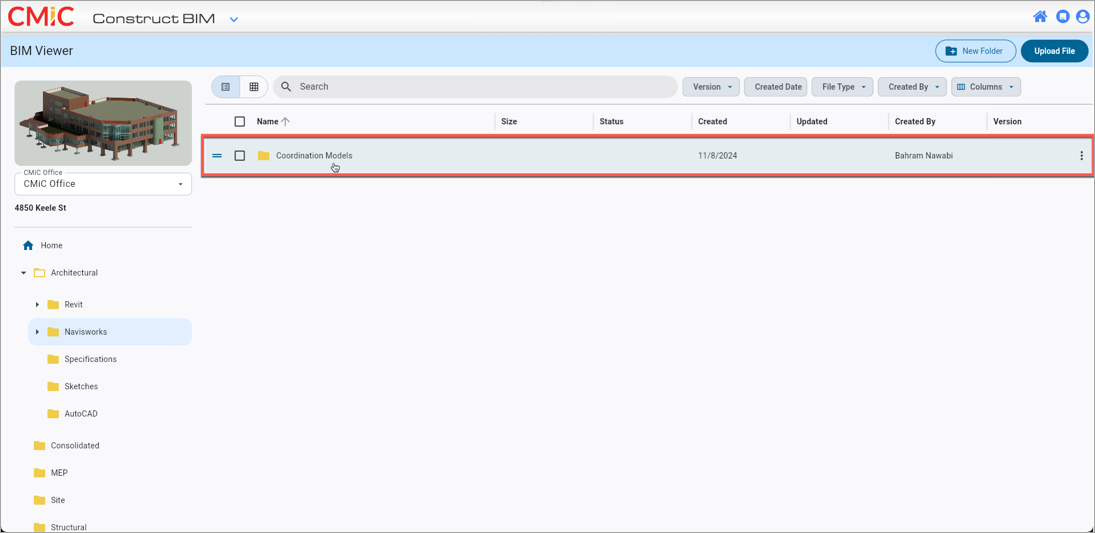
The new folder will be created in the current directory of your workspace.
Uploading Files
Supported Formats
Construct BIM can convert over 30 file formats. Currently, we only support Revit and Navisworks.
Upload a File
To upload a model file, complete the following steps:
-
Click on the [Upload File] button.
![Screenshot of BIM with [Upload File] button highlighted.](../../../Resources/Images/Collaborate/BIM/BIM_UploadFile.png)
-
Browse and select a model from your device.
-
Click [Open] to upload and convert the model into the application.
-
Once a model is selected to upload, the Status column will show the processing status as follows:
-
Uploading: Your model is being uploaded.
-
Uploaded: Your model is uploaded and ready to be cached.
-
Converting: Your model is being converted.
-
Cached: Your model is ready to be opened.
-
Error/Failed: There was an issue with one of the processes above.
-
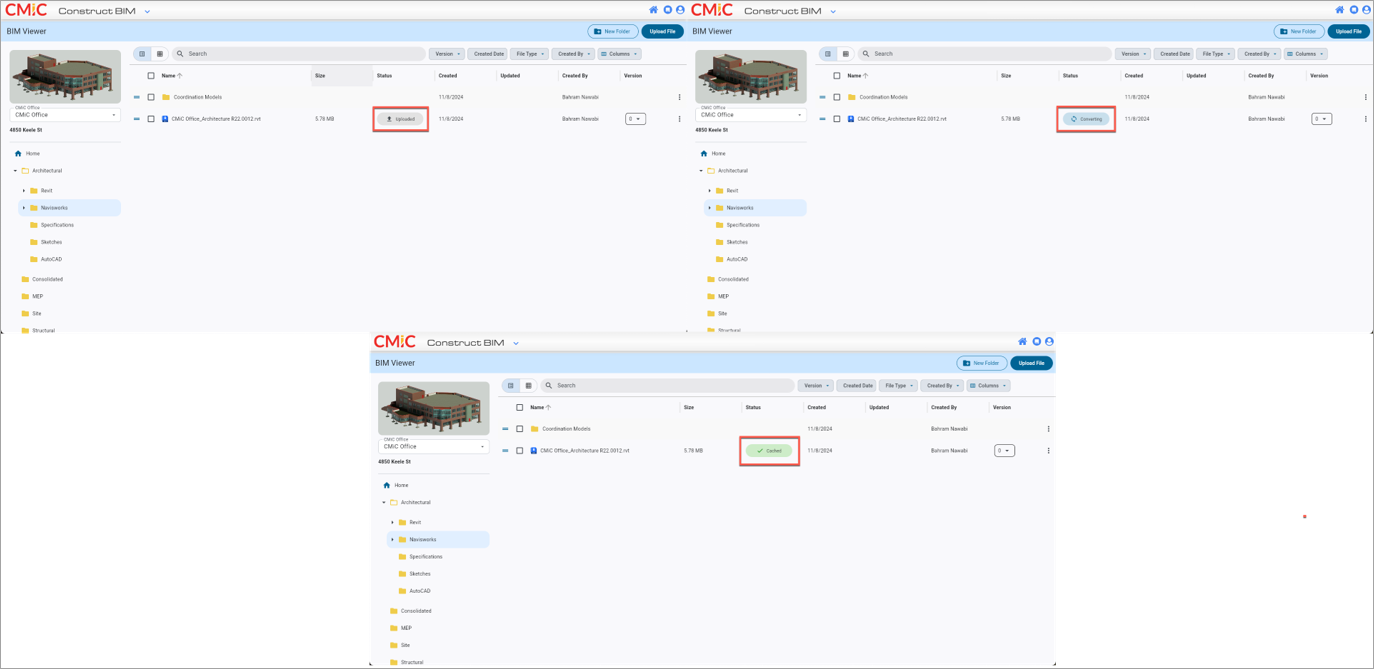
Processing status while uploading models
Opening Files
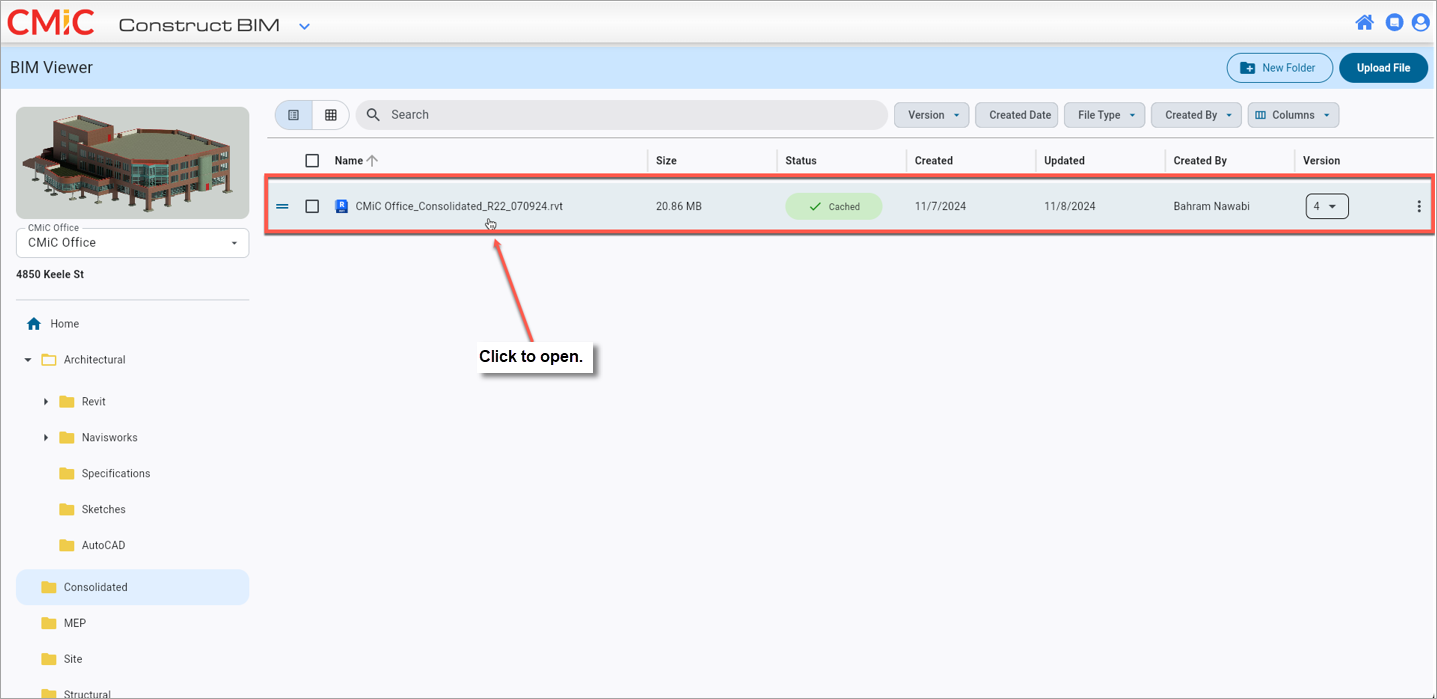
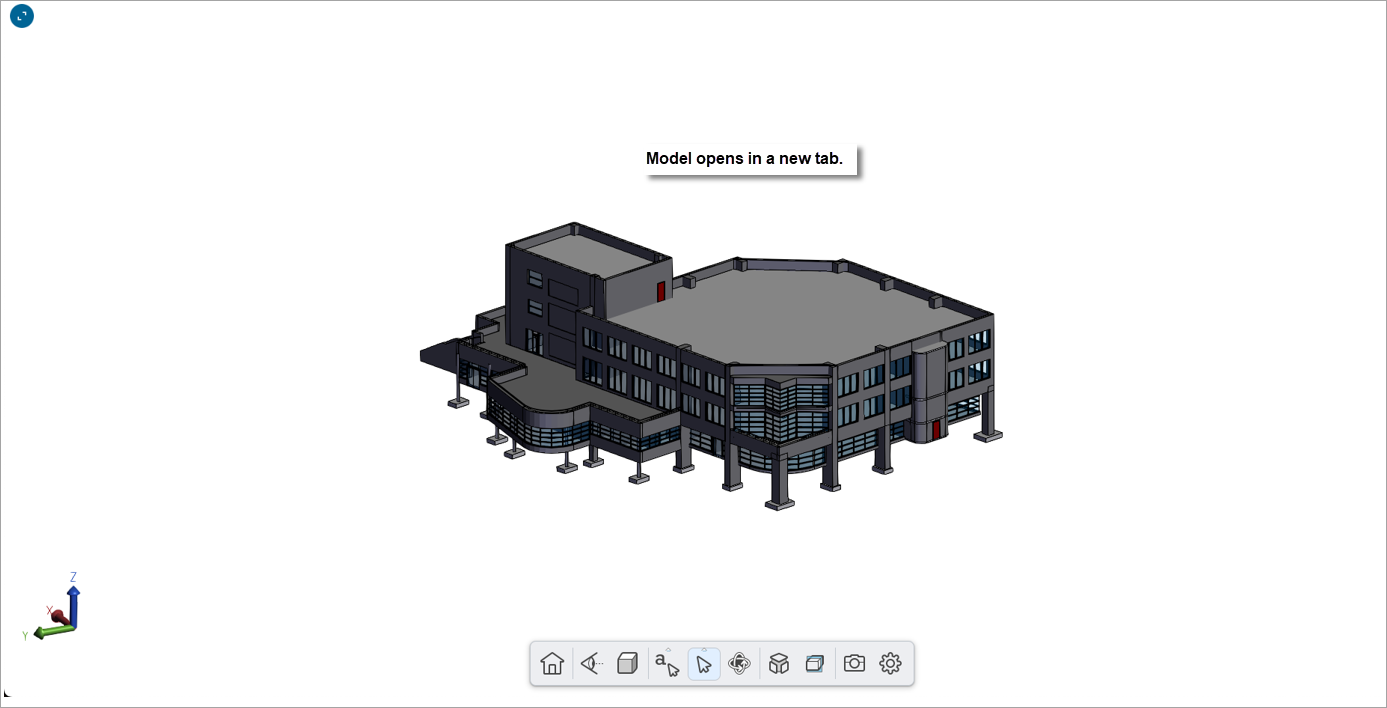
Once your model file has a status of "Cached", simply clicking on it will open a new tab where your model will be displayed.
-
Click on a file to open it.
-
The model will open in new tab.
Renaming Files
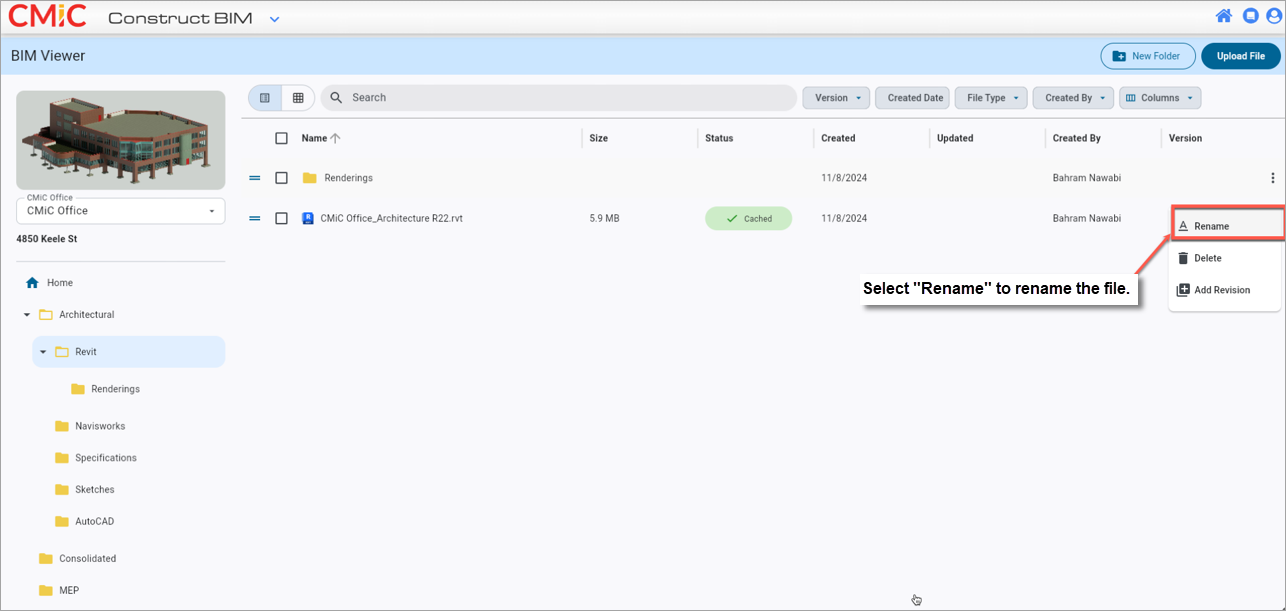
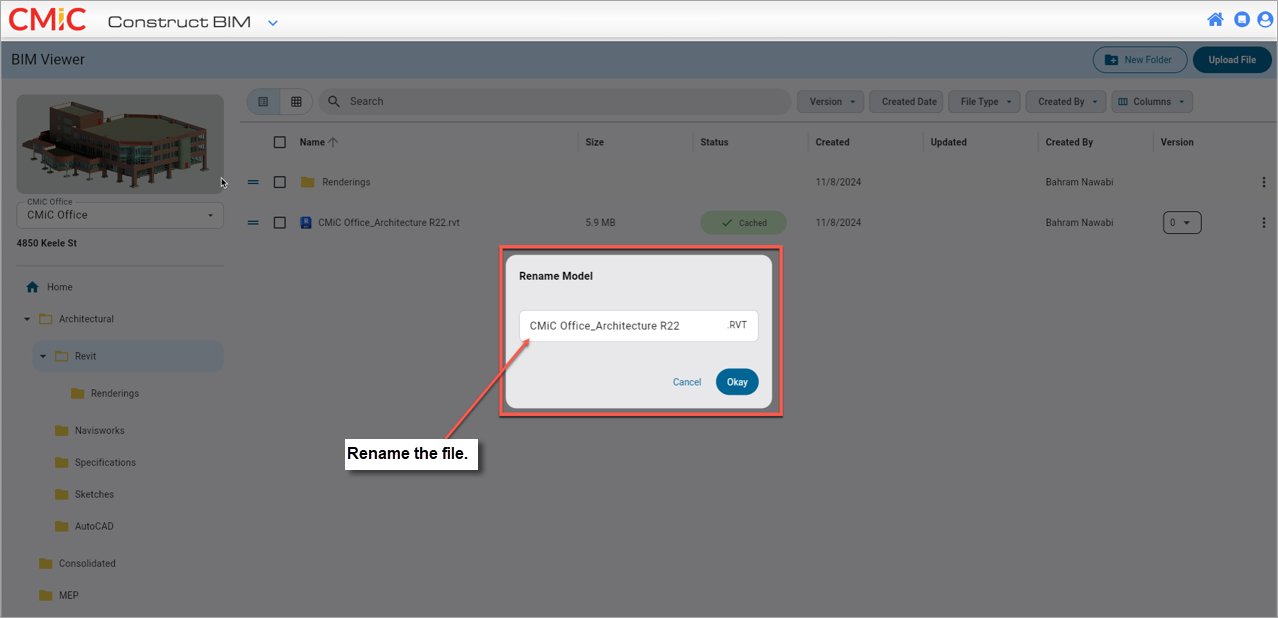
To re-name a file, follow these steps:
-
Open the file's menu option and select "Rename" in the drop-down menu.
-
In the Rename Model pop-up window, enter a new name for the file.
Moving Files and Folders
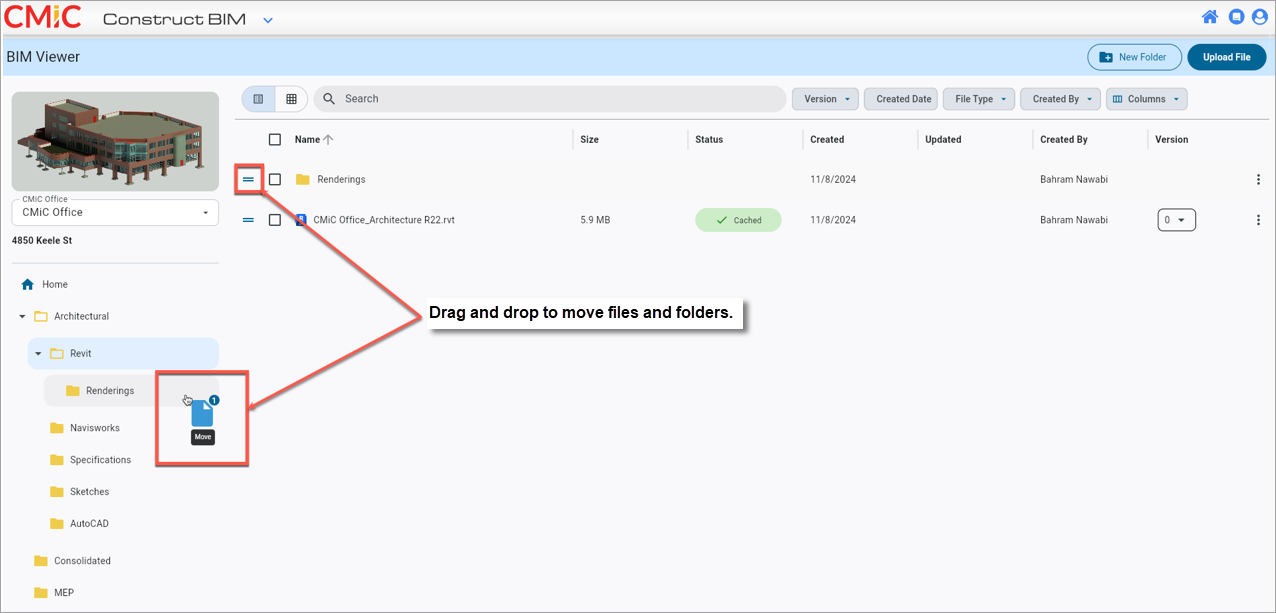
Drag and drop to move files and folders.
Opening Revisions
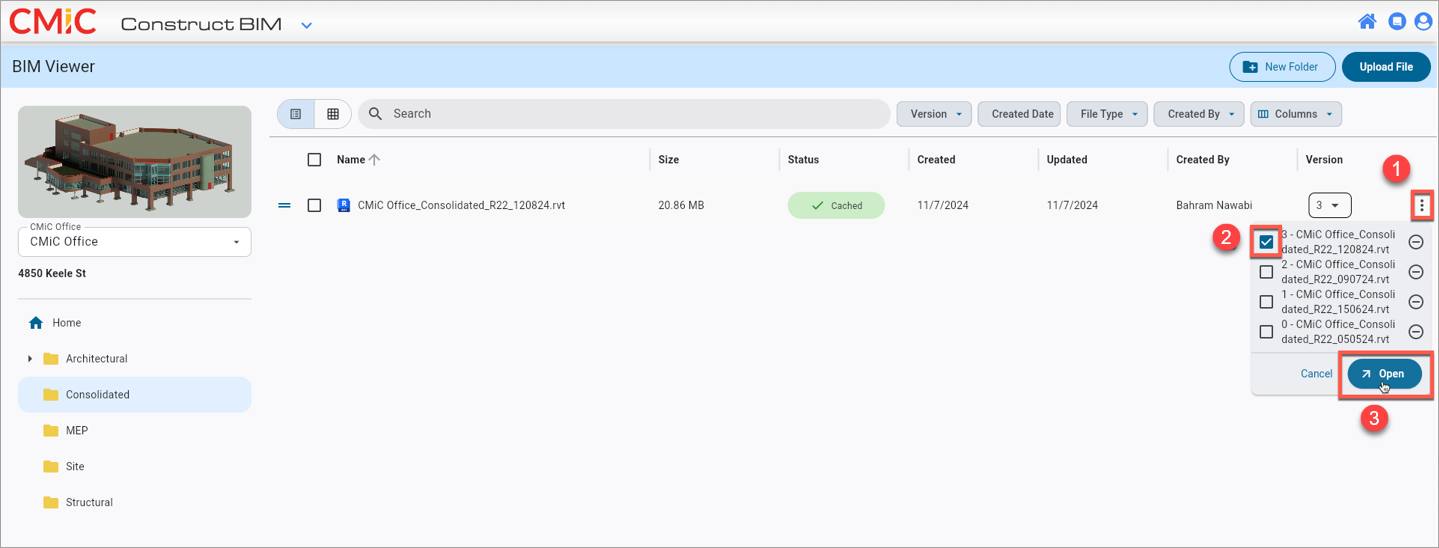
Opening revisions
To open a specific revision of a model file, complete the following steps:
-
Open the version drop-down.
-
Select a revision by clicking the checkbox.
-
Click on [Open] and a new tab will open where your model will be displayed.
Adding Revisions
-
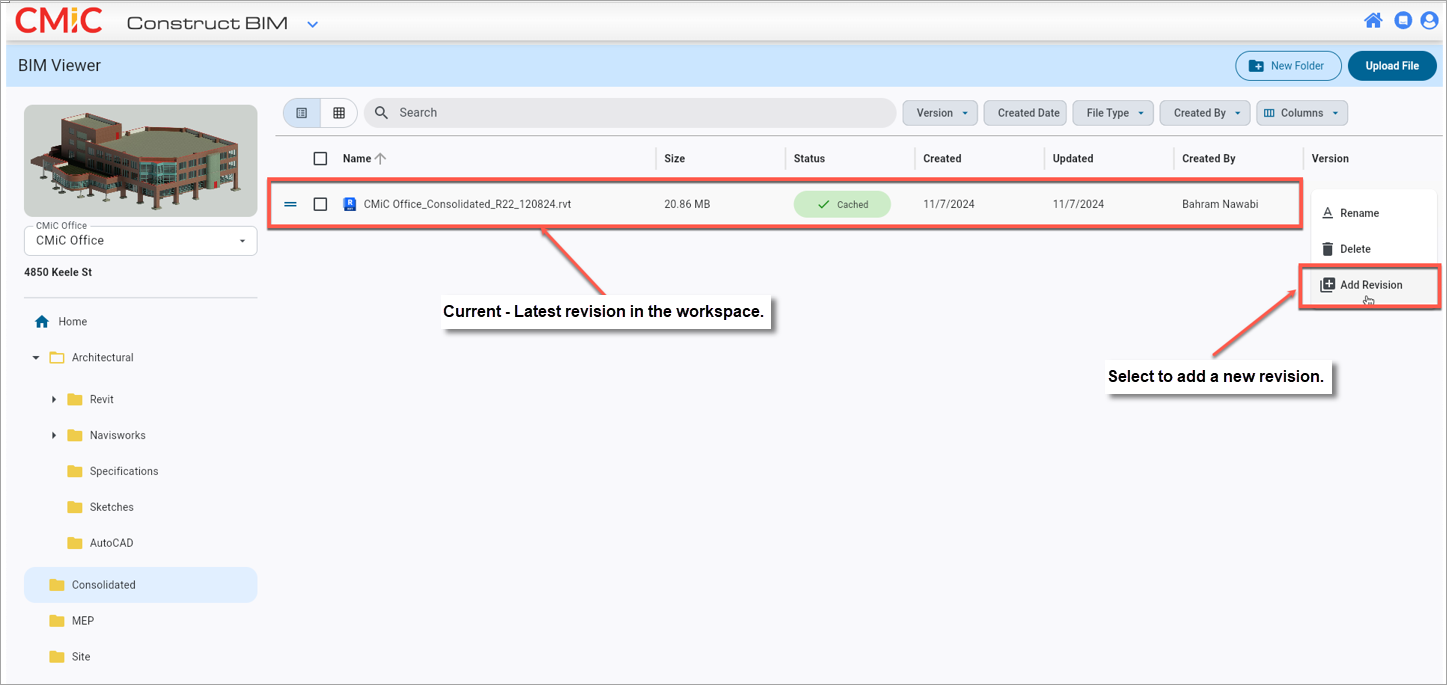
Click on the options menu and select “Add Revision”.
-
Browse and select a revision model from your device.
-
Click [Open] to upload and convert the revision model into the application.
-
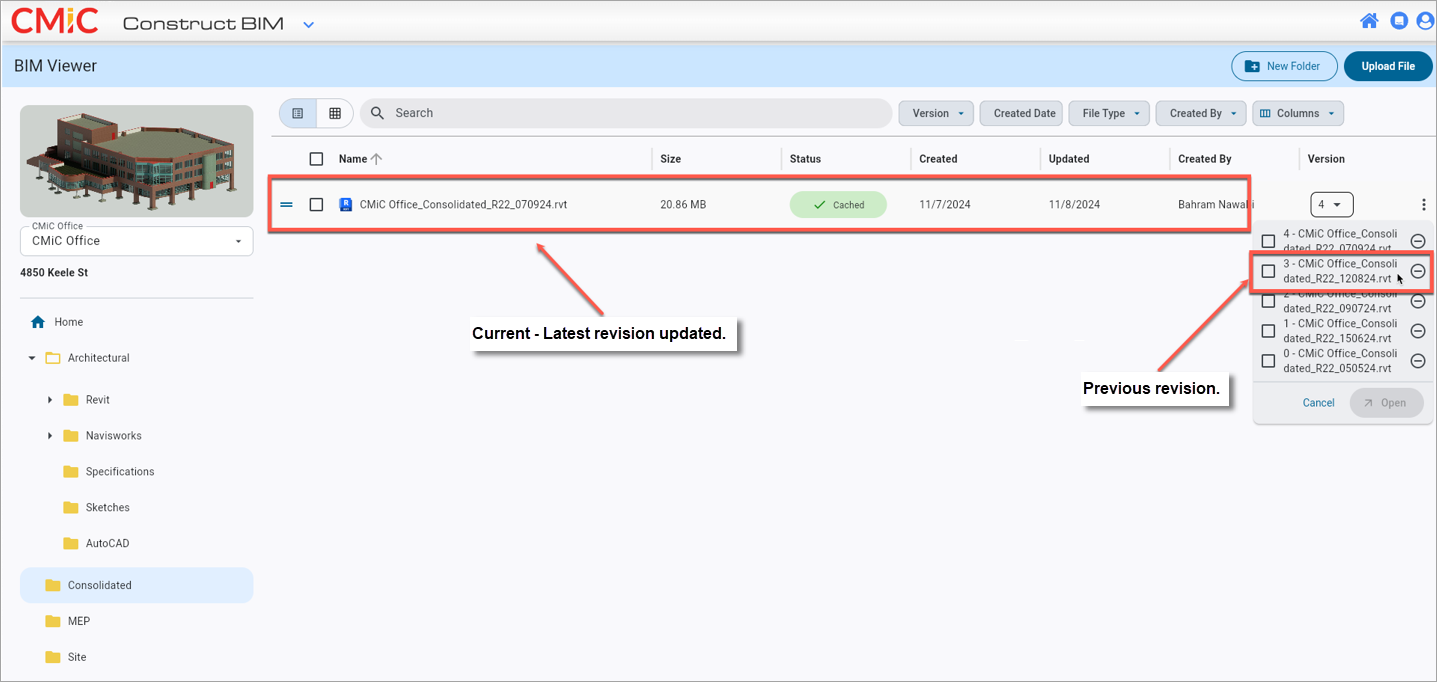
By default, the last uploaded revision becomes the latest revision. Hence, the default model in the workspace.
Deleting Revisions
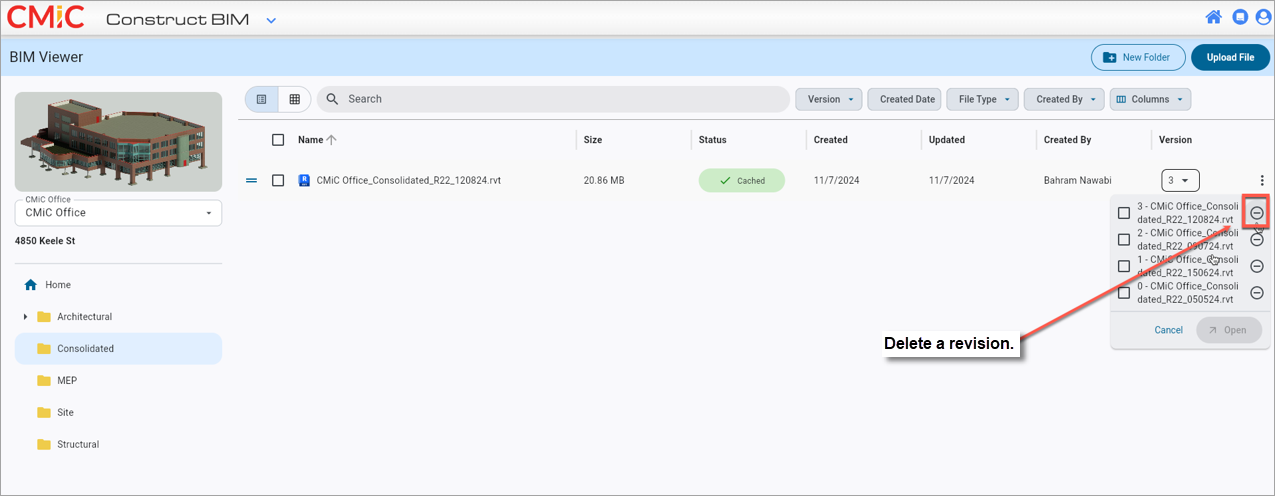
To delete a revision, open the Version drop-down and click on the Delete icon (![]() ) to delete a file.
) to delete a file.