Overview
When viewing any blueprint or other architectural drawing, users can make measurements directly within the drawing using the Drawing Measurements tool.
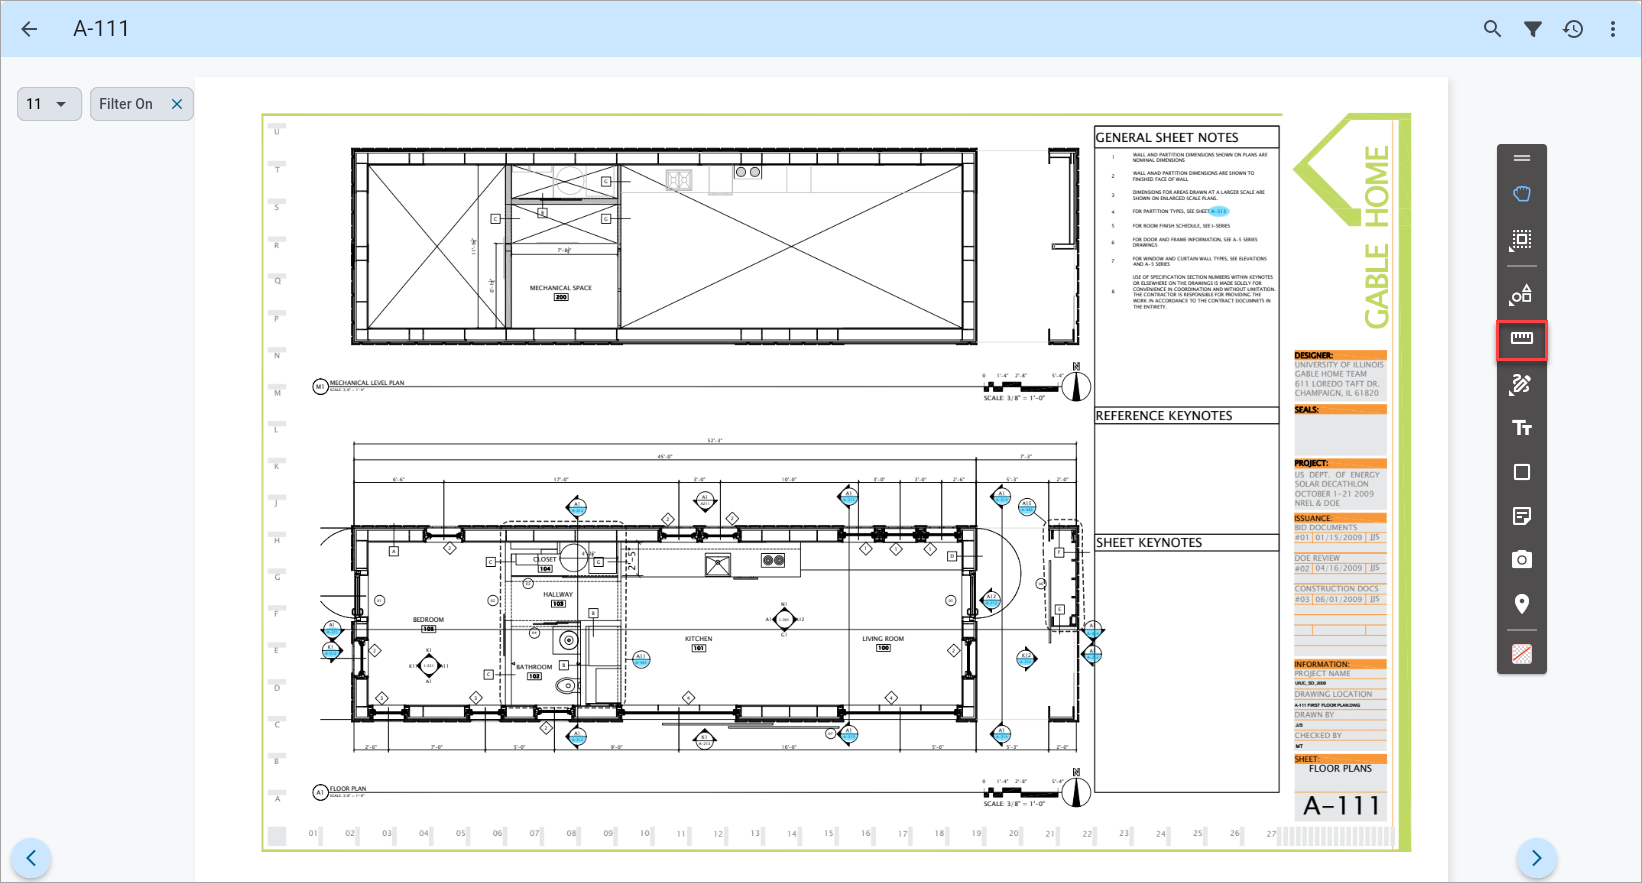
Calibrating Measurements
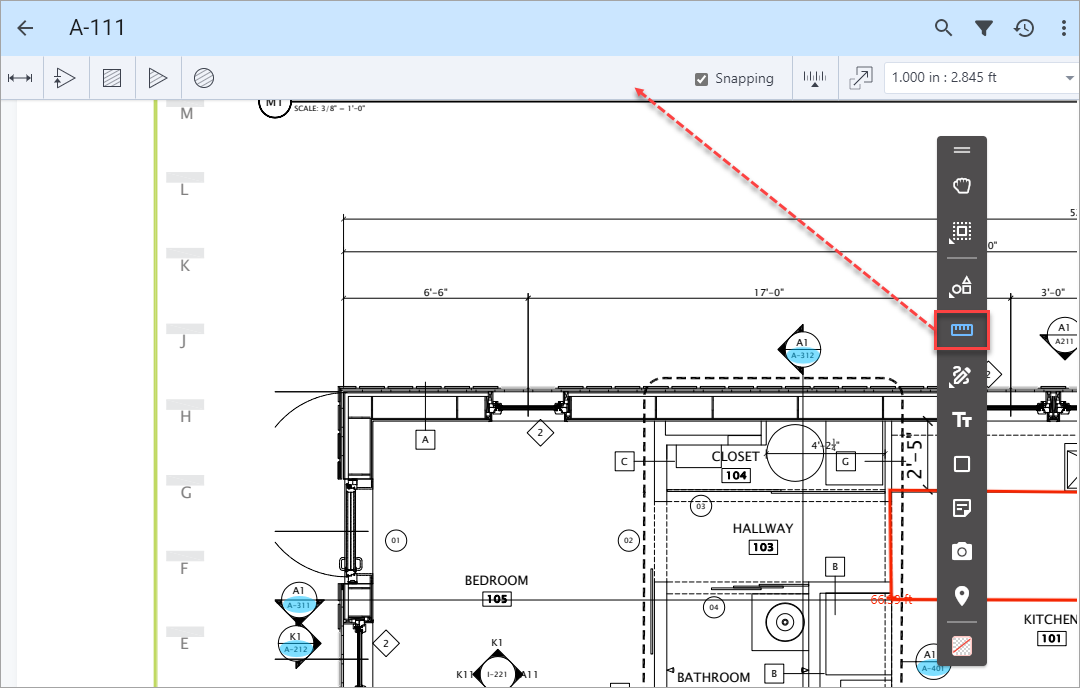
In order to take accurate measurements, the Drawing Measurements tool must be calibrated to the scale of the drawing. Press the Drawing Measurements icon (![]() ) to access the Drawing Measurements toolset
) to access the Drawing Measurements toolset
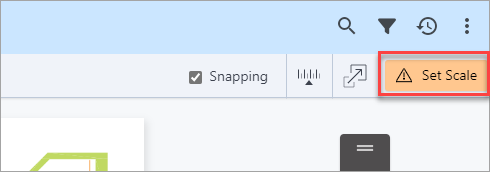
The system will indicate if the scale needs to be set, as shown in the screenshot above. Users may manually enter a scale by pressing the Set Scale icon, as shown above, or use the Calibrate Scale tool (![]() ).
).
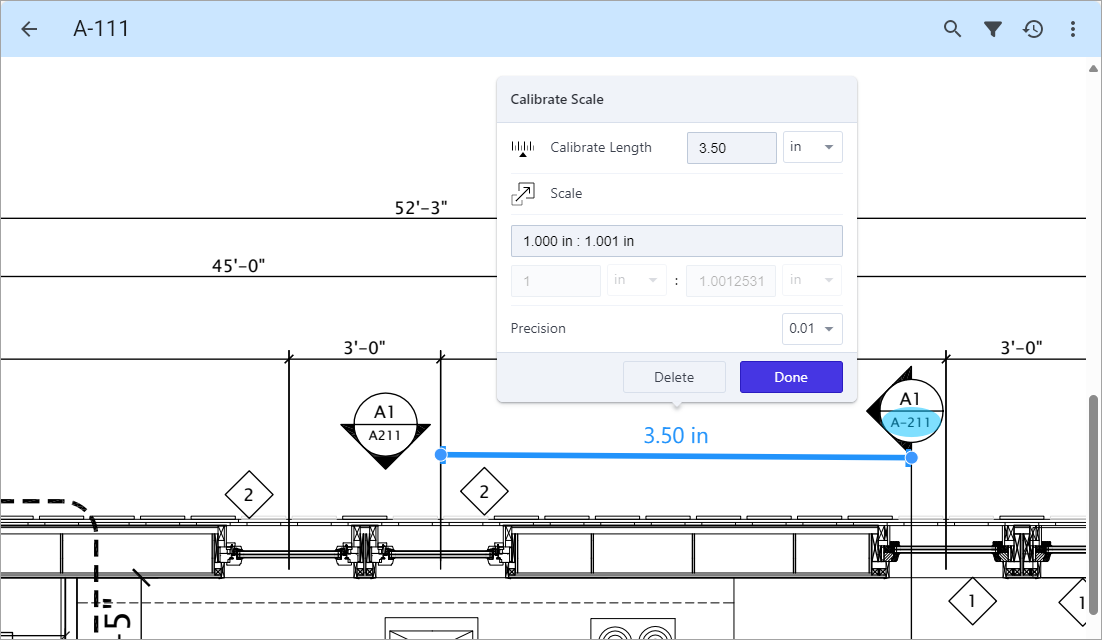
Press the Calibrate icon (![]() ) to activate the Calibrate Scale tool. Draw a line over any known measurement in the drawing. A pop-up window will be displayed which is used to define the measurement settings.
) to activate the Calibrate Scale tool. Draw a line over any known measurement in the drawing. A pop-up window will be displayed which is used to define the measurement settings.
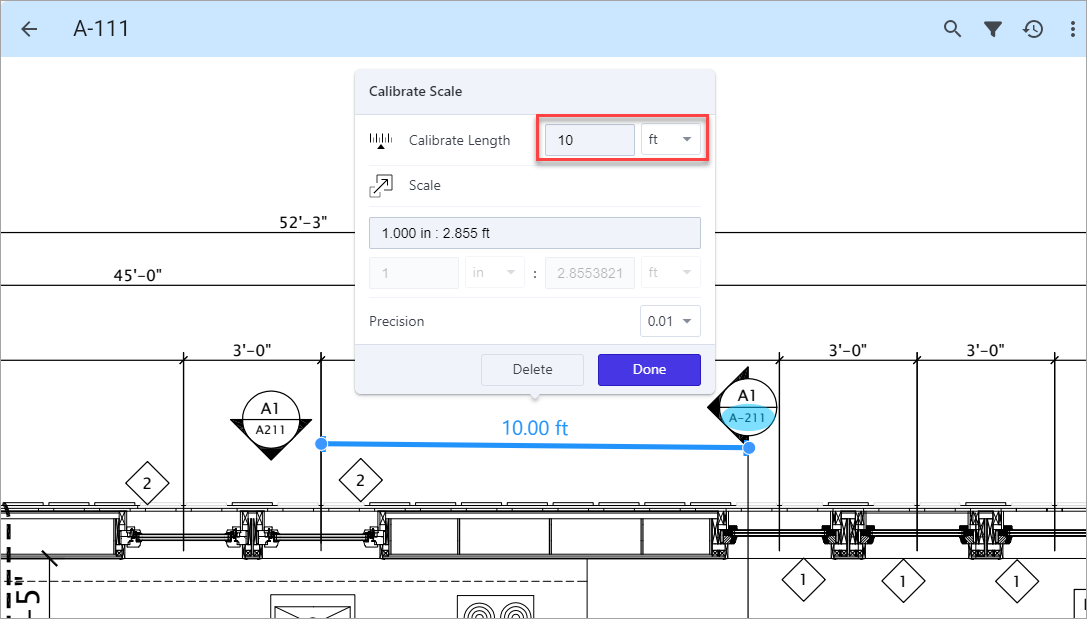
Edit the Calibrate Length field to calibrate the drawn line to the known distance in your preferred units. Once the length is calibrated, the Scale field will show the scale used by the Drawing Measurements tool.
Using Drawing Measurements
Once the Drawing Measurement tool has been calibrated, measurements can be added to the drawing. There are several measuring tools available in the toolset. To access the complete set of tools, press the Drawing Measurements icon to open the toolset menu
Users can press ![]() )
)
Users also adjust the scale, line color, line opacity, and line thickness of the tool.
Line Snapping
Measurement lines placed on a drawing will autosnap to the nearest drawing line to aid in measurements if the 'Snapping' box on the Drawing Measurement toolbar is checked.

Line Measurement
Use the Distance tool (![]() ) to place a line anywhere within the drawing to measure the distance.
) to place a line anywhere within the drawing to measure the distance.

Elliptical Measurement
Use the Ellipse Area tool (![]() ) to measure the square footage of any ellipses drawn.
) to measure the square footage of any ellipses drawn.

Rectangular Measurement
Use the Rectangle Area tool (![]() ) to measure the square footage of any rectangle drawn.
) to measure the square footage of any rectangle drawn.

Perimeter Measurement
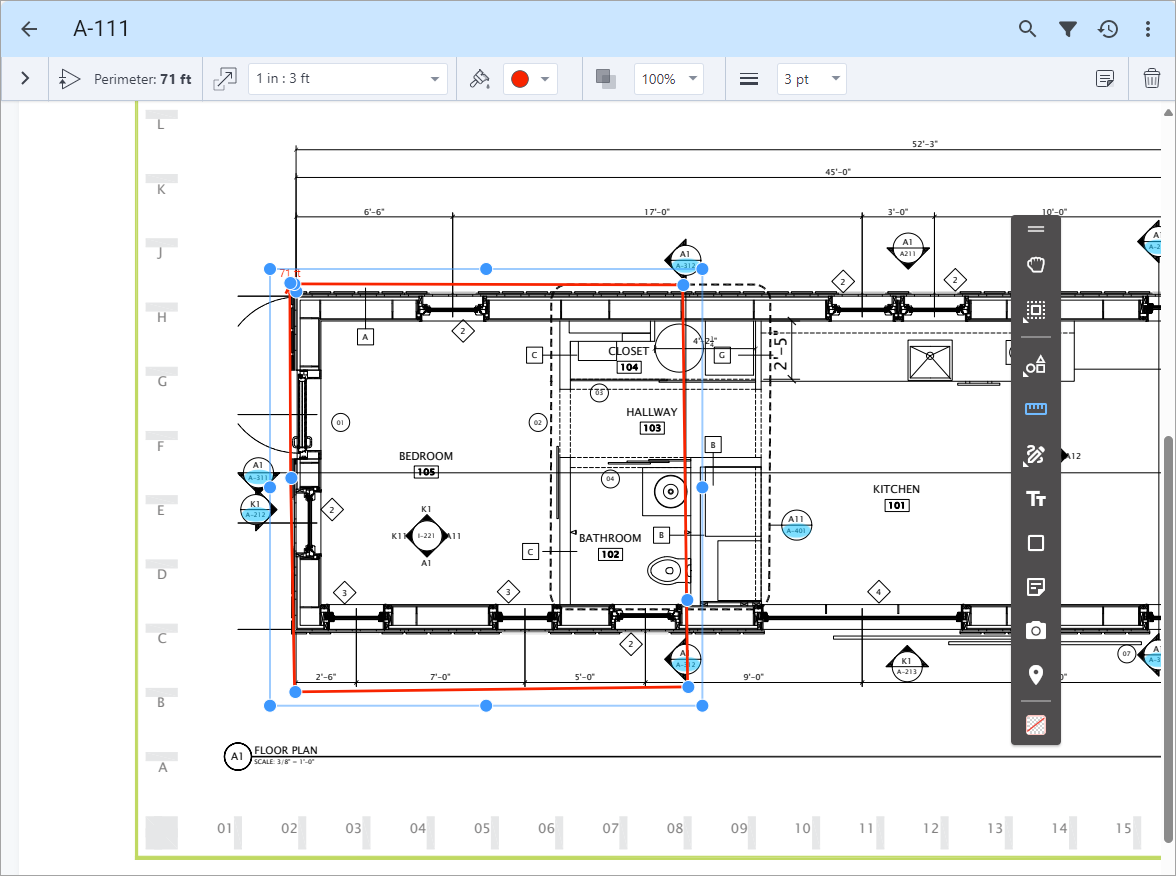
Use the Perimeter tool (![]() ) to measure the length of the perimeter of any shape on your drawing.
) to measure the length of the perimeter of any shape on your drawing.
Polygonal Area Measurement
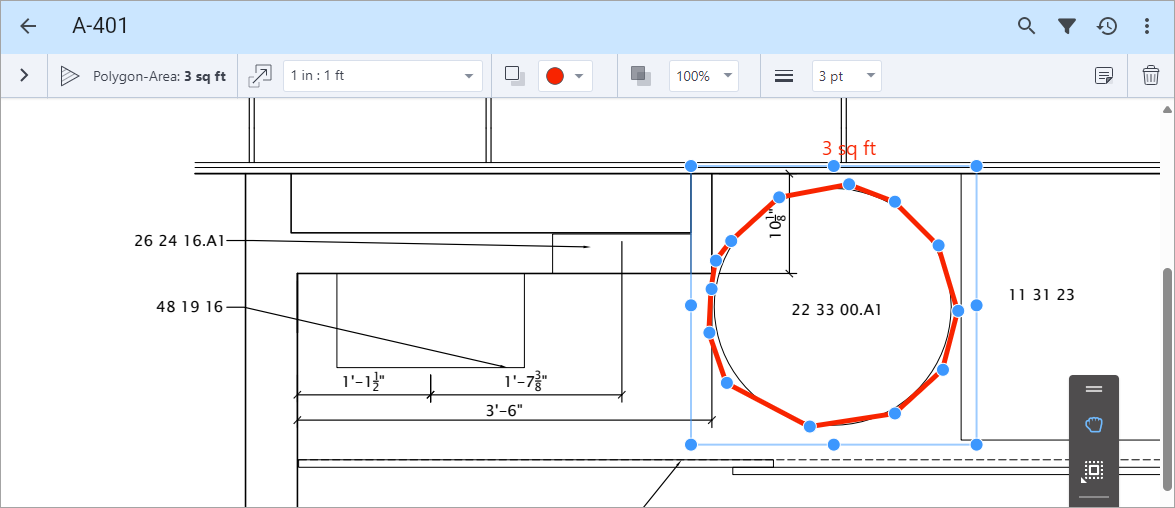
Use the Polygon Area tool (![]() ) to measure the area of any shape on your drawing.
) to measure the area of any shape on your drawing.
Known Issues
The following known issues are currently being worked on and are expected to be resolved in upcoming releases.
| Feature | Summary | Description |
|---|---|---|
| Line Measurement | Autosnapping the measurement line, perpendicular to a wall. | When adding a new measurements to the drawing, the autosnapping feature will snap to the nearest line, but does not snap perpendicularly to that line. |
|
Calibrate Measurement
|
Editing the value of calibration length. |
When editing the calibration length, users will notice a bug with decimal entry, where the decimal will not show up when entered as part of a number. The workaround is to start with the decimal point first, and then type the value around it. Additionally, it is only possible to enter measurements in feet or inches but not both. |
| Annotations | Saving drawing measurements. | When leaving a drawing after having made measurements, the measurements are not automatically saved as annotations. Additionally, calibration information is not saved. |