CMiC API and OAuth 2.0 Integration - Setting Up a Custom Claim via Azure
-
Go to the Azure portal.
-
Navigate to App Registrations.
-
Pick the application to modify that will support mapping claims.
-
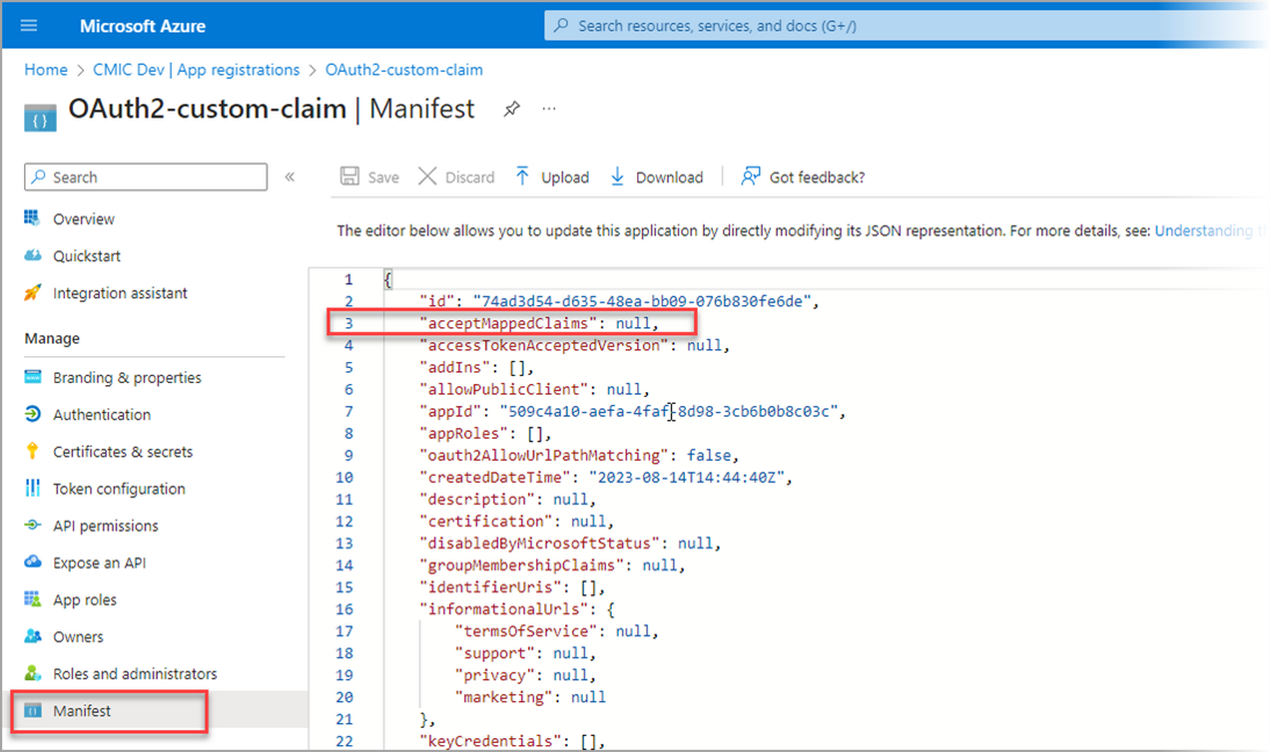
Click on the Manifest option under the Manage section and set acceptMappedClaims from "null" to "true".
-
Click [Save] to commit the changes in the manifest.
-
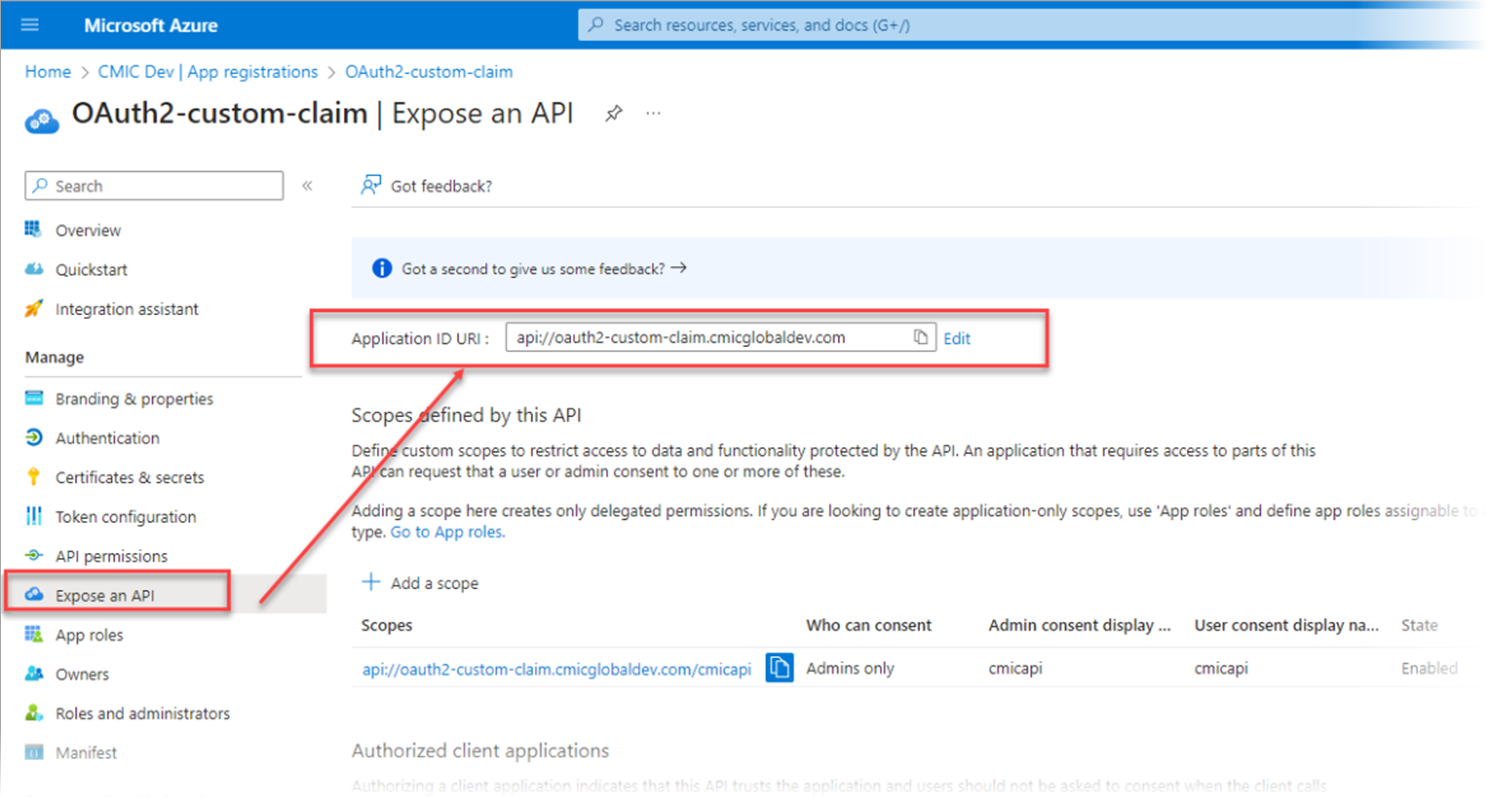
Navigate to the Expose an API option under the Manage section of the left navigation menu.
-
Set the Application ID URI field to use the unique name with the verified domain, not GUID (e.g. api://oauth2-custom-claim.cmicglobaldev.com).
-
During this step, if this error is encountered, "AADSTS501461: AcceptMappedClaims is only supported for a token audience matching the application GUID or an audience within the tenant's verified domains", do the following:
Solution:
-
Change the resource identifier or use an application-specific signing key.
-
Set the Application ID URI field to have the verified domain and not GUID, as described in Step 7.
For example, instead of "api://509c4a10-aefa-4faf-8d98-3cb6b0b8c03c", use "api://509c4a10-aefa-4faf-8d98-3cb6b0b8c03c.cmicglobaldev.com" or "api://oauth2-custom-claim.cmicglobaldev.com".
-
-
The application change is now complete.
-
Next, navigate Enterprise Applications.
-
Select the Enterprise Application to be modified.
-
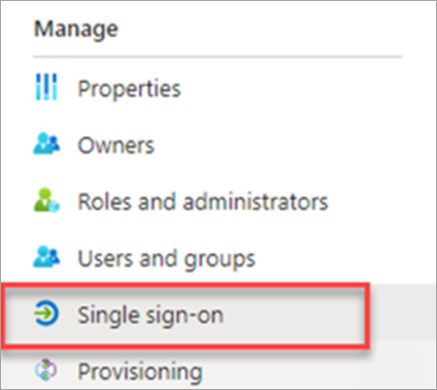
Click on the Single Sign-On option under the Manage section.
-
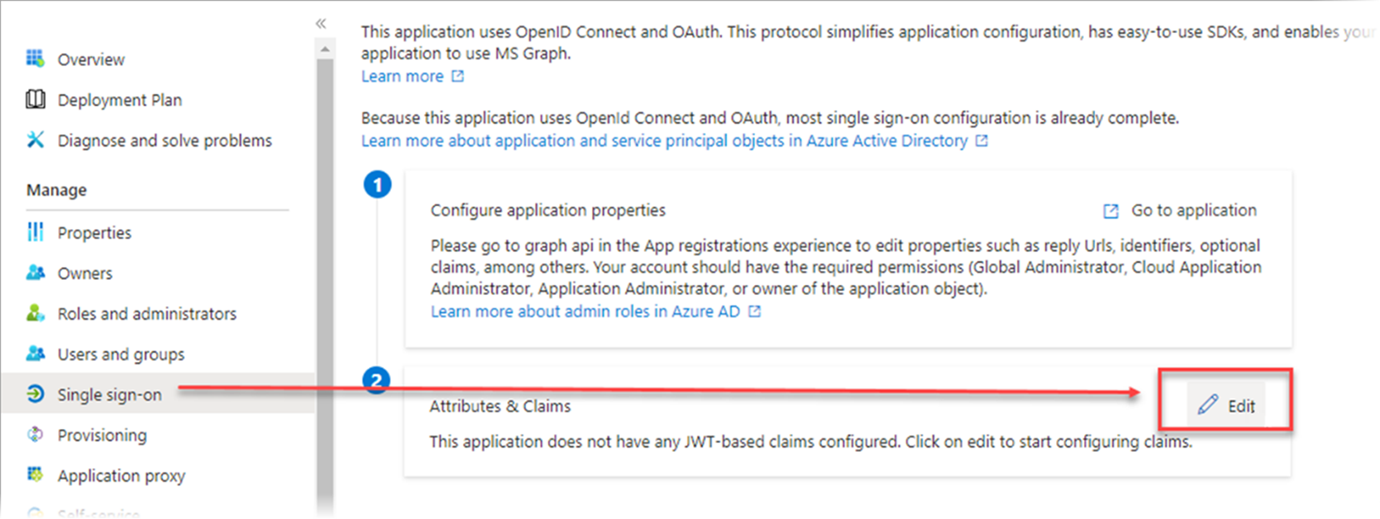
On the Attributes & Claims section, click Edit.
-
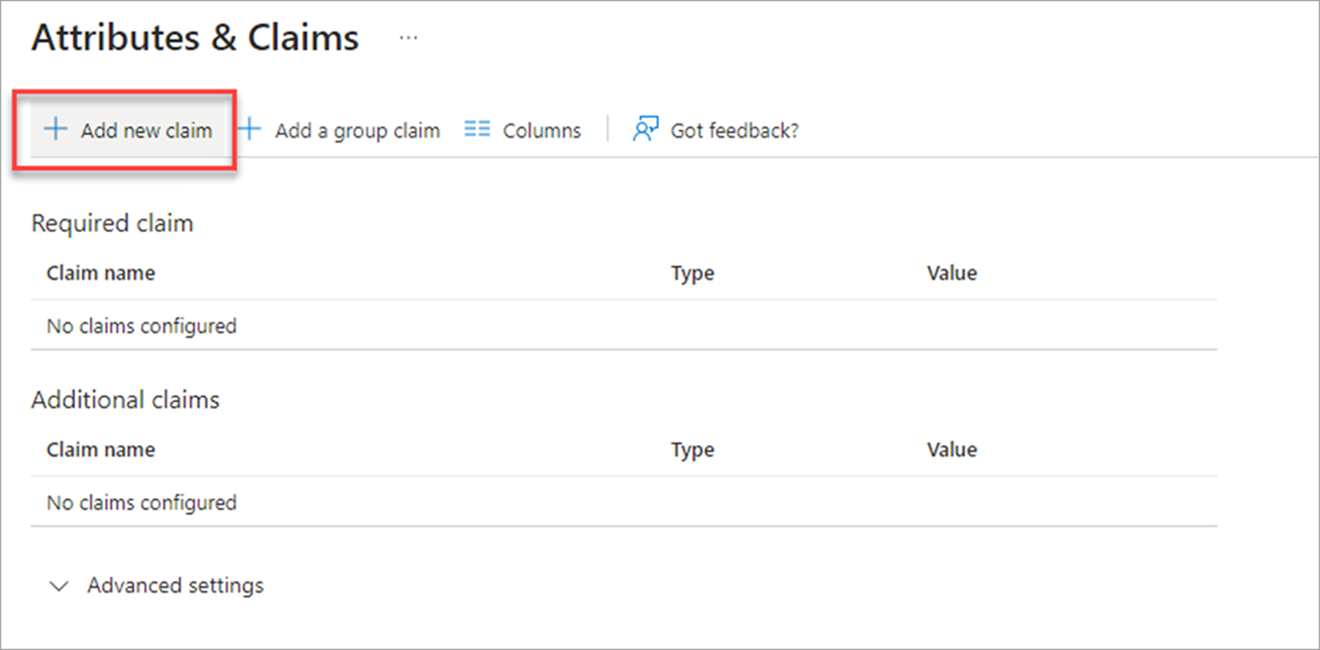
On the Attributes & Claims screen, click on [Add new claim].
-
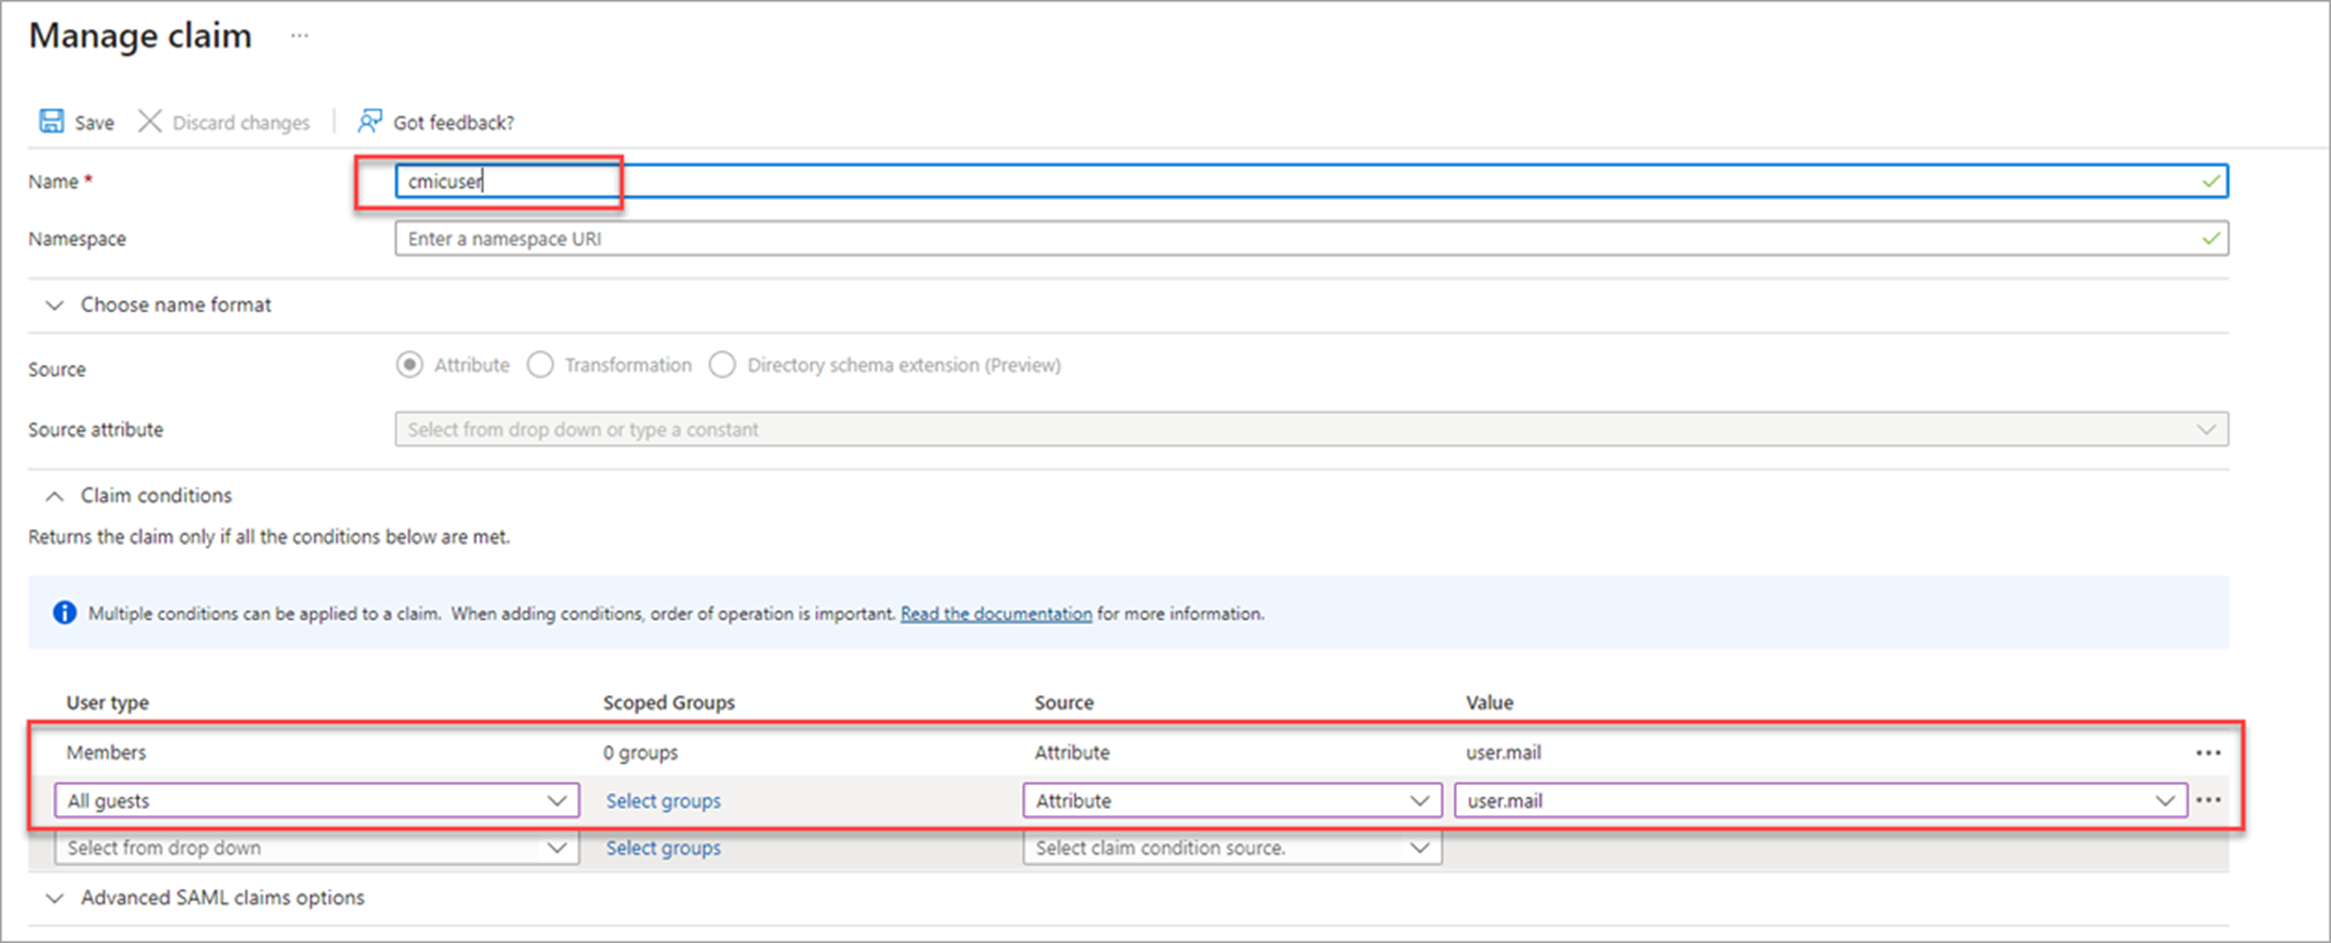
For the Name field, enter "cmicuser" and add the condition under the Claim Conditions section, as shown in the screenshot below. The claim conditions are what the value of the claim should be.
-
Click [Save] to save the changes.