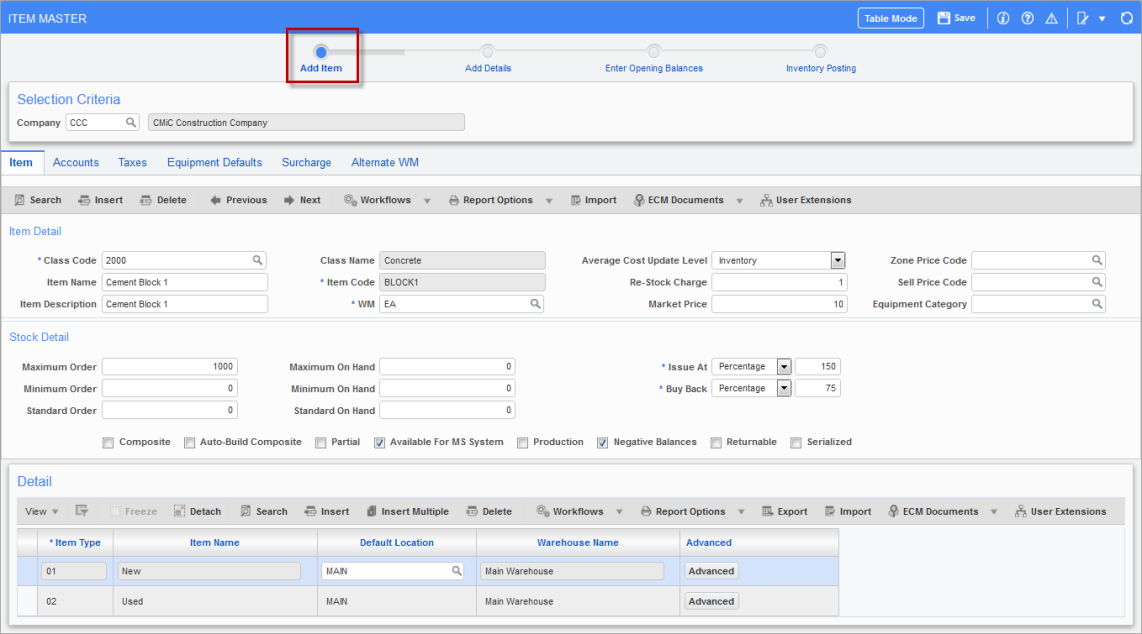
Pgm: CIITEM – Item Master; standard Treeview path: Inventory > Setup > Item Master
Every inventory item must be created in the Item Master screen. The Item Master screen is used to define the inventory code, class, and other setup options. The information entered here will default to the Item Detail screen, where the item will be assigned to a warehouse and become active.
The default state of checkboxes, taxes, and accounts comes from the Inventory Control File screen, to the Item Class screen, and now to the Item Master screen. This is the final default and can be left as is or changed if this particular inventory item requires a different setting.
NOTE: The Item Master screen contains a processing train at the top of the screen which guides users through the steps of creating inventory items. For convenience, each step (node) on the processing train provides access to key screens that the user will need during the creation of inventory items. These screens are also available in the Treeview menu.
Item – Tab
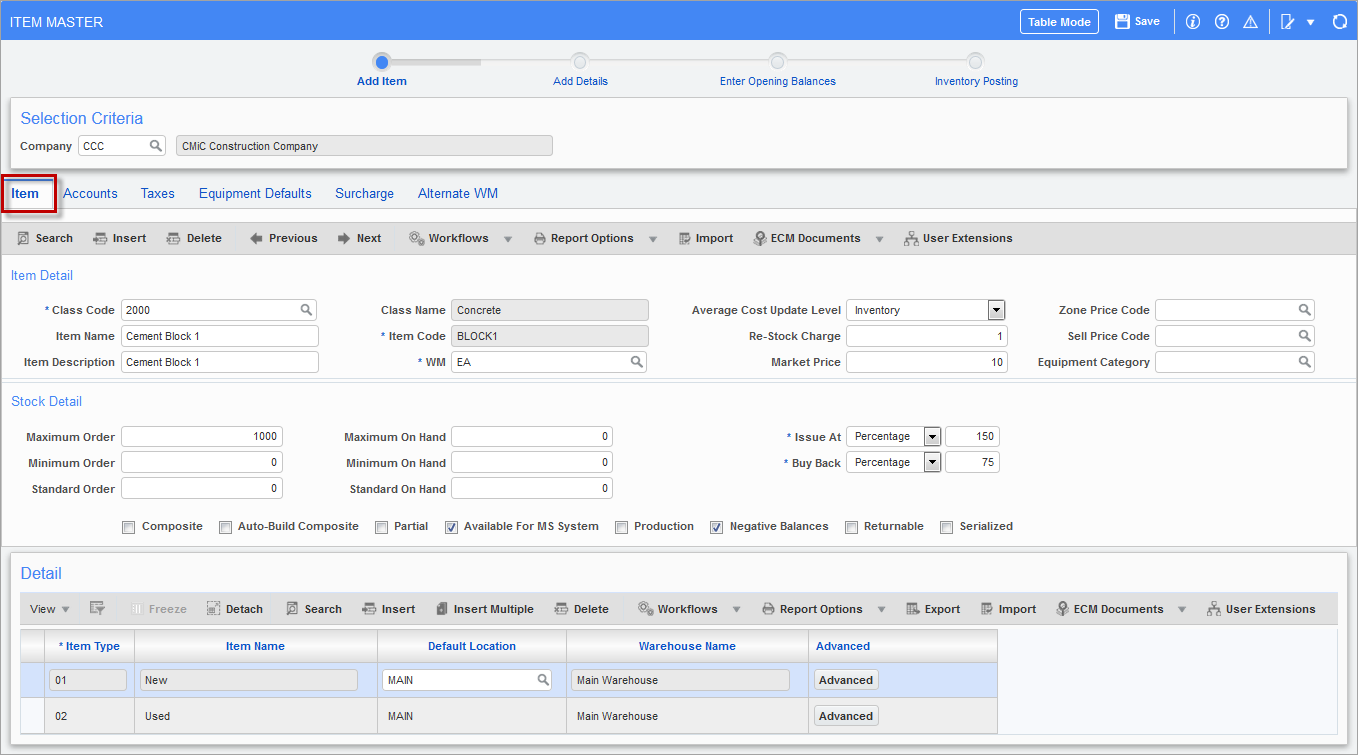
Pgm: CIITEM – Item Master; standard Treeview path: Inventory > Setup > Item Master – Item tab
Item Code
Enter a user-defined code for the inventory item.
Item Name
Enter the item name for the item code being defined. This name will be displayed beside the item code on all forms.
Item Description
The item description is a free-form long field, which will only appear on select reports that can be used to add additional information on the item.
Item Class Code
The inventory item will inherit the cost method and rules as set up on the Item Class screen. All other inventory items using this class will inherit the same. Therefore, although it is possible to go back to the Item Class screen and change the rule(s), all subsequent inventory items set up with this code will inherit the new rules.
WM Code
This is the WM code that will be the default WM for the item. This should be the most commonly used WM for the item. For other WM codes to be available, they must be set up in the Alternate WM tab.
Order and On Hand Quantities (Maximum, Standard, Minimum)
Enter the default on hand and order quantities for the item.
Zone Price Code
Select a zone price code from the LOV.
Zone pricing codes are maintained on the Zone Pricing screen in the Material Sales module (standard Treeview path: Material Sales > Setup > Local Tables > Zone Pricing).
Sales Code – Checkbox
When the ‘Sales Code’ checkbox is checked, it is marking this inventory item as a generic name/product code for an existing inventory item. The Item field will become enterable where an existing inventory item must be mapped to the generic inventory code. No transaction will occur against the item marked as ‘Sales Code’ but will occur behind the scenes with the associated inventory item. Both the generic/product code and existing inventory item must be found at the same inventory location and share the same WM code. Generic/product code type of inventory items will not be allowed in any inventory transaction but will be allowed in the Material Sales and AP modules.
Production – Checkbox
If checked, this will mark the item class as a production item used in the Material Sales module. The main feature of a production item is that it can be associated with a job costing phase, and the inventory item will increase when the associated phase quantity is posted. A production item can be a regular inventory item or a composite item. Composite items will have components assigned to it, however, a composite item that is also marked as a production item cannot be assembled nor disassembled using existing inventory options. Also, unlike regular composite items, production composite items allow for alternate units of measure and negative balances. The main difference between regular composite items and production items will be that the cost of components of a production composite item will be transferred into this item unlike the case of inventory composite items where costs always reside on the components.
Serialized – Checkbox
Serialized items are items where each instance of the item must be identified individually. An item marked as serialized will require the specification of a serial number during the receipt, issuance, transfer, write-off, or physical count of that item.
Check the ‘Serialized’ checkbox if the item being defined is serialized.
Leave this field blank if this inventory item is not serialized.
Composite – Checkbox
This checkbox setting will have defaulted from the Item Class screen but can be changed here.
Leave this field blank if the inventory item is not a composite item.
Composite items are items that are made up of multiple inventory items referred to as components.
Inventory items marked as composite in the Item Master screen will require an item specification in the Composite Item Specification tab in the Item Detail screen. Each component will be assigned to the composite. When inventory is received, it is received to the components. The composite is then fully or partially assembled. The component inventory is decreased and the composite inventory is increased.
Composite items have the option to be serialized, where the system will require that at least one of the components that make up the composite item be serialized. Therefore, if five components are part of the one composite item and are serialized, the user will have to select five serial numbers which match the items being removed from inventory.
When the composite item is a production item as well, the components must be entered the same as above, however, price share, serialized, and partial disassembly will not be taken into consideration.
Partial – Checkbox
This checkbox will have defaulted from the Item Class screen but can be changed here. This option is used in conjunction with the composite items checkbox in the previous field.
In the case where the ‘Composite’ checkbox has been checked, the ‘Partial’ checkbox will indicate whether the composite items within this class allow for partial assembly.
Composite items must be assembled when they are issued. The assembly process allows for full assembly or partial assembly.
Full assembly requires the existence of each component in the specified quantities for the assembly of the composite item.
Partial assembly allows for the assembly of the composite item without the necessity of all components in the exact quantities specified.
Returnable – Checkbox
Check the ‘Returnable’ checkbox if the item must be returned to the vendor after use. This field is used for reference purposes only.
Available For MS System – Checkbox
If checked, the item will be available in the Material Sales module.
Auto-Build Composite – Checkbox
If checked, this will auto-build composite items.
Alternate WM Allowed – Checkbox
Check the ‘Alternate WM Allowed’ checkbox if the item will require the entry of alternate units of measure. For example, the inventory item lists the inventory item as a box but inside the box there are ten items.
The ‘Alternate WM Allowed’ checkbox allows for the maintenance of an inventory item in a specific weight measure, but to receive that same item in a different weight measure.
When this box is checked, inventory transactions can be entered using the alternate WM, but the final inventory evaluation will always be done in the basic weight measure of the item.
With this option enabled, the Alternate WM tab on the Item Master screen will become enabled to allow the user to enter a conversion factor.
Negative Balances – Checkbox
If the user indicated that this class allows negative balances, then this field will automatically be checked. It may be changed here.
Average Cost Update Level
If using the average cost method of inventory valuation, specify whether to update the average cost of this inventory item by the total inventory, or by the inventory within a specified location.
Re-Stock Charge
Enter a value that will be added to each unit (as defined by the WM) of this inventory item, when all or a portion of the item is returned. This is a dollar amount per item not a percentage.
Market Price
Enter a value for the market price of this inventory item. The market price is referenced from the Accounts Payable control setting – ‘Use Inventory Item Market Price As Bill Rate’ checkbox. When this checkbox is checked, and an invoice is entered for a PO with an inventory item, the AP Voucher Distribution pop-up billable amount for the transaction will be populated by the item market price that was entered in the Inventory module.
Issue At (Method)
Specify whether to issue this item based on an issue price or as a percentage of the item’s cost.
The issue at method will default from the Item Class screen but can be changed on an item-by-item basis.
Issue Price/Percentage
Enter the issue price or issue percentage of the item to be used when processing an issue.
If the price method has been selected in the previous field, then enter the actual issue price of the item in this field.
If the percentage method has been selected in the previous field, enter the percentage of the items cost.
E.g. for 10% enter 110.0000
Buy Back (Method)
Specify the buy back method for this item based on a specific buy back price or as a percentage of the item’s cost.
Buy Back Price/Percentage
Enter the buy back price or buy back percentage of the item to be used in processing an issue.
Sell Price Code
Select a sell price code from the LOV.
Selling price codes are maintained on the Sell Price Index Maintenance screen of the Material Sales module (standard Treeview path: Material Sales > Setup > Local Tables > Zone Pricing).
Equipment Category
Select an equipment category from the LOV.
Equipment categories codes are maintained in the Equipment Costing module (standard Treeview path: Equipment Costing > Setup > Local Tables > Category Codes) and in the Preventative Maintenance module (standard Treeview path: Preventative Maintenance > Setup > Equipment Tables > Category Codes).
Item Type, Default Location
Enter a default item type and default location from the LOVs.
NOTE: These fields become read-only once the screen is saved.
Detail – Section

Pgm: CIITEM – Item Master; standard Treeview path: Inventory > Setup > Item Master – Detail section
As item types are assigned to an inventory item, they will be listed in the Detail section of the Item Master screen. Item types can be assigned by clicking on [Insert] in the Block Toolbar, as shown in the screenshot above. Select the item type and default location, and then click on the [Advanced] button to launch the Item Details screen to complete the item type’s details.
Accounts – Tab
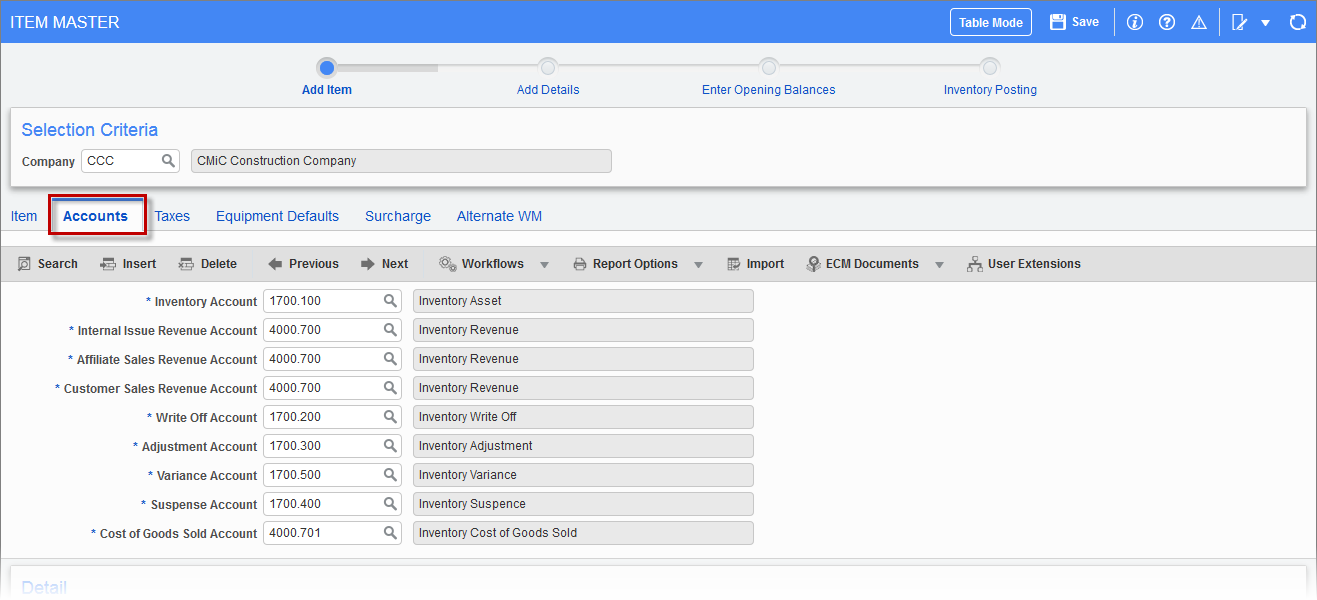
Pgm: CIITEM – Item Master; standard Treeview path: Inventory > Setup > Item Master – Accounts tab
Click the Accounts tab to access and modify the accounts, otherwise leave as defaulted. The Production Credit JC Category field, used in Material Sales production entry, is found in the Accounts tab.
Taxes – Tab
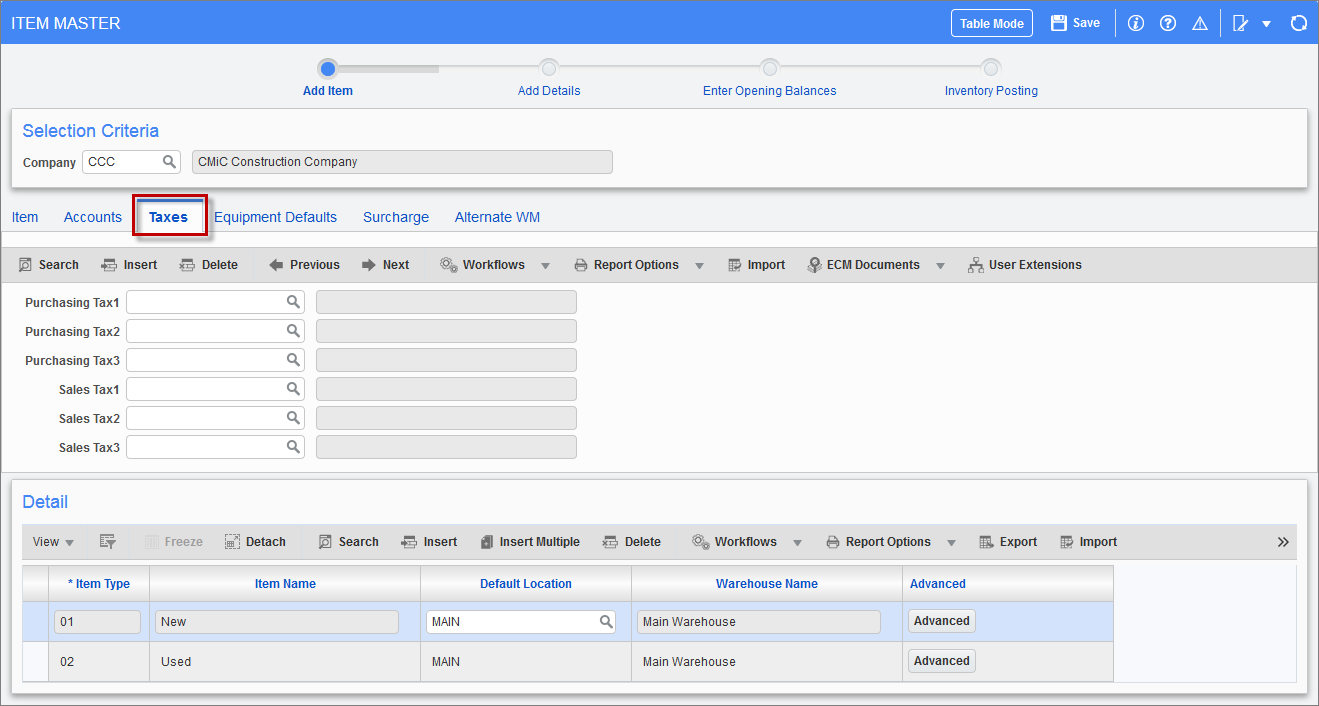
Pgm: CIITEM – Item Master; standard Treeview path: Inventory > Setup > Item Master – Taxes tab
Click the Taxes tab to access and modify the default taxes for the processing of this particular inventory item.
Equipment Defaults – Tab
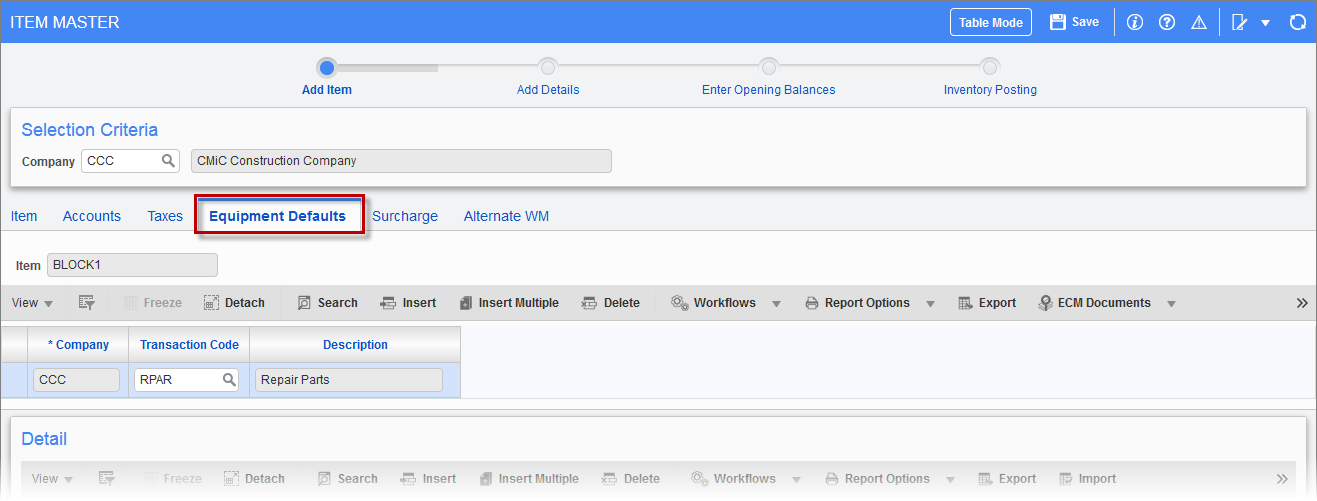
Pgm: CIITEM – Item Master; standard Treeview path: Inventory > Setup > Item Master – Equipment Defaults tab
The Equipment Default tab will associate equipment transaction codes and categories to inventory items. This association will be used in the Quick Inventory Issue To Equipment screen found in the Preventive Maintenance Utilities menu, where a mass inventory issue to equipment may be created and posted.
Surcharge – Tab
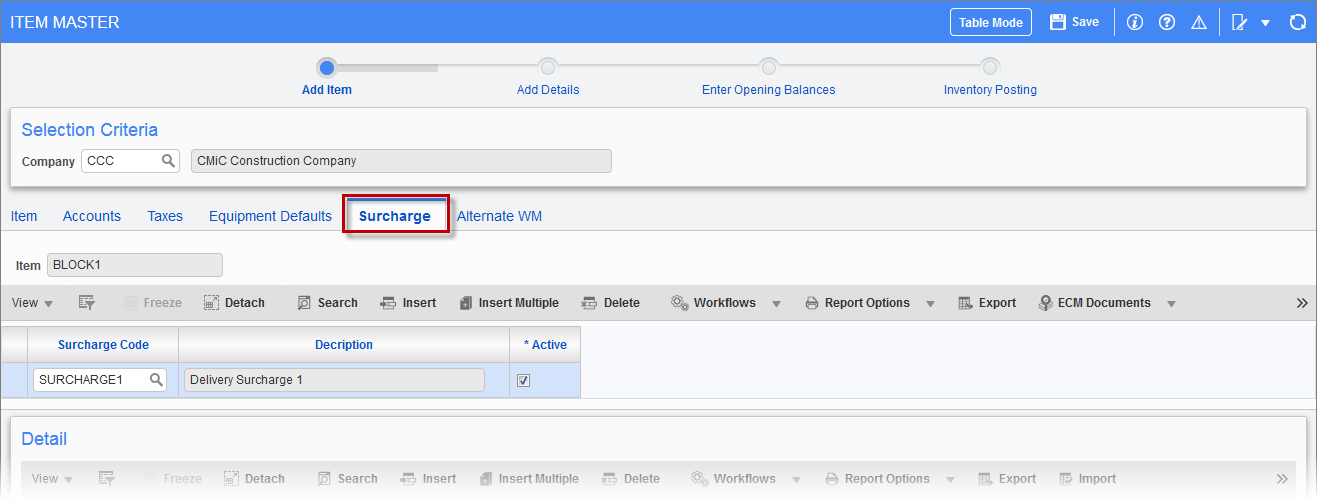
Pgm: CIITEM – Item Master; standard Treeview path: Inventory > Setup > Item Master – Surcharge tab
Click the Surcharge tab to modify the default delivery surcharges.
Surcharge codes are maintained on the Surcharge Code Maintenance screen in the Material Sales module (standard Treeview path: Material Sales > Setup > Local Tables > Delivery Surcharge Code Maintenance).
Alternate WM – Tab
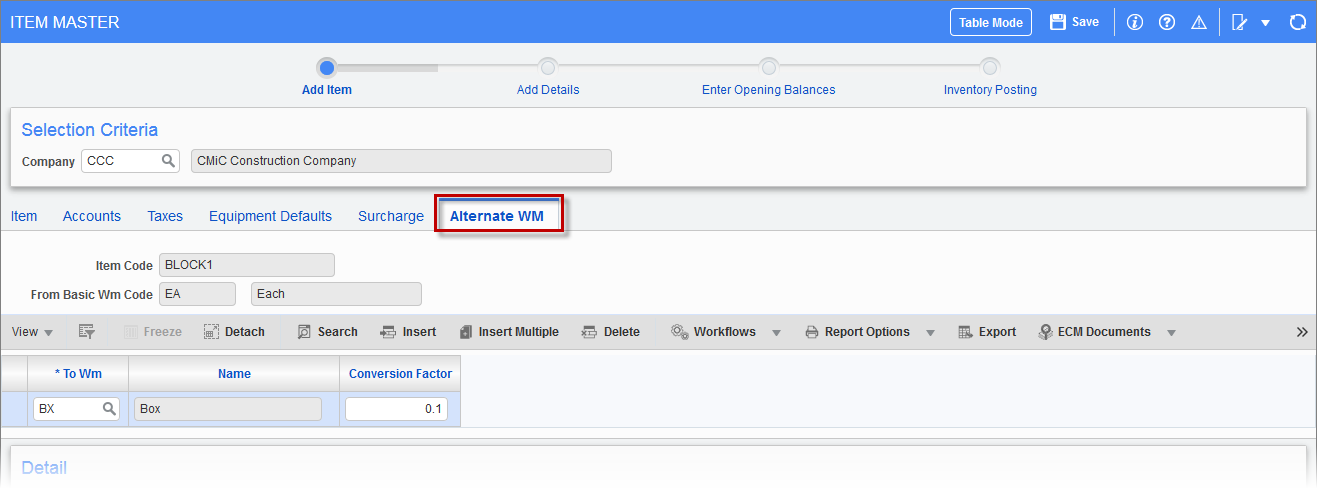
Pgm: CIITEM – Item Master; standard Treeview path: Inventory > Setup > Item Master – Alternate WM tab
Click this tab to enter the alternate WM codes to be available for the item.
For example, if the basic WM is "Each" and alternate WM is "Box", if there are ten items in a box, then conversion factor would be 0.1.