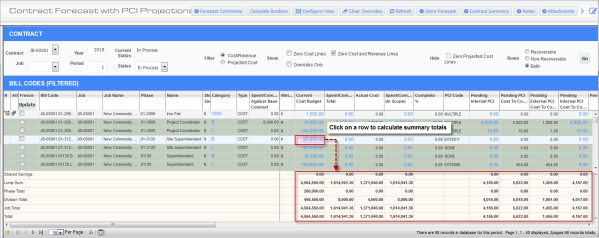
Document – Icon
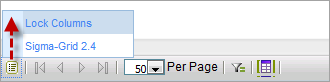
Clicking on the document icon and selecting “Lock Columns” from the menu launches a pop-up window where users can lock/unlock columns. If checked, locked columns will appear on the left side of the screen and remain in the frozen area when scrolling screen left or right.
Pop-up window launched from document icon on bottom panel of Contract Forecasting with PCI Projections screen
Navigation Arrows
Use the navigation arrow icons to move forward one page of records, or backward one page of records. Users can also advance to the last page of the records or the first page of records.
NOTE: The number of records displayed per page is set in the Per Page field.
Per Page
Use the drop-down menu to set the number of records to display per page.
Filter – Icon
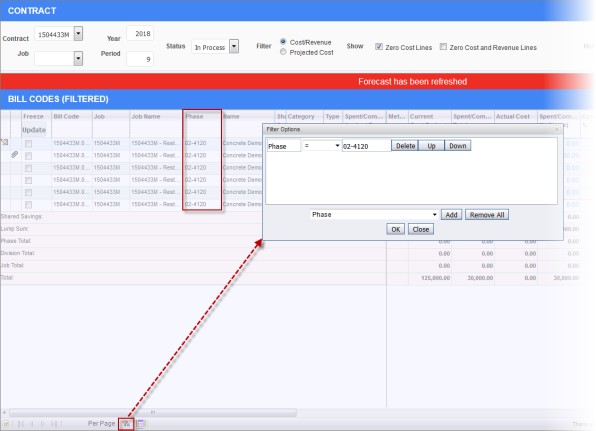
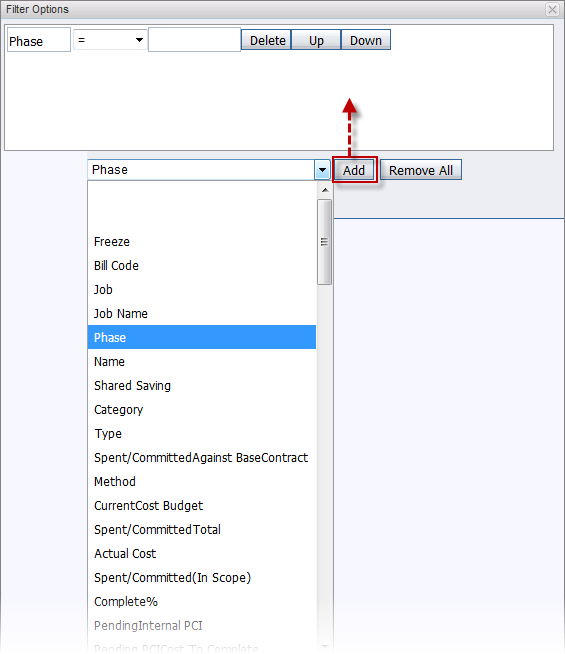
Pop-up window launched from Filter icon
Clicking on the Filter icon launches a pop-up window where users can set options to filter the records displayed on the screen.
The filter icon indicates when filters exist:
 indicates no filters exist.
 indicates filters exist.
To apply a filter, click on [Add] button in the Filter Options pop-up window to add a row of filter option fields. Next, use the drop-down menu to select a column by which to filter, select a comparison operator from the drop-down menu, and enter an expression by which to filter in that column.
NOTE: Sorting a column after a filter is applied will not clear the filters previously set.
Pin Summary Rows – Icon
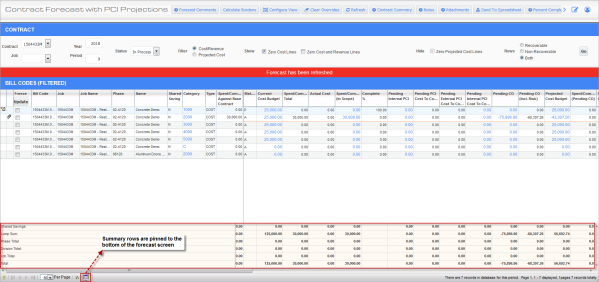
Clicking on the Pin Summary Rows icon allows users to pin the summary total lines to the bottom of the screen so that they can view the summary information without (vertical) scrolling. Users can switch to un-pin mode by clicking on the icon again.