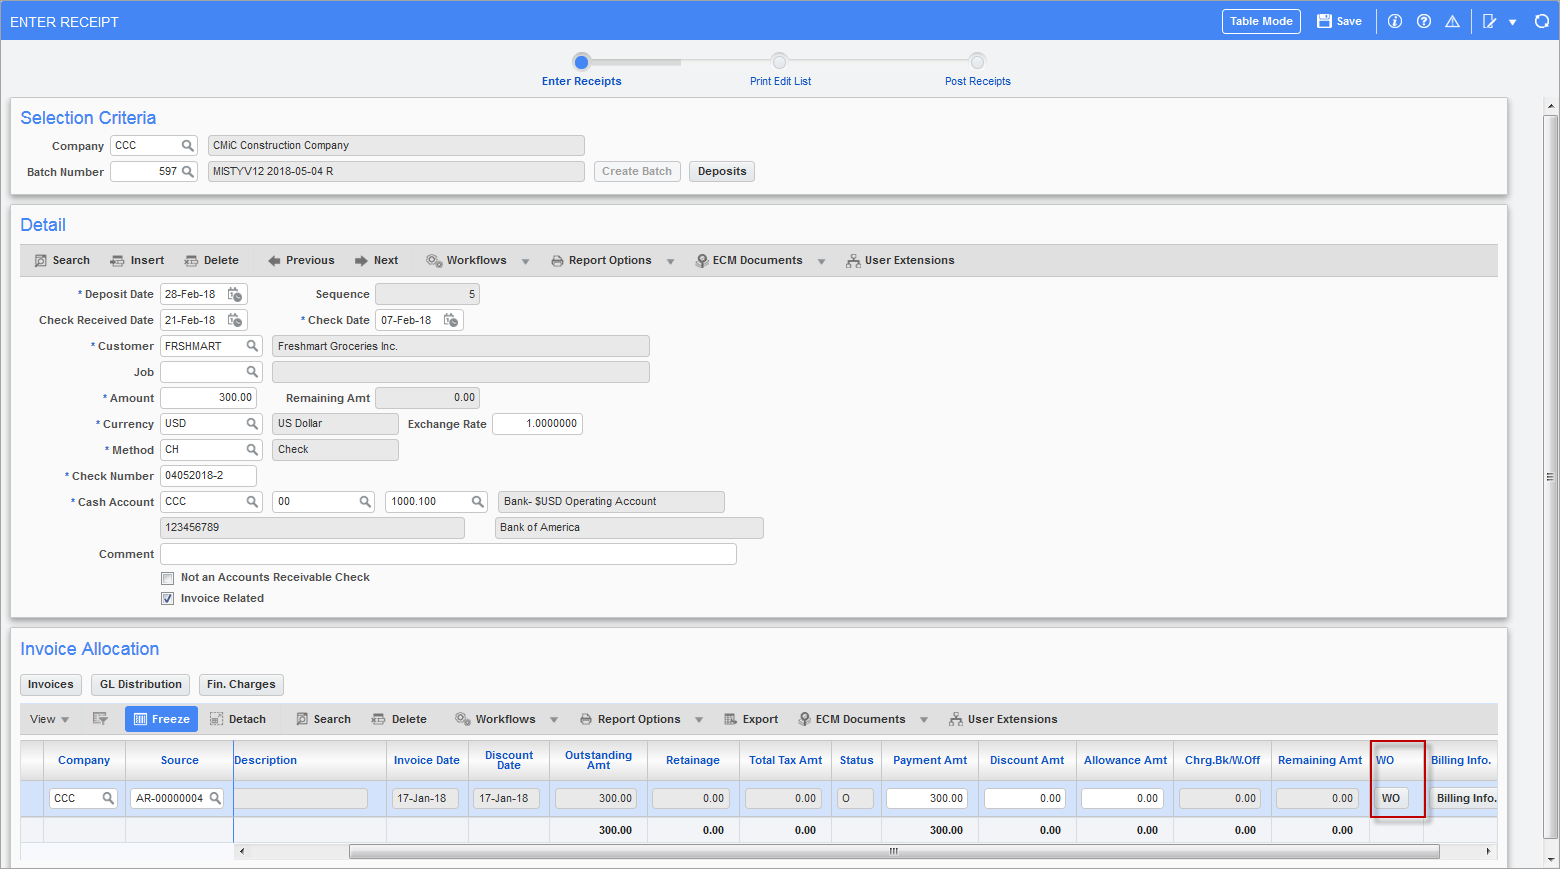
Write-offs are entered for an invoice using the screen launched by the [WO] button in the Invoice Allocation section of the Enter Receipt screen, as shown below:
Pgm: ARCHQFM – Enter Receipt; standard Treeview path: Accounts Receivable > Receipt > Enter Receipts
Pgm: ARCHQFM – Enter Receipt; standard Treeview path: Accounts Receivable > Receipt > Enter Receipts – [WO] button
A write-off occurs when the payment is less than the full amount outstanding because of a dispute or an error.
A common example of a write-off would be if the invoice was for $1017.18 and the client accidentally sends a check for $1017.17. Instead of leaving one cent outstanding on the invoice (and showing up on the aging), it should probably be written off.
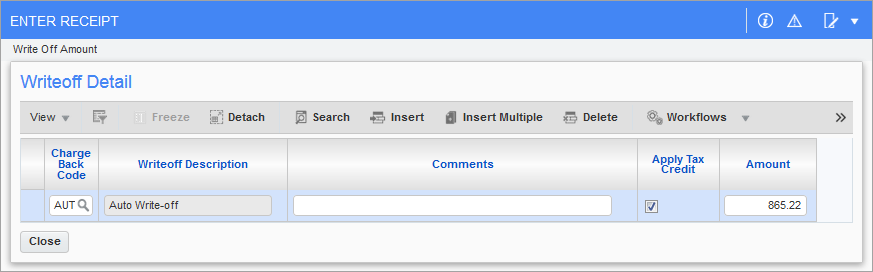
In this case, the amount outstanding is cleared even though the check amount is less than the amount outstanding. The GL distribution debits the write-off account associated with the write-off type to reconcile the difference.
To enter a write-off, click the block toolbar’s [Insert] button.
Charge Back Code
Enter/select the type of the write-off being applied against the invoice.
These codes can be set in the Invoice Writeoff Types screen (standard Treeview path: Accounts Receivable > Setup > Local Tables > Invoice Writeoff Types).
Comments
Enter any comments for the write-off using this field.
Apply Tax Credit – Checkbox
If checked, the system will apply tax credit for the tax portion of the write-off amount.
Amount
Enter the write-off amount to apply against the invoice. The total write-off amount can’t exceed the difference between the payment amount and the outstanding amount, and it cannot exceed the limits set on the Receipt tab of the AR Control File (shown below), unless the selected type creates a secondary invoice:
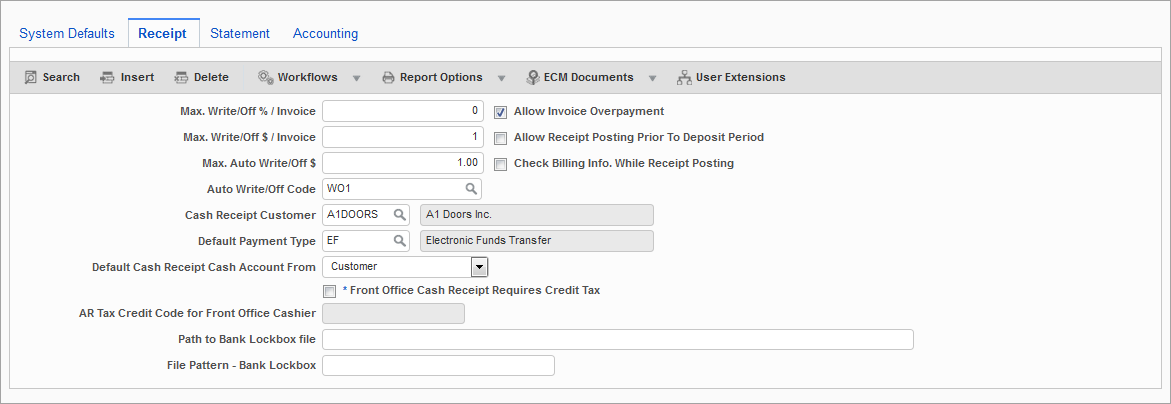
Pgm: ARCTRLFM – Maintain AR Control Settings; standard Treeview path: Accounts Receivable > Setup > Local Tables > Control File Options – Receipt tab
The module allows for multiple types of write-offs against a single invoice. If more than one is required, continue to insert records and enter write-off amounts until the total write-off amount is equal to the payment amount minus the outstanding amount.
Press the [Close] button to save the entries, validate the total write-off amount, and return to the Enter Receipt screen.
NOTE: Where the write-off type calls for the creation of a new invoice, the system will generate a new invoice from the write-off amount entered against that type. The Edit Listing will indicate that a new invoice will be created and the posting will create the invoice. The invoice number for this write-off invoice will be assigned from the invoice series code on the write-off type.