This
Considerations
-
Both regular AR invoices and Job Billing generated AR invoices can be written-off.
-
If the remainder was not written-off at the time of check entry, a debit/credit memo can be entered to decrease the invoice so that it will be removed from the AR Aged Report.
Deposit Entry
When a check is entered without being linked to an invoice, or if the check amount is greater than the invoice(s) it is paying, the receipt will be kept around in the Deposits pop-up window so that it can be later applied.
-
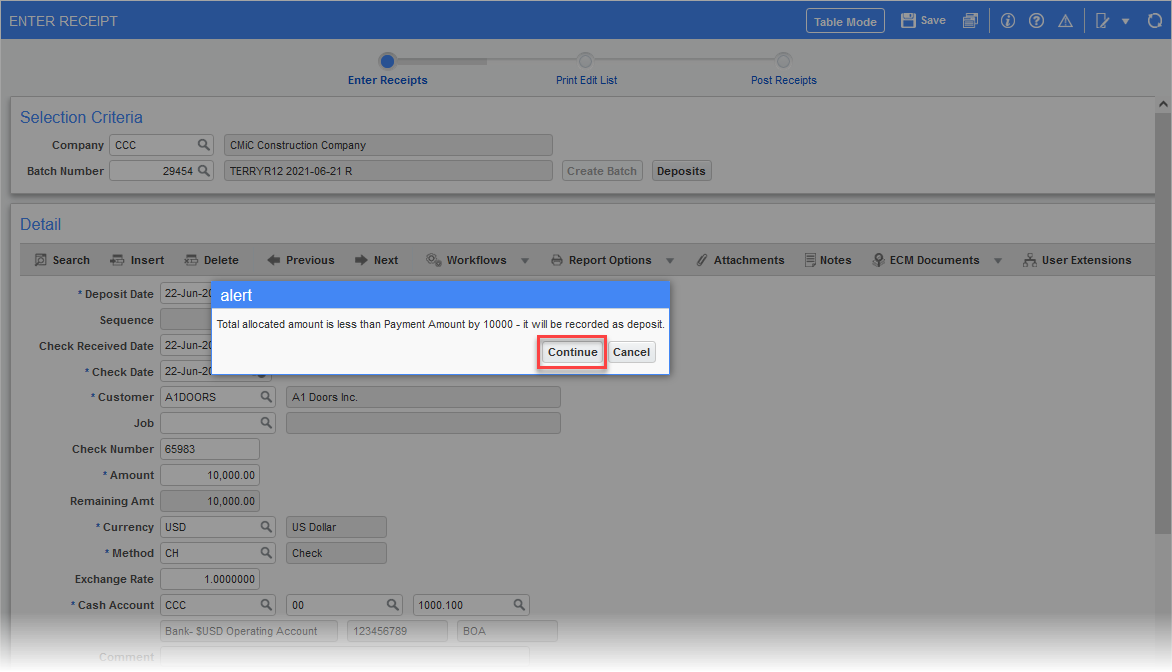
To create a deposit, fill out the Detail section of the Enter Receipt screen, click the [Save] button, and then click the [Continue] button:
-
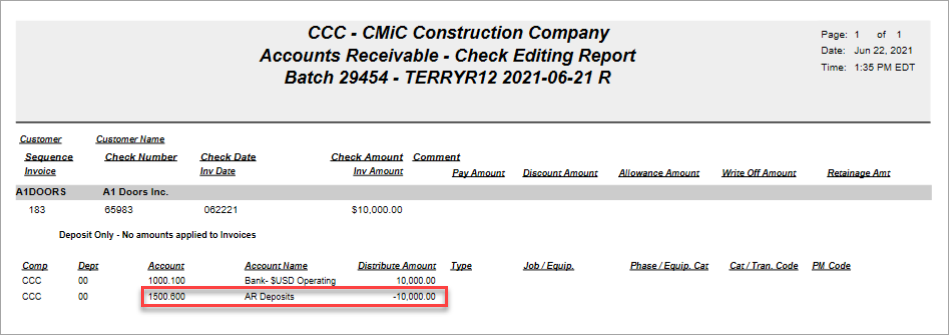
Because the 'Invoice Related' box is checked, this is assumed to be an AR check and will create a deposit that can later be linked to an AR invoice. Note the special account for the debit line, which is set in the control file:
-
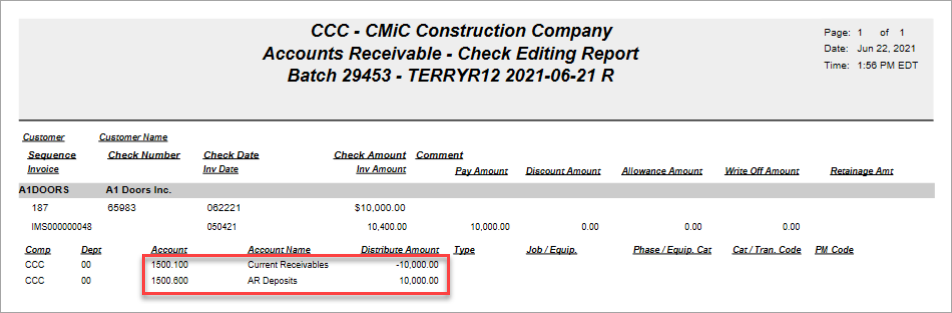
Later, when the deposit is linked to an invoice, the money comes out of the cash deposit account and reduces receivables:
Writing Off Under-Payments
Write-Off Rules
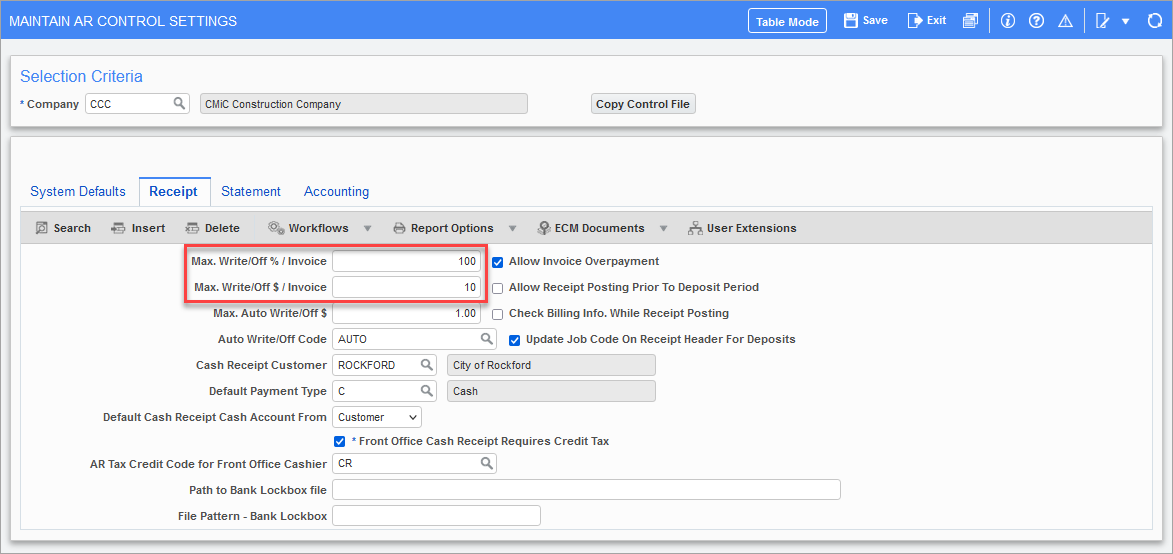
The amount that users can write-off can be restricted in AR Control to be a maximum amount or percentage. When both are specified, the maximum write-off will be the lesser of the two:
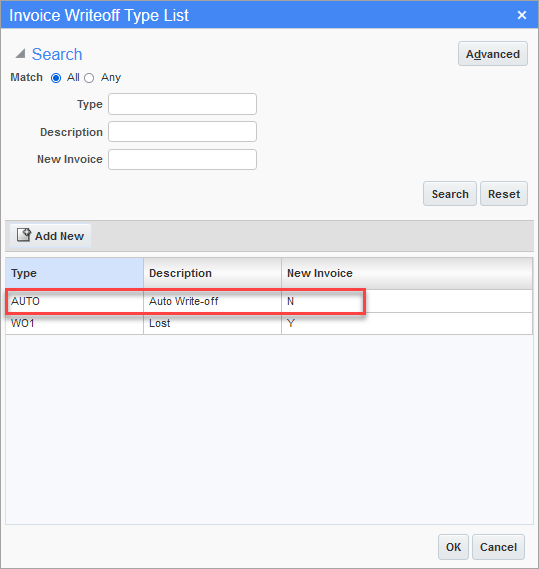
Write-Off Types
A default type can be set for the default write-off code that will be used when a user presses the [WO] button within the Enter Receipt screen.
-
Write-off types are specified through the Auto Write/Off Code LOV in the AR Control screen:

-
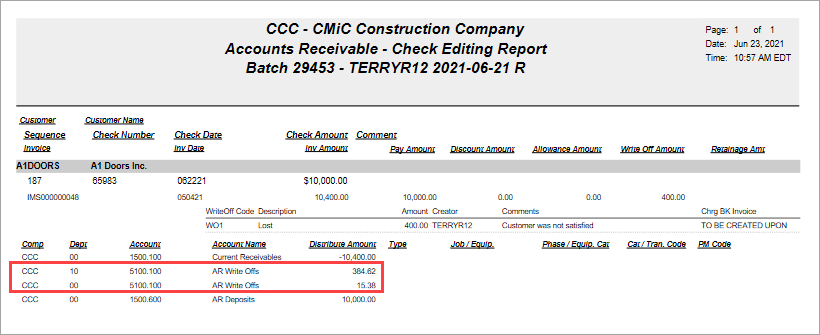
Often, there is one type that is used to write off bad debt:
-
In the above LOV, press the Add New button to go to the setup screen for write-off codes. Additional write-off codes can be added, or the default GL accounts used for each code can be reviewed or modified.
-
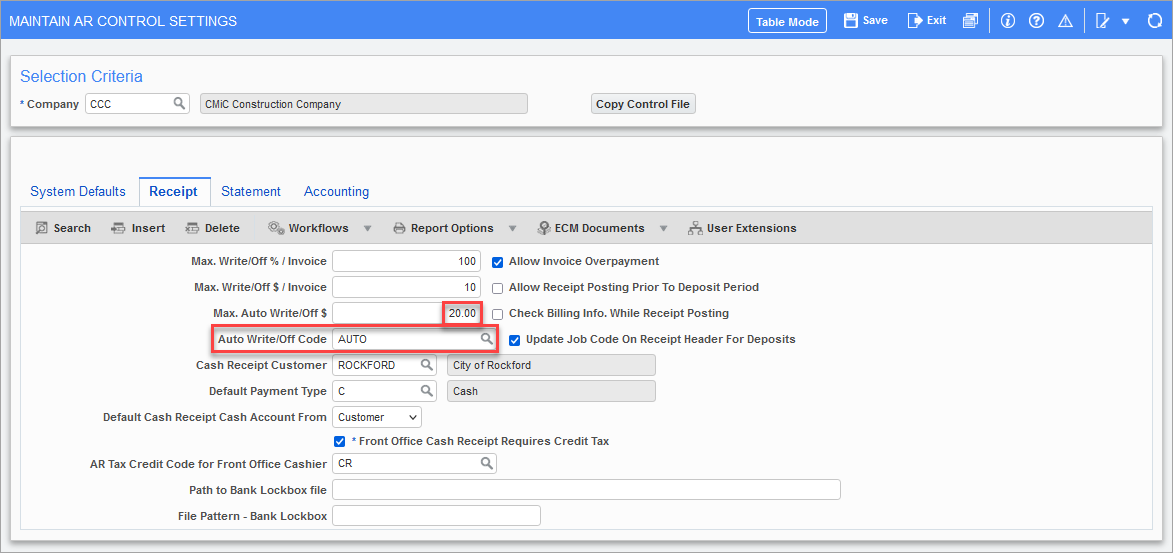
In order to set up an auto write-off code, choose a non-zero amount for the Max. Auto Write/Off $ field, and then select the write-off code to be used automatically when the amount to be written off is less than that amount:
The Write-Off Process
-
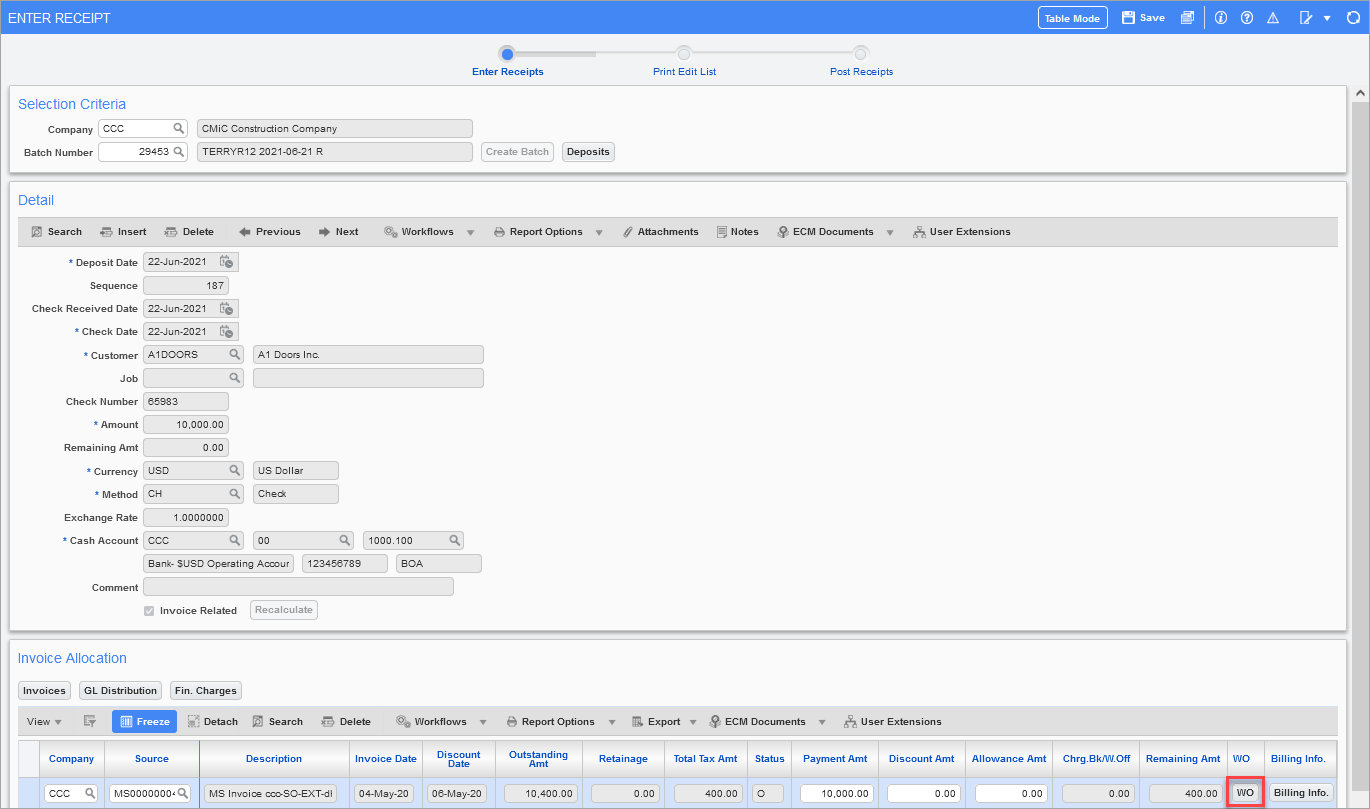
Check to see whether there is a remaining amount to be written-off. If so click on the [WO] button:
-
When an auto write-off code is specified and the amount to write off is less than the max auto write-off amount, the Writeoff Details pop-up window is automatically populated. Confirm the amount to write-off and close the pop-up window:
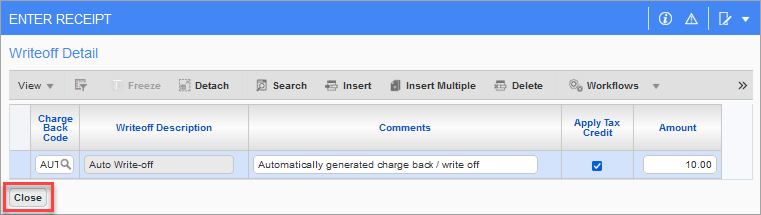
-
The remaining amount will be reduced by the write-off amount:

-
After going into the Writeoff Detail pop-up window, you can also select other write-off codes, which may be associated with different accounts. Insert a row, choose the desired write-off code and type in the amount. An optional comment can be added.
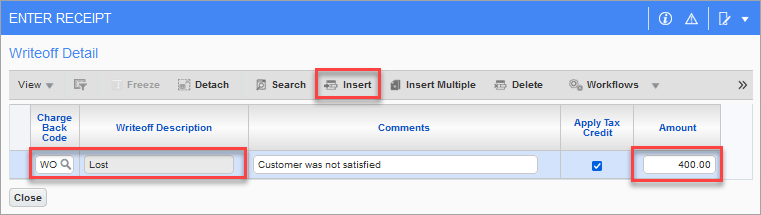
-
The remaining amount will be reduced by the write off amount entered in the Writeoff Detail pop-up window:

-
When printing the edit list, the account specified for write-offs/bad debt will be used: