Part 1: Enter & Post Back Dated Invoice with Interest
Step 1: Change Current Year & Period in AR
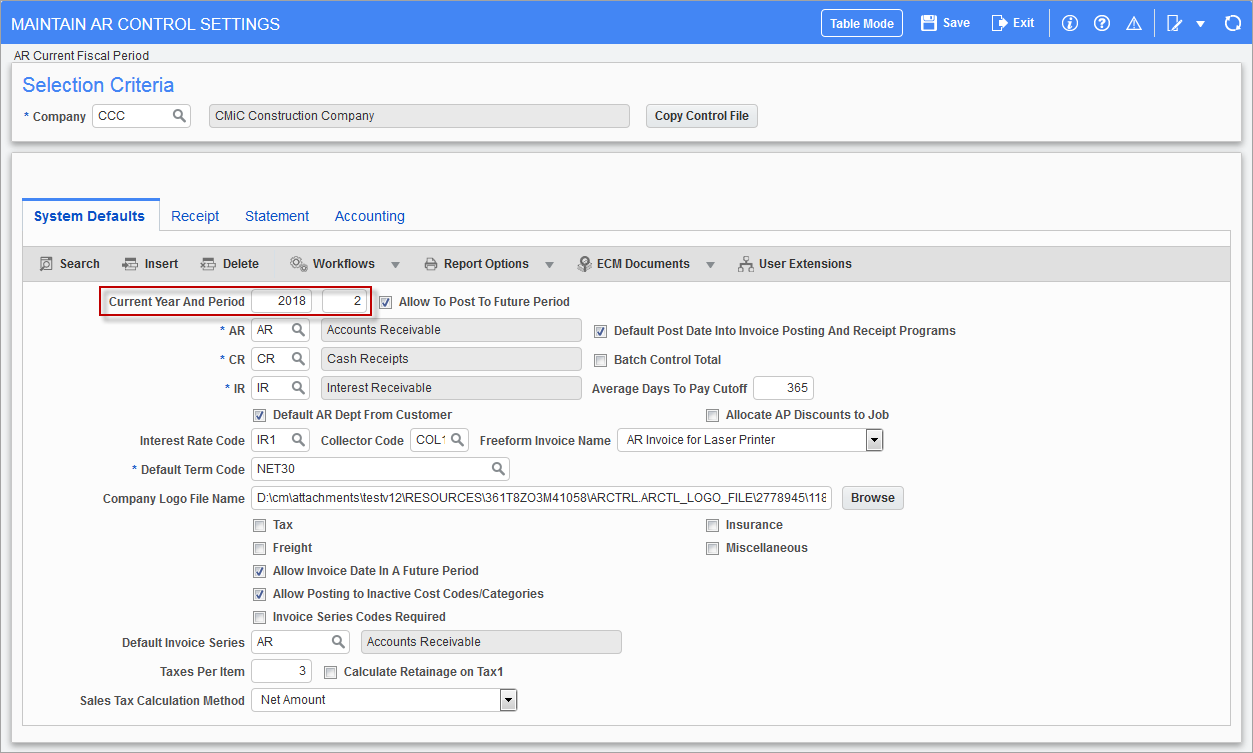
Change the Current Year And Period field in the AR Control File screen in order to enter a back dated invoice.
Step 2: Set Up Interest Code
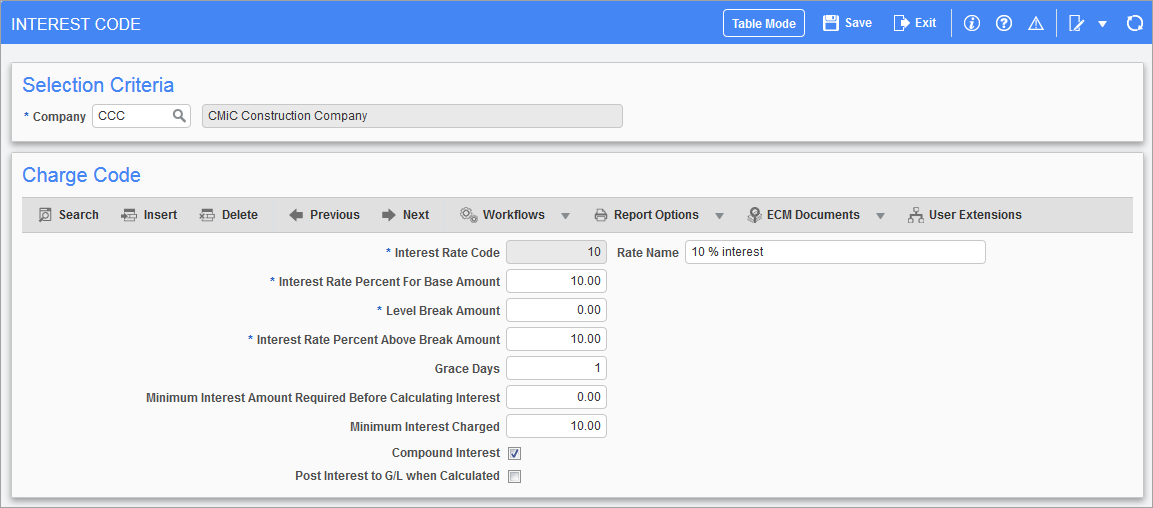
This sample interest code will calculate 10% interest. For details about the maintenance of interest codes, please refer to the Interest Code Maintenance subsection, under the System Configuration section (standard Treeview path: Accounts Receivable > Setup > Local Tables > Interest Codes).
Step 3: Set Statements Required Checkbox for Customer
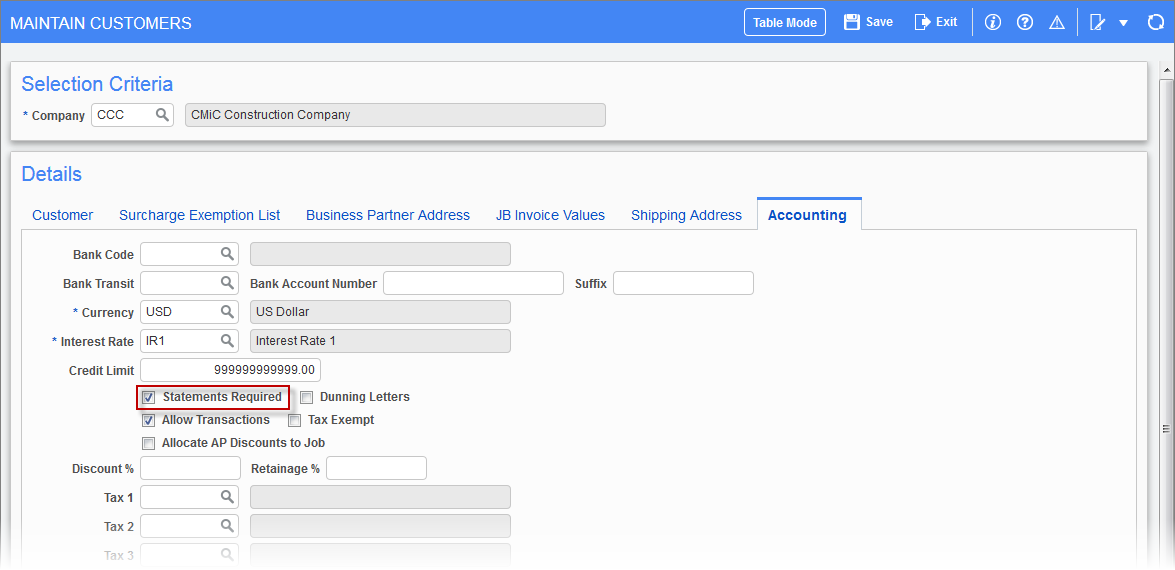
In the Maintain Customers screen, for the relevant customer, check the ‘Statements Required’ checkbox so that statements can be printed for the customer.
Step 4: Enter Back Dated Invoice with Interest
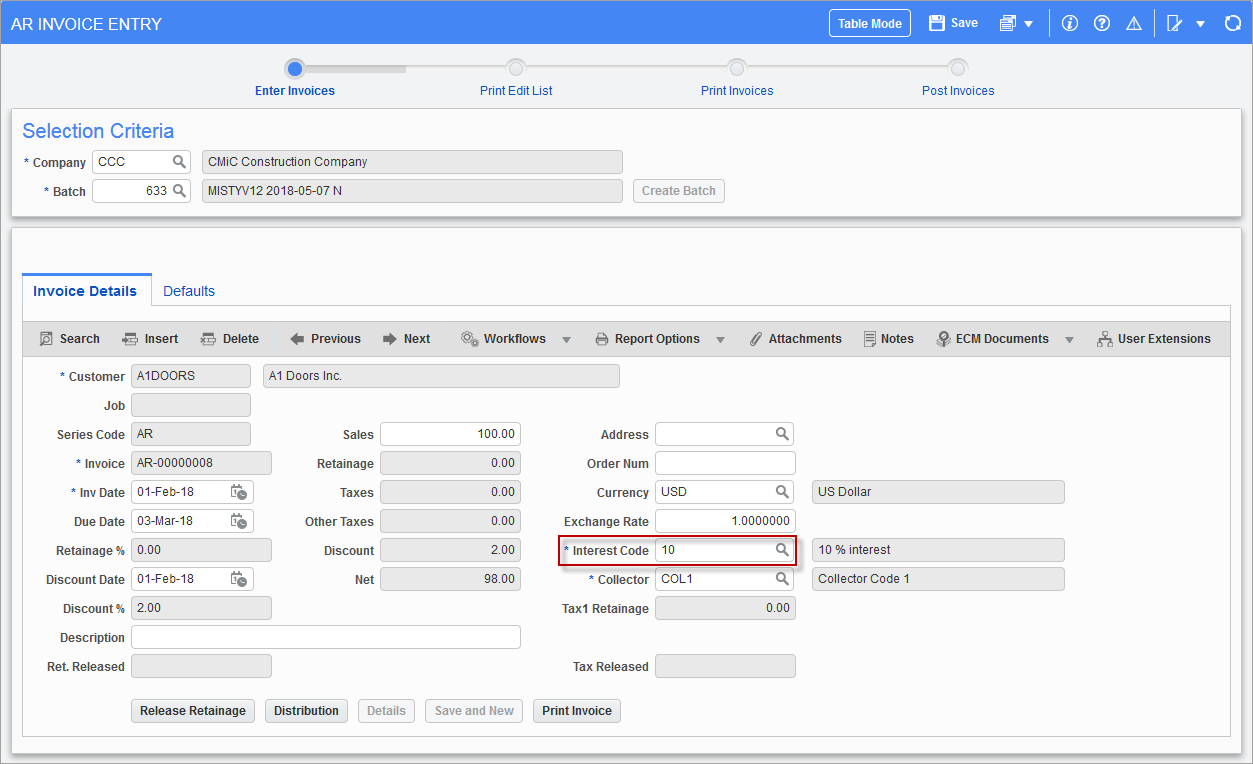
A back dated invoice can now be entered, with a date of Feb/01/2018 and an interest code that charges 10%.
Step 5: Post Invoice with Interest
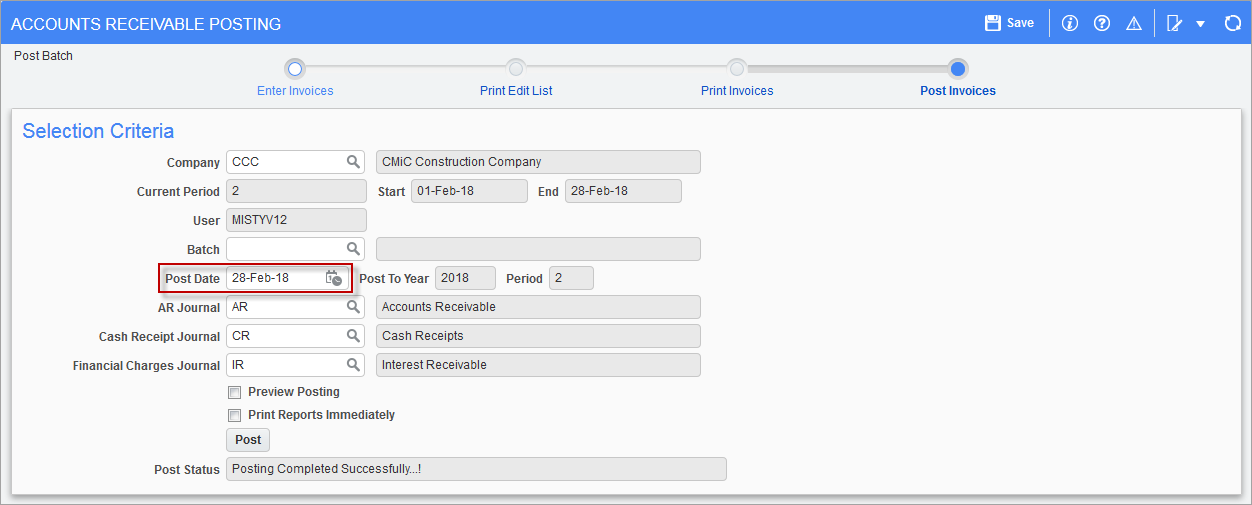
The invoice was posted as of 28-Feb-2018.
Part 2: Customer Statements – Post Interest & Print Statements
Step 1: Post Interest

On the Post Interest screen (standard Treeview path: Accounts Receivable > Statement >Post Interest), the Date on Statement field should default to the last day of the current period.
NOTE: The current period in the AR Control File is set to May 2018.
Step 2: Print Statements
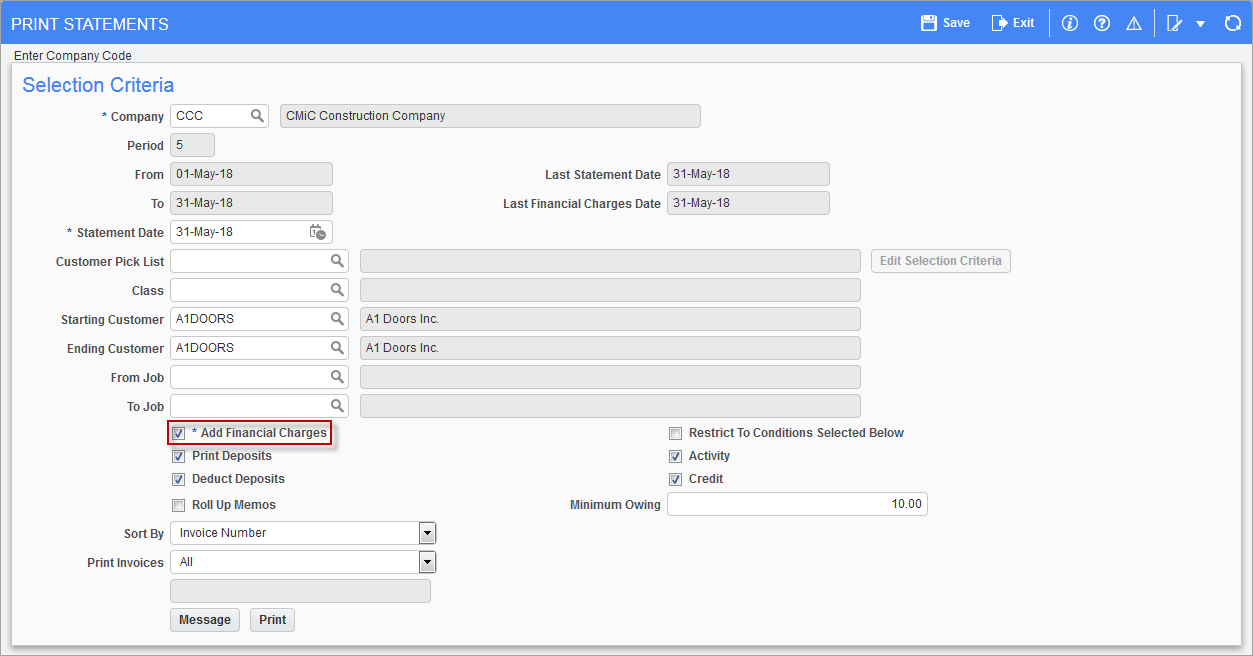
On the Print Statements screen (standard Treeview path: Accounts Receivable > Statement > Print Statement), ensure that the ‘Add Financial Charges’ checkbox is flagged, select values for the Starting Customer and Ending Customer fields, then click [Print].
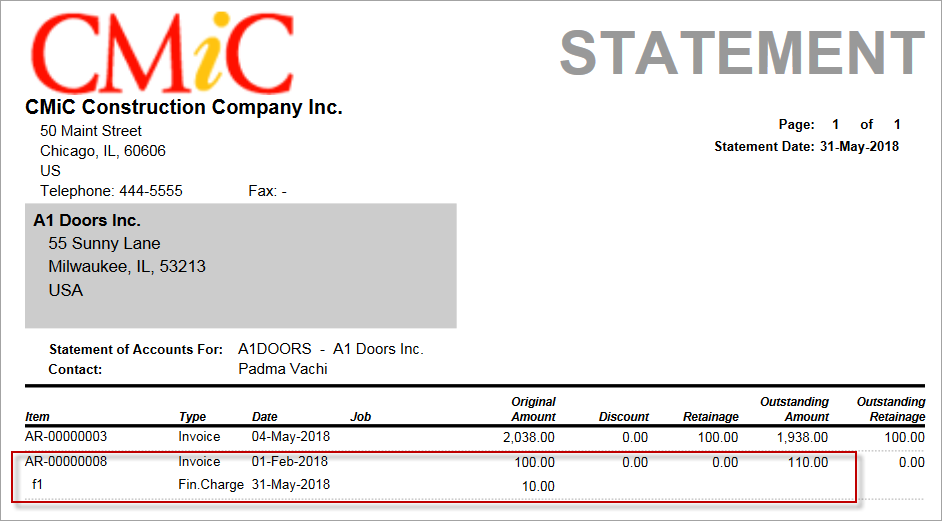
As shown below, the generated report shows that financial charges have been created.
Part 3: Enter & Post Receipt
Step 1: Enter Receipt
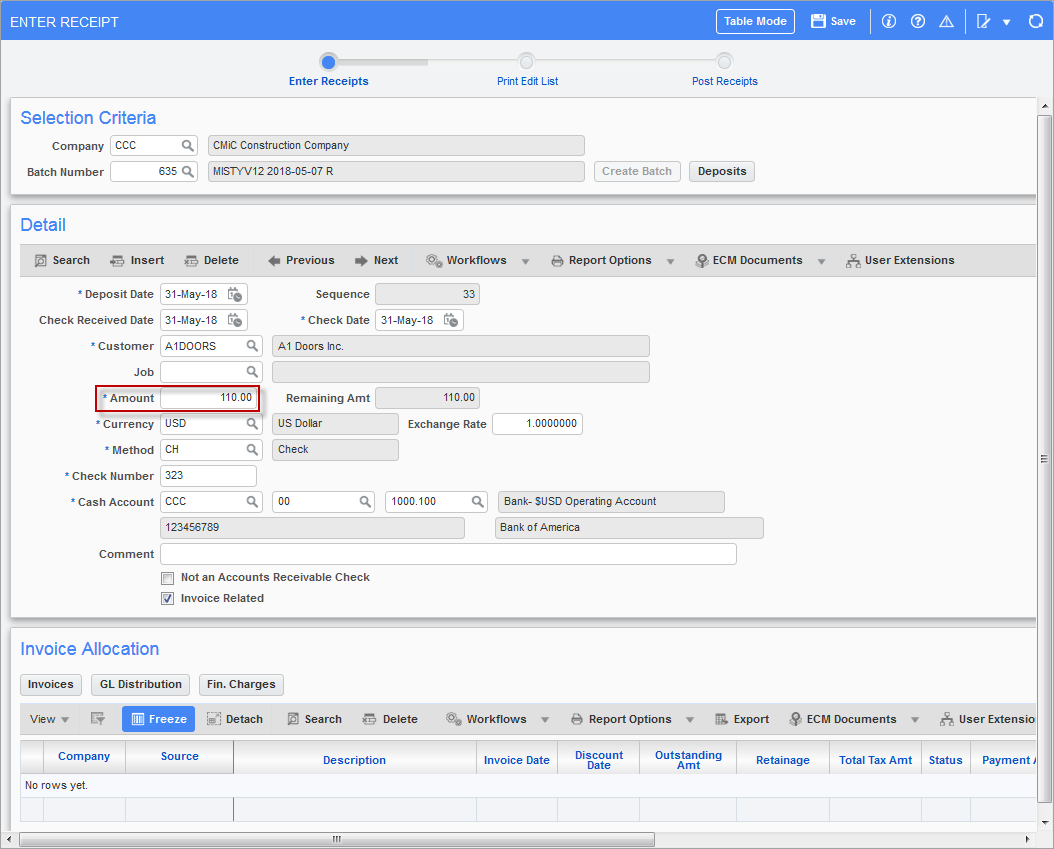
On the Enter Receipt screen, the value entered in the Amount field must be the original invoice amount plus the calculated interest charge. So, if the invoice amount is $100 and the interest is 10%, then the amount entered in this field is $110. In the Invoice Allocation section’s table, after the relevant invoices and financial charges have been selected, the original invoice amounts and financial charges will appear as separate entries.
Step 2: Select Relevant Invoices
To select relevant invoices, click the [Invoices] button on the Enter Receipt screen above. The following pop-up window appears:
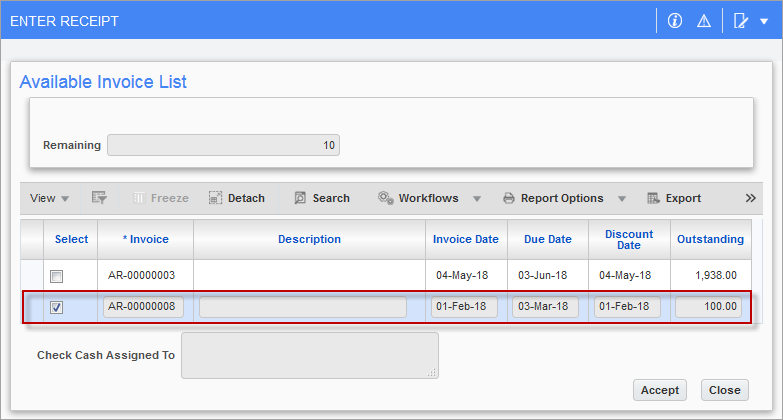
Select the desired invoice and click [Accept] button. The system will return to the initial Enter Receipt screen.
Step 3: Select Relevant Interest Charge
To select relevant financial charges, click the [Fin. Charges] button on the initial Enter Receipt screen. The following pop-up window appears:
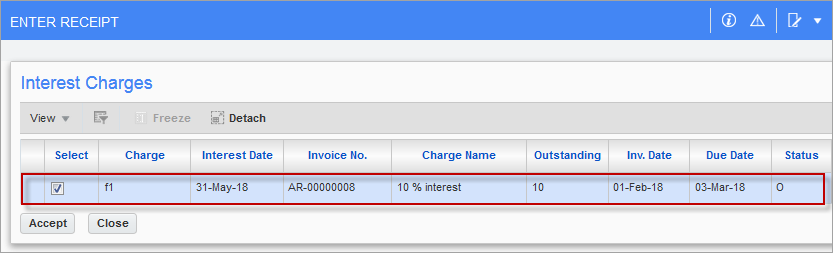
Select the desired financial charges and click [Accept] button. The system will return to the initial Enter Receipt screen.
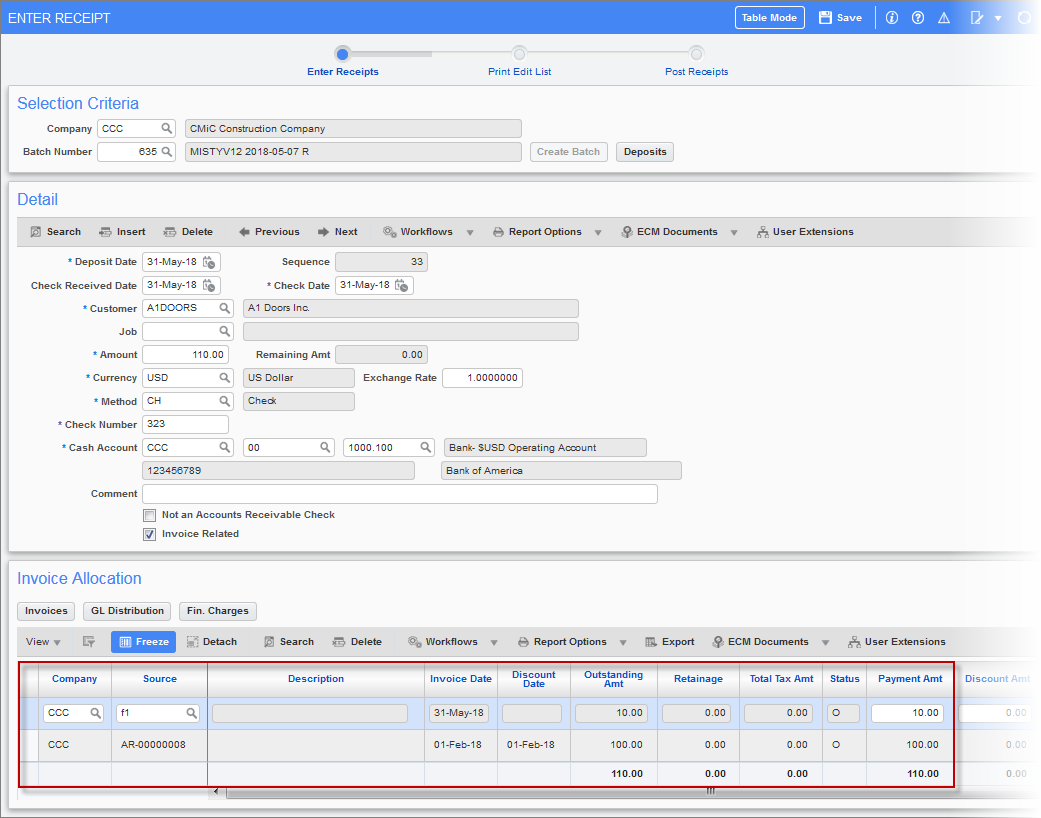
The Invoice Allocation section should now look like the sample below, with the original invoice amounts and financial charges appearing as separate entries:
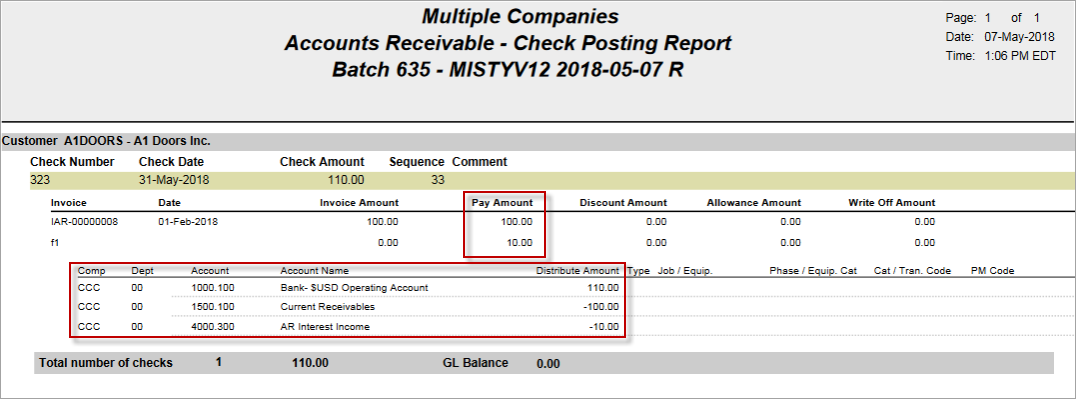
Step 4: Post Receipt
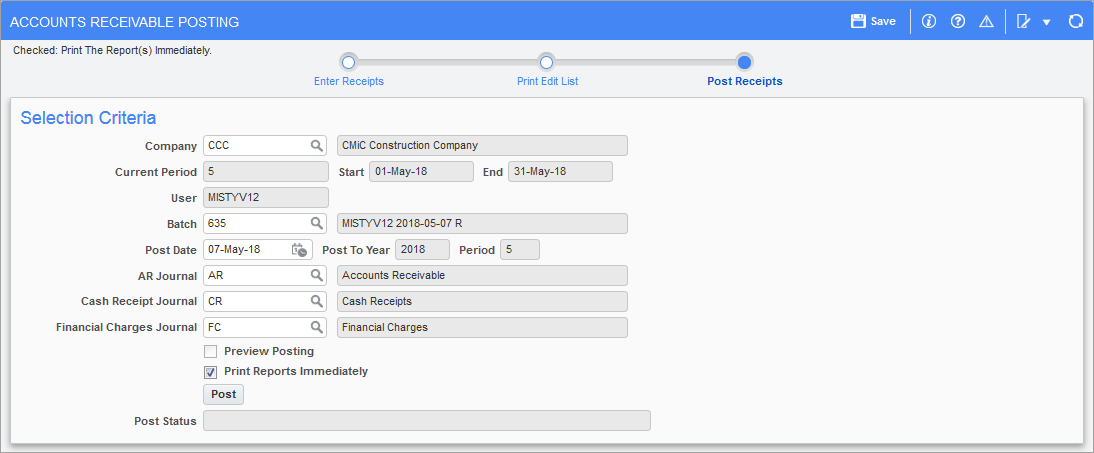
As shown in the following sample, the posting report will show the invoice amount and the interest charges as being distributed.