Pgm: APPRENOTE – AP - Prenote File; standard Treeview path: Accounts Payable > Utilities > Create Prenote File
Overview
This screen is used to create a prenote (or prenotification) file. A prenote file is a file sent to the bank for verification purposes before a vendor can be issued EFT payments. If a vendor is flagged as "prenote", then users won't be able to select payments for EFT for this vendor until the bank prenote process has been approved.
The Select Payments screen and the Manual Check Entry screens validate the vendor so if vendors have the 'Prenote Flag' box checked on their Vendor record, then vouchers for this vendor will not be included in the EFT payment selection; however, they will be available for Manual, EFT and Non-EFT, and Non-EFT payment selections.
Once the verification process has been approved by the bank, the 'Prenote Flag' can be unchecked on the vendor's record and EFT payments can be processed.
Create Prenote File
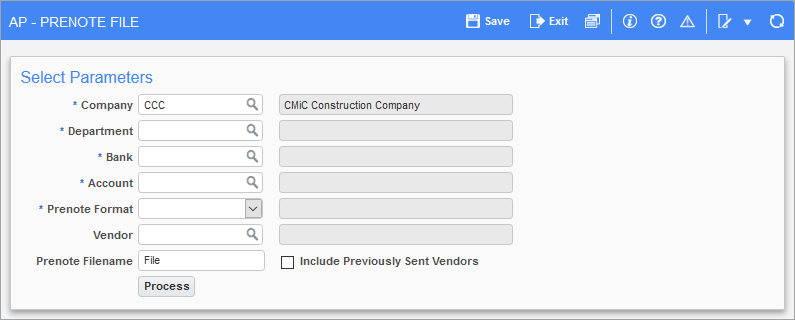
The AP - Prenote File screen, shown in the screenshot above, is used to create a prenote file. The fields on this screen are described below.
Company
Enter/select the company being used to create the prenote file.
Department
Enter/select the department of the selected company being used to create the prenote file.
Bank
Enter/select the bank to which the prenote file will be sent. The list of available banks will include all banks where the user's company has an account.
Account
Enter/select the bank account for the selected bank.
Prenote Format
Enter/select a prenote format from the list of available formats for the selected bank.
NOTE: These formats are maintained in the EFT File Formats screen (standard Treeview path: Accounts Payable > Setup > Global Tables > EFT Formats). The prenote file will be generated using the original file line from the EFT File Format screen. If more than one file is defined, only the original file will be available for selection from the Prenote Format field's drop-down list.
Vendor
Enter/select a vendor. The list of available vendors includes all of the vendors of the selected company that have the 'Prenote Flag' checked on their Vendor record.
Prenote Filename
Enter a name for the destination file.
Include Previously Sent Vendors - Checkbox
If the prenote file for the vendor has already been sent and the 'Include Previously Sent Vendors' checkbox is not checked, an error message will be issued: "Record not found for specified options." To re-send the previously sent file, check the 'Include Previously Sent Vendors' checkbox.
[Process] - Button
Once all of the fields have been completed, click the [Process] button. A prenote file will be created according to the specifications (format) provided, as shown in the screenshot below.
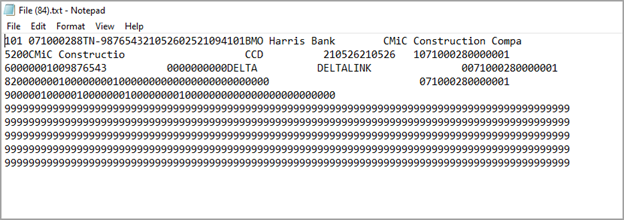
Example of Prenote File
Prenote Process
The following section provides a detailed example to demonstrate how this functionality is used.
Step 1: Select Bank's Prenote File Format
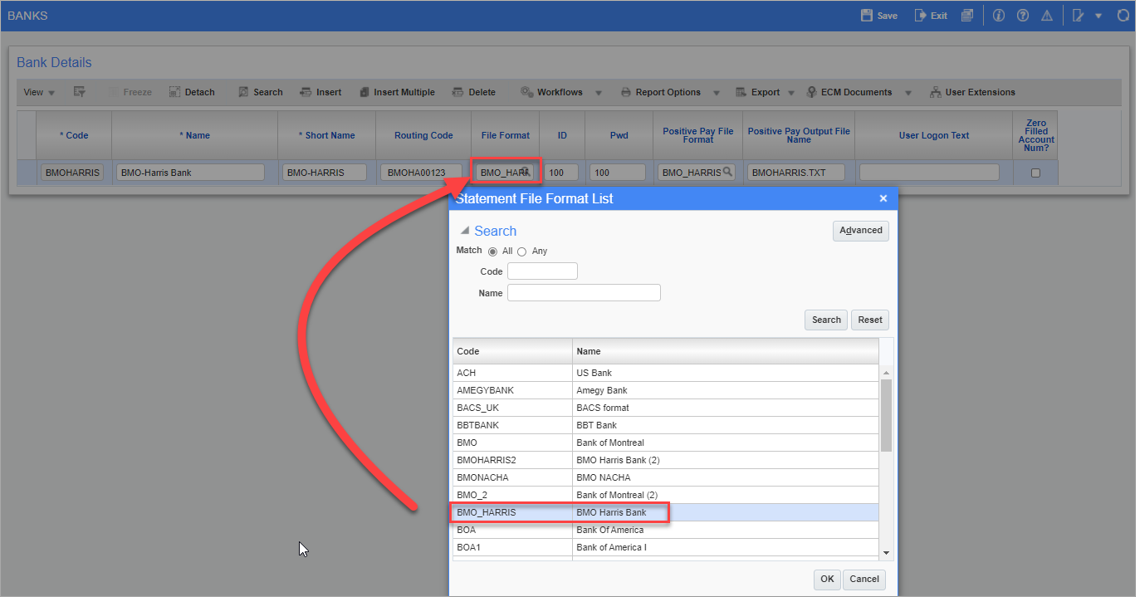
Pgm: ABABANK – Banks; standard Treeview path: System > Global Tables > Banking > Banks
Select the bank's prenote file format in the File Format field on the Banks screen. This examples uses BMO-Harris bank and the file format for BMO-Harris bank is "BMO_HARRIS".
Step 2: Verify Bank Accounts
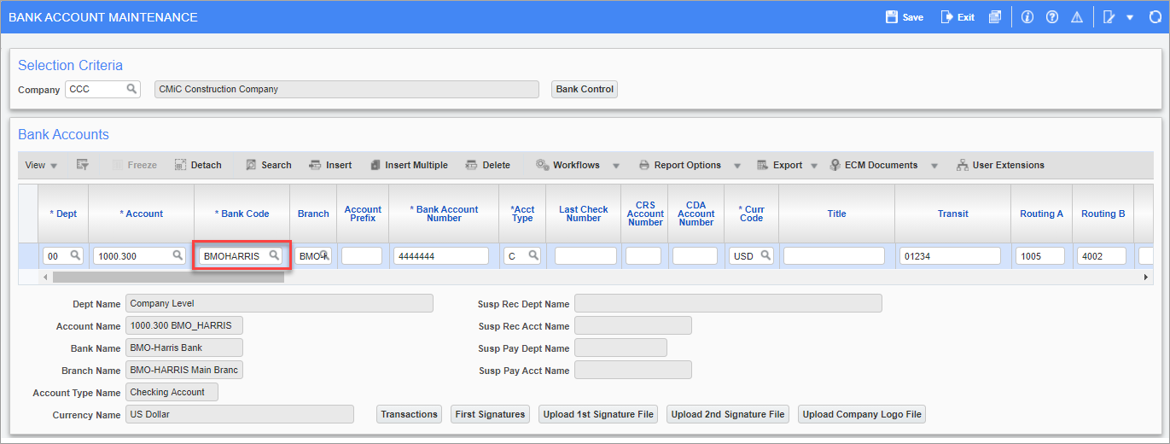
Pgm: BABANKAC – Bank Account Maintenance; standard Treeview path: System > Global Tables > Banking > Bank Account
Verify the bank accounts set up for the bank specified in Step 1. The screenshot above shows the bank account set up for BMO-Harris bank.
Step 3: Flag Vendors for Prenote
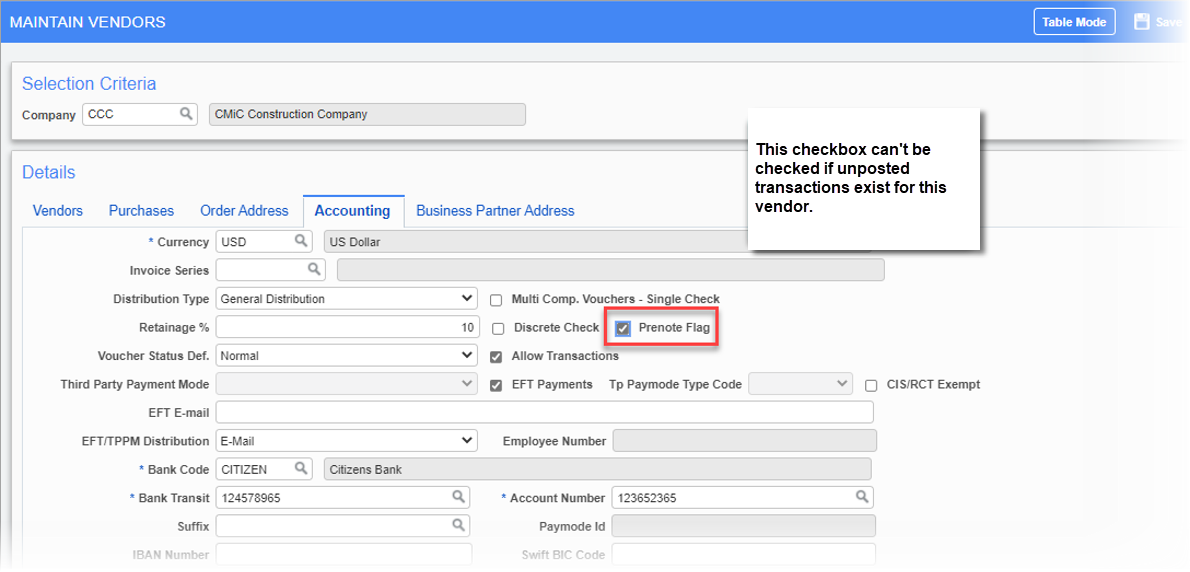
Pgm: BPVENFM – Maintain Vendors; standard Treeview path: Accounts Payable > Setup > Maintain Vendors - Accounting Tab
To flag a vendor for prenote, ensure the 'Prenote Flag' checkbox is checked for the vendor on the Accounting tab of the Maintain Vendors screen. This checkbox is unchecked by default.

Pgm: BPVENFM – Maintain Vendors; standard Treeview path: Accounts Payable > Setup > Maintain Vendors - Accounting Tab
If unposted transactions exist for this vendor, this checkbox can't be checked and an error message will be displayed, as shown in the screenshot above.
Step 4: Complete Payment Process

If a vendor is marked as prenote, then vouchers for this vendor will not be included in the EFT payment selection. The vendor "DELTA" in the screenshot above has been flagged as prenote so vouchers for this vendor will not be included in the EFT payment selection. The screenshots below demonstate the various processing cases.
a) Create EFT voucher for the vendor DELTA.
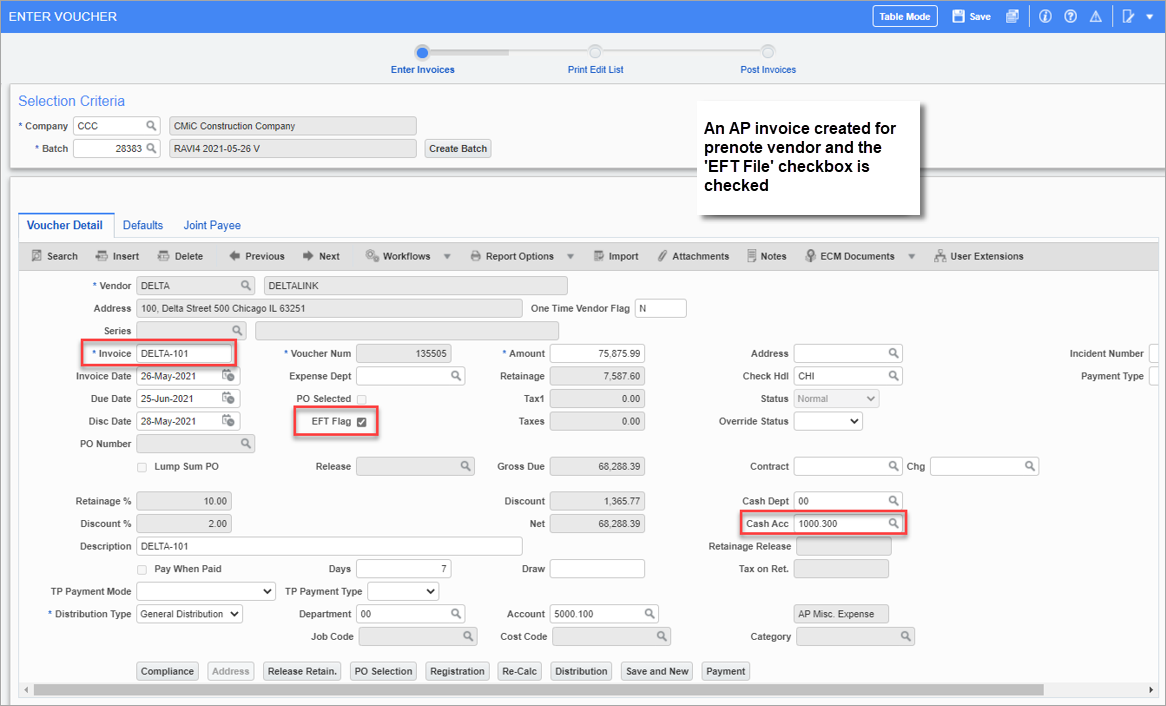
Pgm: VOUCHENT – Enter Voucher; standard Treeview path: Accounts Payable > Voucher > Enter Voucher – Voucher Detail tab
b) Select payment for EFT vouchers only. The invoice "DELTA-101" is not included in the selection.
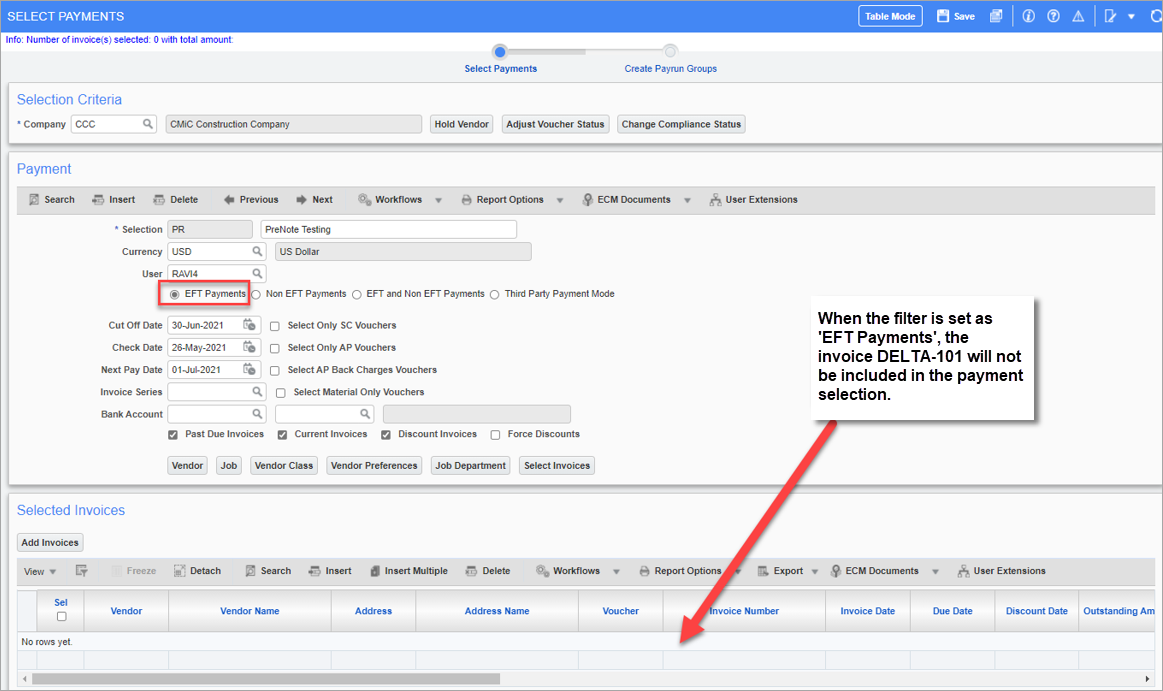
Pgm: PAYSEL – Select Payments; standard Treeview path: Accounts Payable > Payment > Select Payments
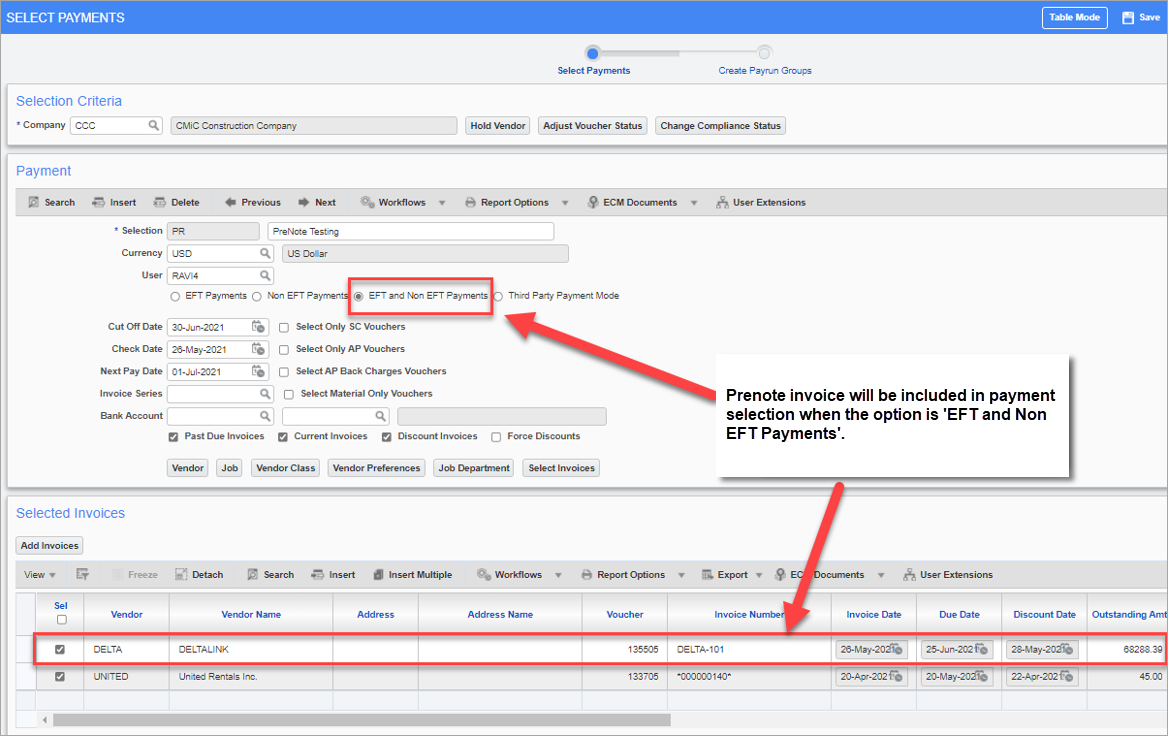
c. Select payment for EFT and Non-EFT (the system treats this selection as non-EFT payment).
In this case, the created voucher for prenote vendor DELTA will be included in the selection code.
NOTE: The prenote voucher will be included in Non-EFT payments selection code as well.
Prepare and print the checks (the system will issue regular checks for this selection code).
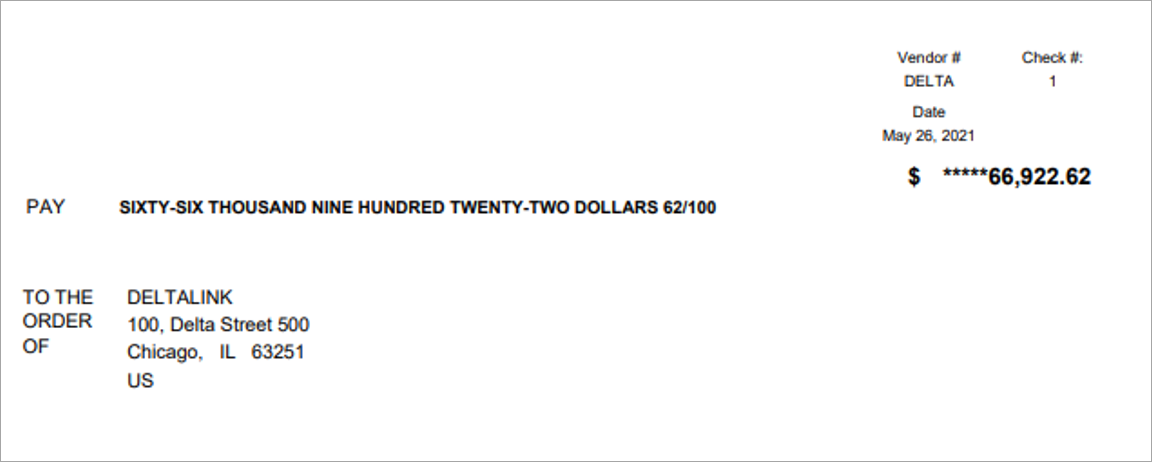
The system issues the regular checks for all vouchers in the selection code (EFT and non-EFT) including the voucher for the vendor with the 'Prenote File Flag' checkbox checked.
Similarly, creating a manual check against the prenote invoice is also permitted.