Overview
This process describes how to create and use a one-time vendor. If an invoice is from a vendor that will not be used again, the one-time vendor feature can be used instead of having to create the business partner and vendor records for a one-time invoice.
Setup
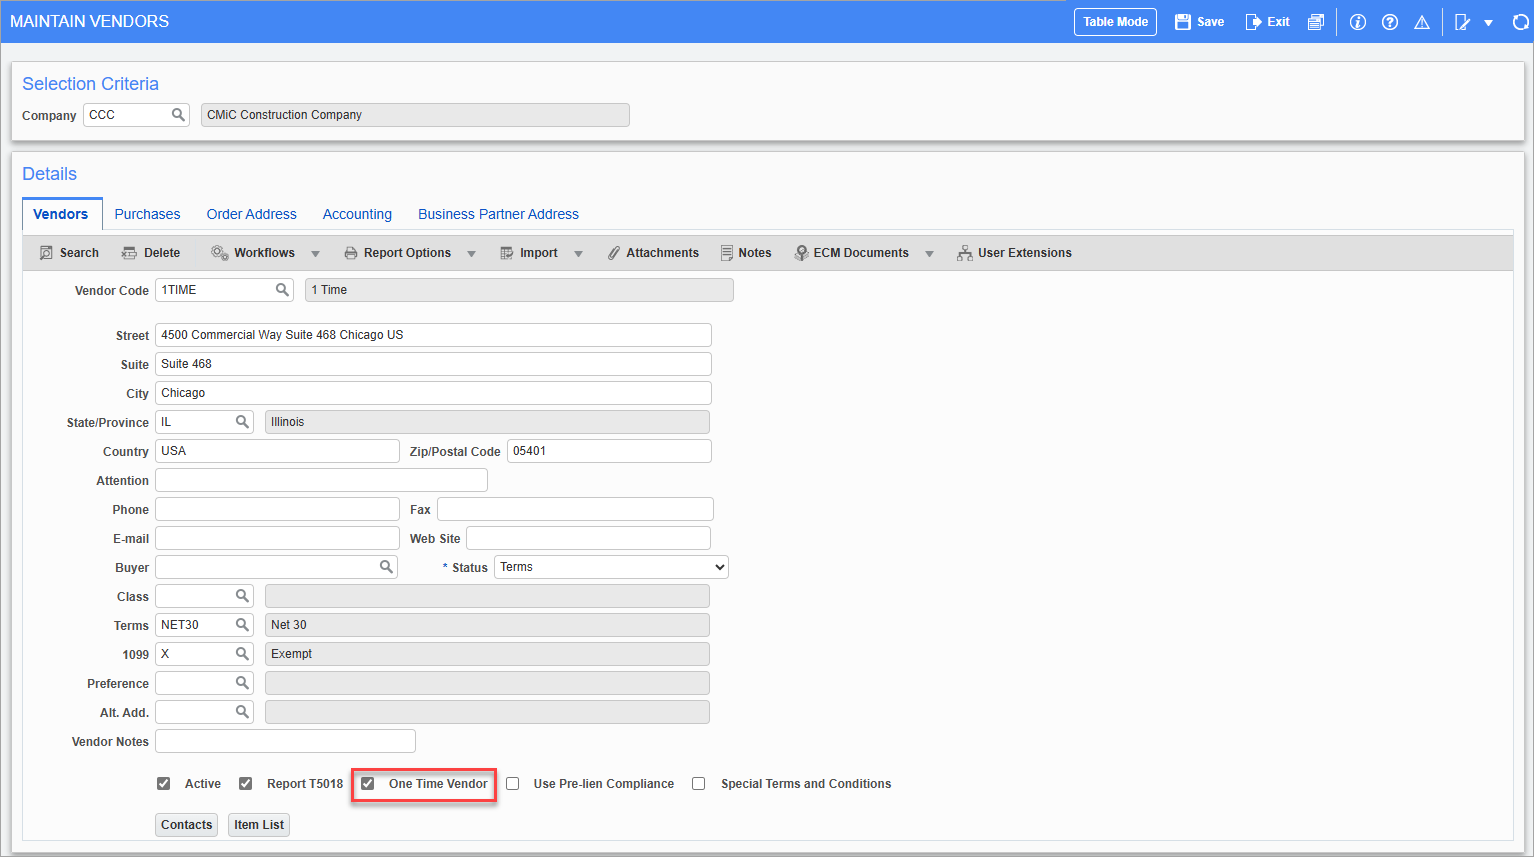
Pgm: BPVENFM – Maintain Vendors; standard Treeview path: Accounts Payable > Setup > Maintain Vendors - Vendors tab
To create up a one-time vendor, enter details in the Maintain Vendors screen and check the 'One Time Vendor' box on the Vendors tab, as shown in the screenshot above.
Process
When entering a one-time vendor invoice, the steps are identical to entering a normal invoice, except:
-
The vendor code selected must be for a vendor set-up as a one-time vendor.
-
The vendor name and address information must be entered via the Address pop-up that will automatically open. The name and address entered here will print on the check produced for this voucher.
NOTE: One-time vendors can't be used in the Imaging module for entering one-time vendor invoices.
Step 1: Enter Voucher for One-Time Vendor
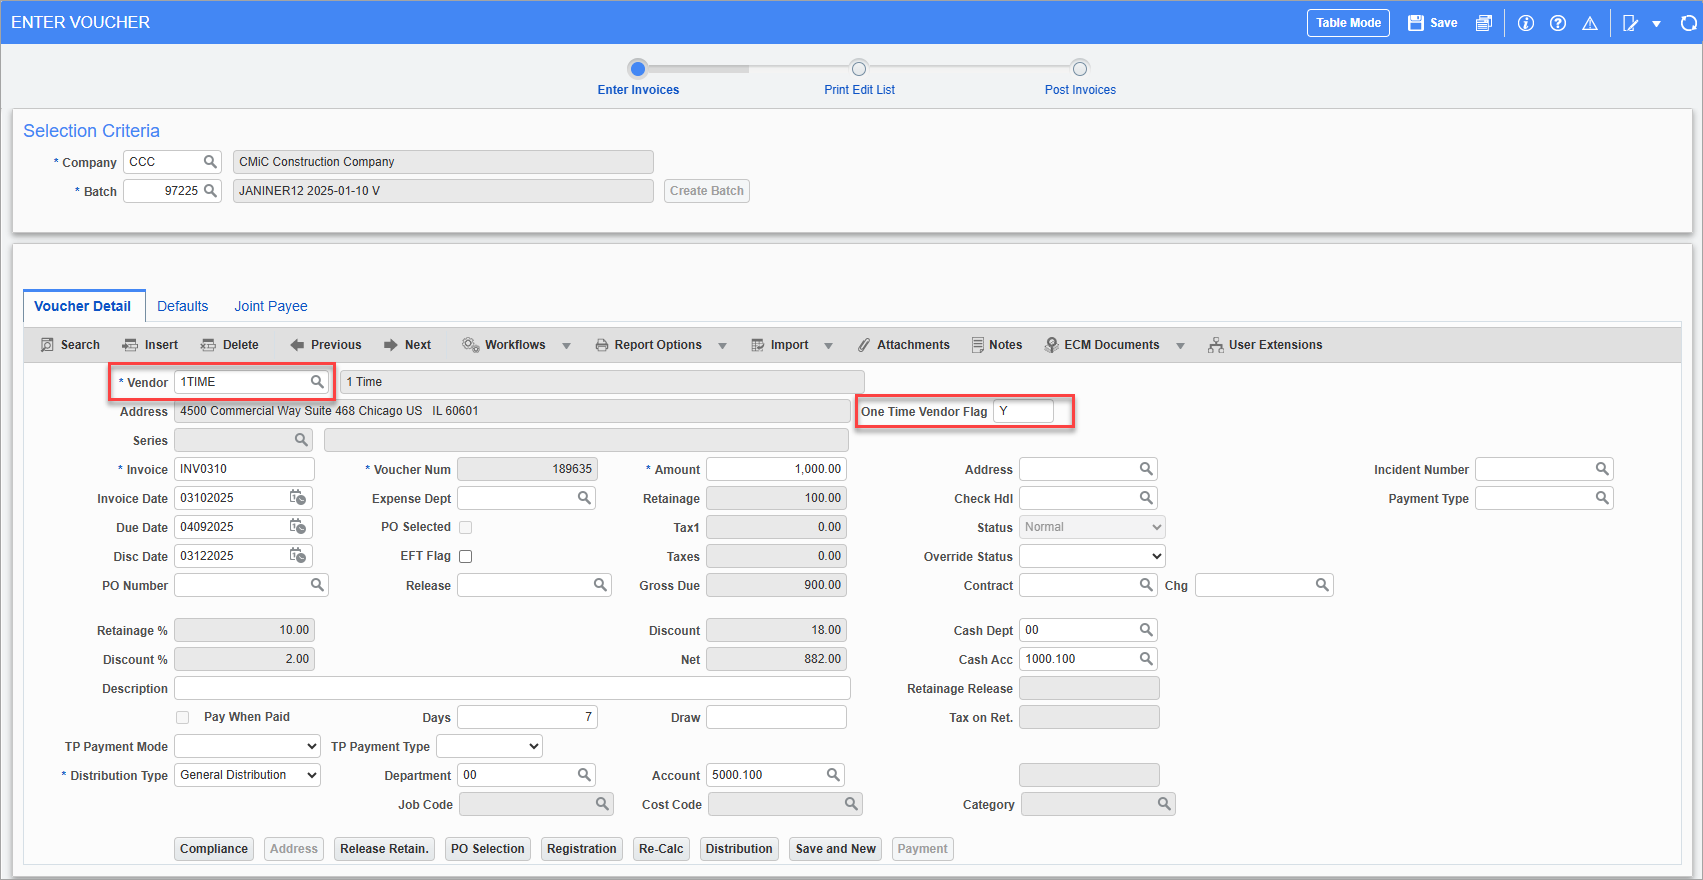
Pgm: VOUCHENT – Enter Voucher; standard Treeview path: Accounts Payable > Voucher > Enter Voucher – Voucher Detail tab
In the Enter Voucher screen, enter/select a one-time vendor for the invoice and ensure the One Time Vendor Flag displays "Y". For more information, please refer to Accounts Payable - Enter Vouchers - Voucher Detail - Tab.
Step 2: Enter Address Information
Once the invoice details are entered, press the Save button. The vendor name and address information must be entered via the Address pop-up that will automatically open, as shown in the screenshot below.
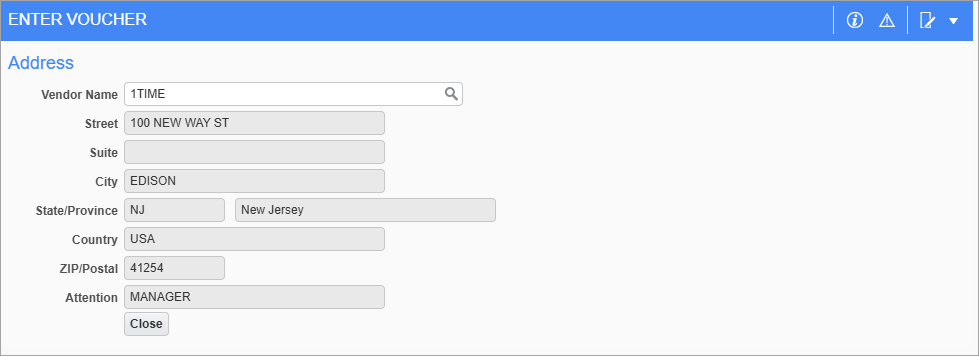
Address pop-up for one-time vendor
Users can select an existing address from the LOV or add a new address. The name and address entered here will print on the check produced for this voucher.
Once the vendor Address pop-up is exited, an address code is created and applied to the voucher. This will make this vendor readily available for selection again, should the need arise.
Step 3: Post Invoice
Once the address has been entered, users can continue to process and post the invoice as usual.