Import Utilities - R12
Standard Import Functions
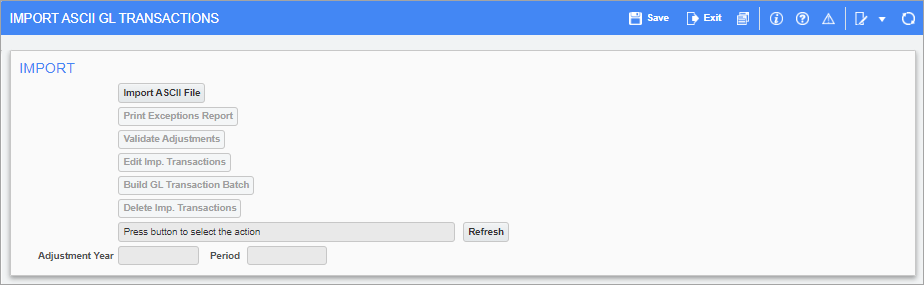
Sample of Standard Import Screen
CMiC provides import utilities as a way of bringing crucial data into CMiC software from 3rd party systems. Each of the utilities reads an ASCII file provided in a pre-defined format. It is imperative that the ASCII file be created in the format specified in this document.
In general, the import utilities are designed as single user functions, and therefore should have very limited security access.
All the import programs in the various modules are almost identical in format and usage. Each utility has a series of functions available from buttons on the main screen. The buttons are in the order in which the importing function should be completed. All the buttons perform the same function in each utility – they just validate and import into different CMiC tables.
The screenshots in this section show an example of importing an ASCII file for GL transactions.
Import ASCII File
Activates the import routines.
Print Exceptions Report
Runs the validation process against imported data and prints an exception report.
Edit Imported Transactions
Opens a screen where the user can update, delete or sometimes add records.
Build Transactions
This button's name will change according to the import, but the function is to bring the imported data into the required CMiC transaction tables and remove the records from the import tables.
Delete Transactions
Deletes imported transactions.
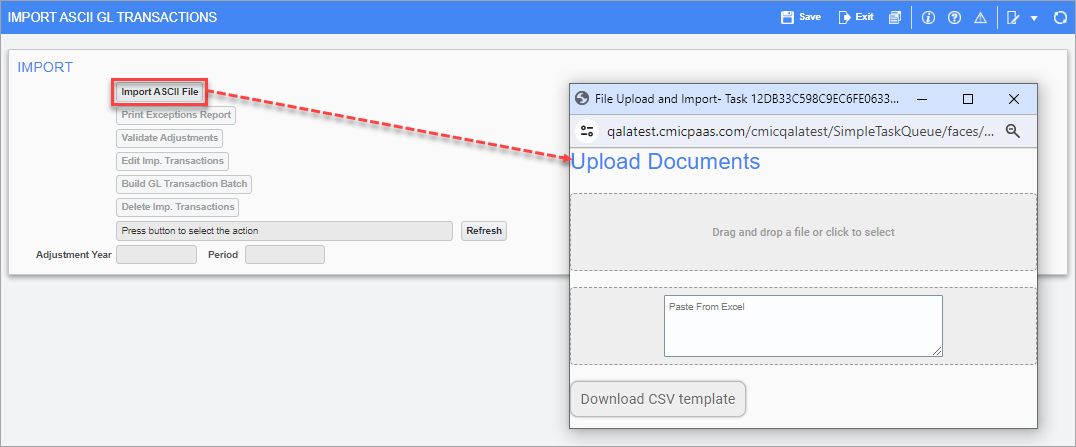
Sample of standard UI Runtime Import pop-up screen
After selecting the [Import ASCII File] button from any of the utilities, the following (or similar) pop-up window will appear.
In the File Upload and Import pop-up window, there are two options available for importing data. Either use the “Drag and drop a file or click to select” option, or copy data from an Excel spreadsheet and paste it in the "Paste From Excel" option. For convenience, the [Download CSV Template] button is available to download a copy of the import CSV template.
If the import routine was not able to complete successfully, an error message will be displayed, then the system will continue to try to import any other records within the ASCII file. Once the entire ASCII file has been read, a message indicating the count of how many records were read and how many were imported successfully will be displayed. If there were any errors, a message will be displayed with the option of printing an error log.
This step runs the validation routine against all the imported records. Once complete, if there were any validation errors, the report will list the invalid record and the error. If the validation passes, the system will automatically return to the main screen with the ‘Build GL Transaction Batch’ option available.
This option allows for the mass deletion of all the imported records. This is a useful option if the data imported is completely incorrect, or the wrong ASCII file was imported. This option does not need to be run as part of the normal processing procedure. The system will display a message indicating how many rows will be deleted and prompt for confirmation before actually deleting the records.
There are certain rules that must be adhered to when creating any ASCII file for importing into CMiC using these utilities:
-
The order of the ASCII file data record must match the object’s file.
-
All columns in the object’s file must be accounted for in the ASCII file, even if there is no valid data for the column.
-
Numeric data must not be formatted with $ or commas.
-
Dates must be in the same format as defined in the object’s CTL file.