Complete the following steps to prepare checks for a selection code:
Additional options for holding or canceling a batch are described in Hold Batch and Cancel Batch.
Step 1: Create Payment Selection Code and Select Payments
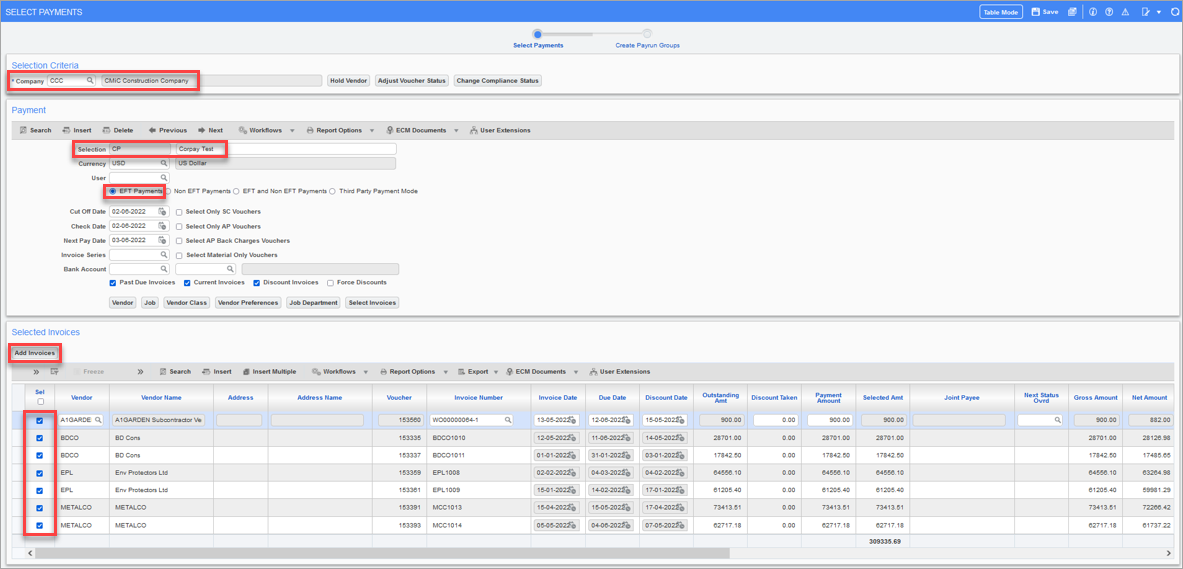
Pgm: PAYSEL – Select Payments; standard Treeview path: Accounts Payable > Payment > Select Payments
Use the Select Payments screen to create a one-time payment selection code. Select the ‘EFT Payments’ radio button and specify any other criteria by which to select invoices associated with the payment selection code. Click the Add Invoices button on the Select Payments screen to display the list of matching invoices and select which invoices to associate to the payment selection code. When finished, click on Save.
Step 2: Generate Corpay Request File
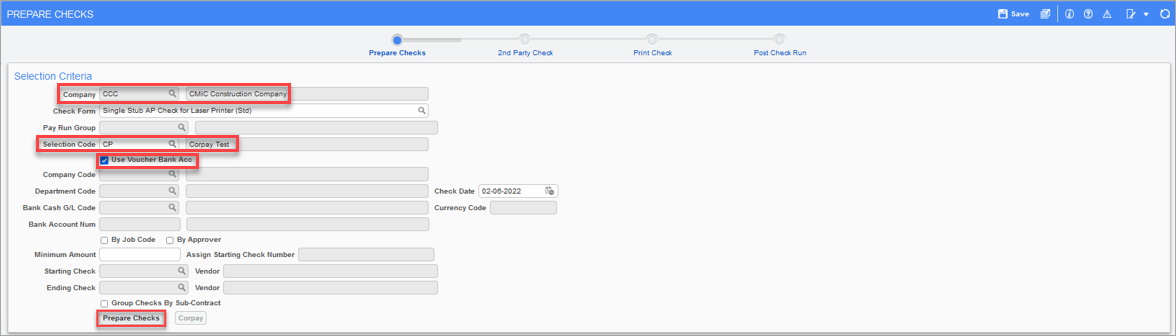
Pgm: APCHQPRE – Prepare Checks; standard Treeview path: Accounts Payable > Check > Print Checks
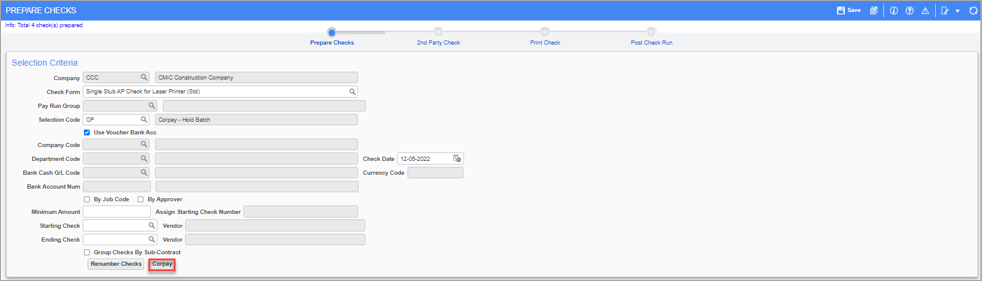
On the Prepare Checks screen, enter/select the company and selection code, and check the Use Voucher Bank Acc checkbox. Click on the Prepare Checks button.
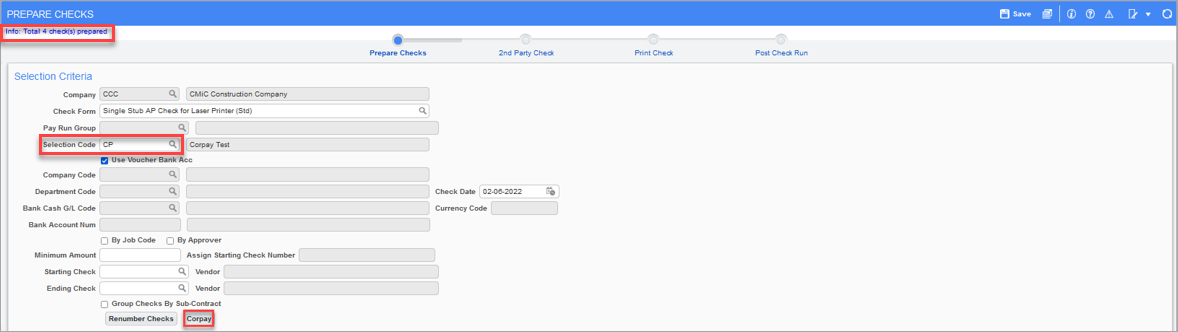
The Prepare Checks button changes to Renumber Checks. A message appears at the top of the screen to indicate the total number of checks prepared and the Corpay button becomes enabled.
Click on the Corpay button to launch a pop-up window to initiate the payment/request file generation process.

Pgm: APCHQPRE – Prepare Checks; standard Treeview path: Accounts Payable > Check > Print Checks - [Corpay] button pop-up
All records must be valid in the Status column for the Generate Request File button to be enabled.
If mandatory fields are not entered properly in the Maintain Vendors screen, as discussed in the previous step, the Generate Request File button will not be enabled.
Once all records are valid in the pop-up window, click on the Generate Request File button to launch a pop-up window to select the EFT format. In Prepare Checks pop-up window, select the file code and the EFT format as follows:
-
File Code: CORPAY
-
EFT Format: CORPAY

Pgm: APCHQPRE – Prepare Checks; standard Treeview path: Accounts Payable > Check > Print Checks - [Corpay] button pop-up - [Generate Request File] button pop-up
The [Transfer Payment Info to Corpay] button is enabled in the pop-up window once the mandatory fields are populated.
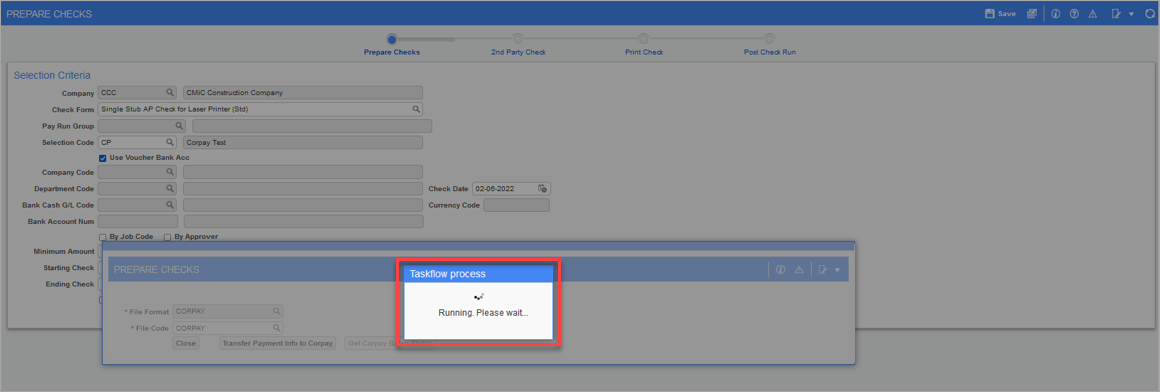
Clicking on the [Transfer Payment Info to Corpay] button triggers the taskflow process.

A message will be issued to indicate when the parsing has completed.

Pgm: APCHQPRE – Prepare Checks; standard Treeview path: Accounts Payable > Check > Print Checks - [Corpay] button pop-up
Use the [Corpay] button to verify the Corpay Status column in the Prepare Checks pop-up window.
Step 3: Approve Corpay Payment Batch
Open AP Gateway to approve the payments.
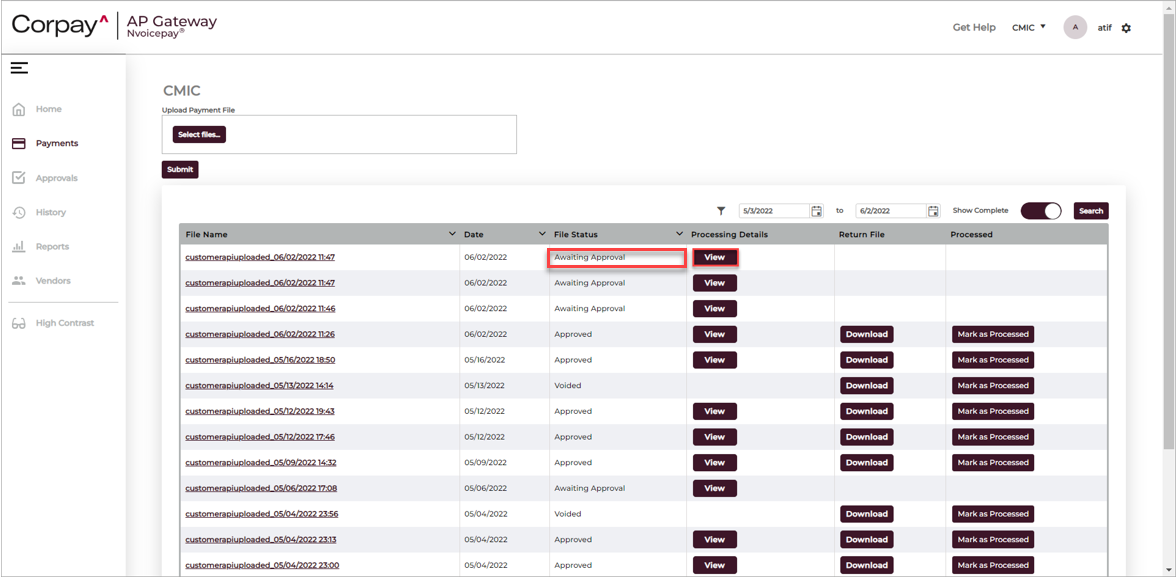
AP Gateway - Payments
Click on the [View] button to approve the file which is awaiting approval. The File Status column will indicate "Awaiting Approval".
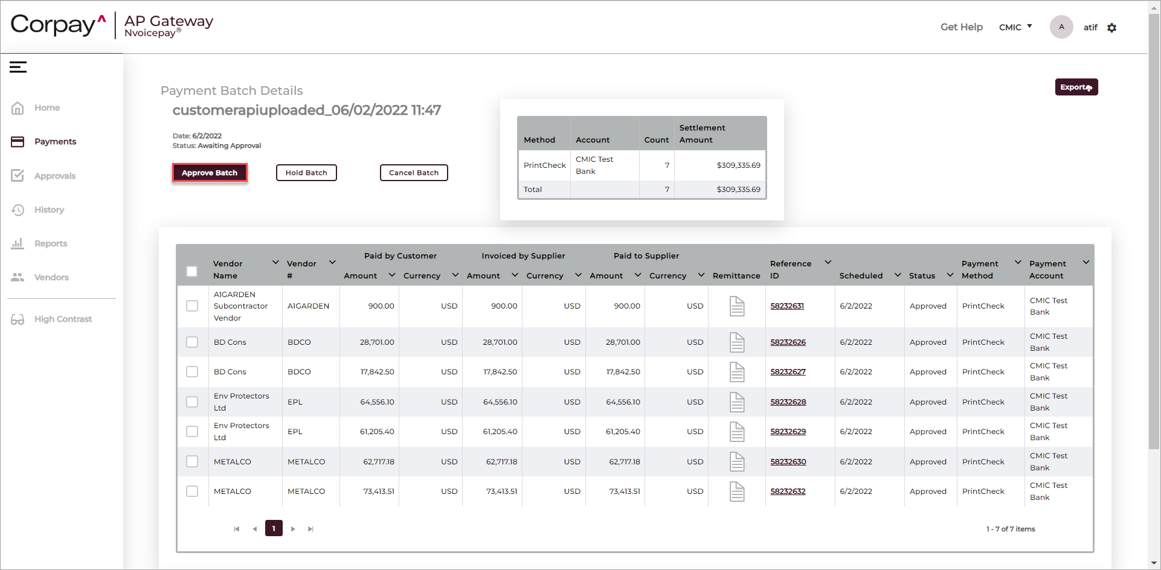
AP Gateway - Payments
Click on the [Approve Batch] button to the approve the whole batch.
NOTE: CMiC integration requires batch approval only.
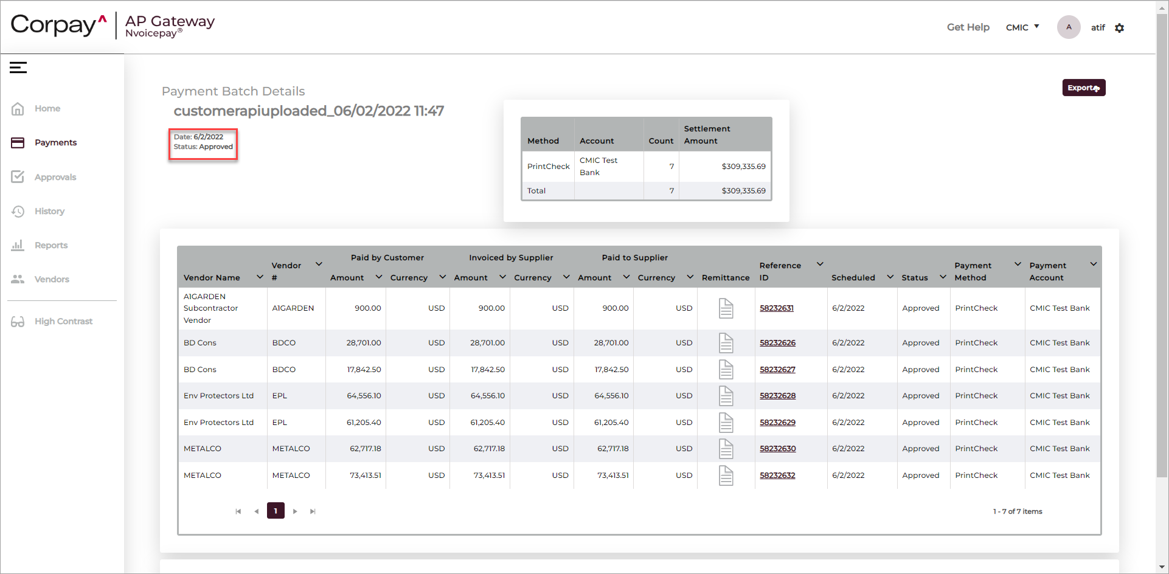
AP Gateway - Payments
Once the batch is approved, the status is changed to "Approved".
Step 4: Post Checks
Pgm: APCHQPRE – Prepare Checks; standard Treeview path: Accounts Payable > Check > Print Checks - [Corpay] button pop-up
Once the payment is approved on AP Gateway, navigate to the Prepare Checks screen in the Accounts Payable module. Populate the same selection code as in Step 1. Click on the [Corpay] button to launch the Prepare Checks pop-up window.
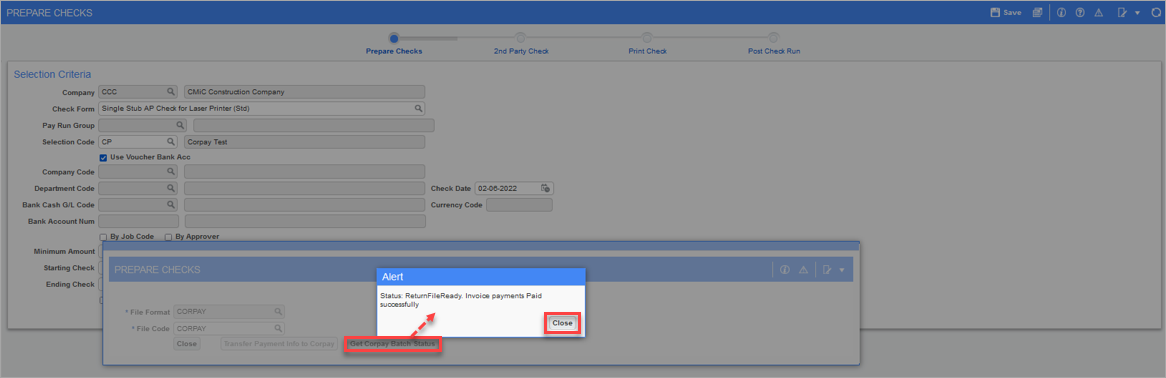
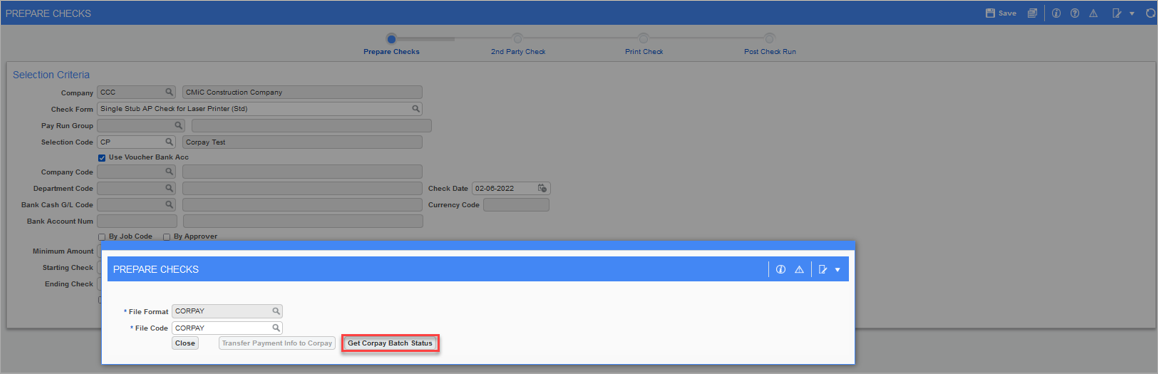
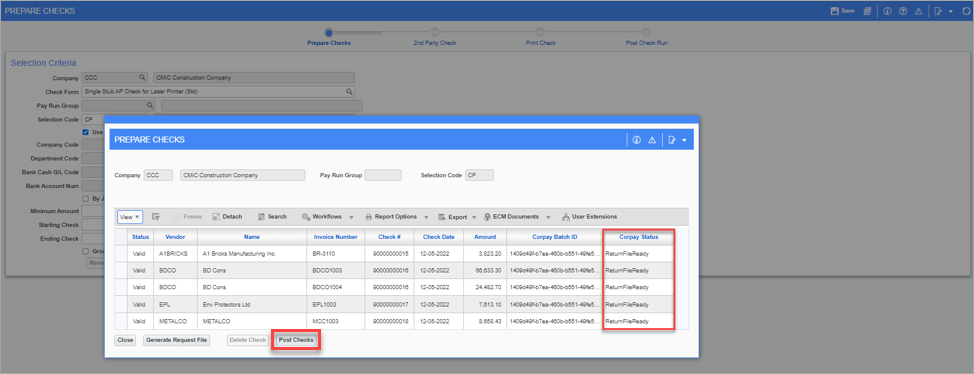
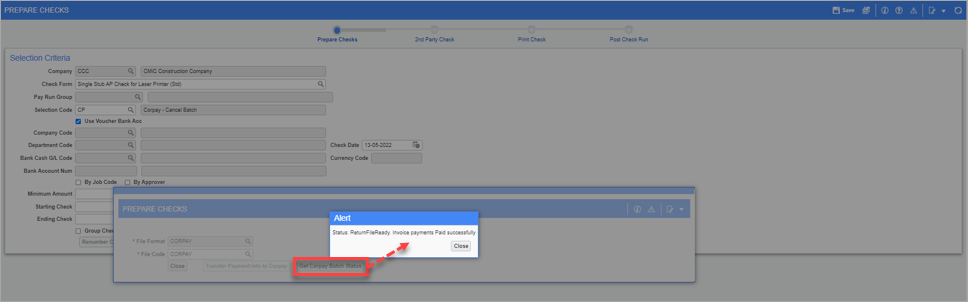
Pgm: APCHQPRE – Prepare Checks; standard Treeview path: Accounts Payable > Check > Print Checks - [Corpay] button pop-up - [Get Corpay Batch Status] button pop-up
In the Prepare Checks pop-up window, click on the Generate Request File button and then in the next pop-up window, click the [Get Corpay Batch Status] button. An alert message should indicate that the Corpay batch status has been updated to "ReturnFileReady" and the invoice payments have been paid successfully.
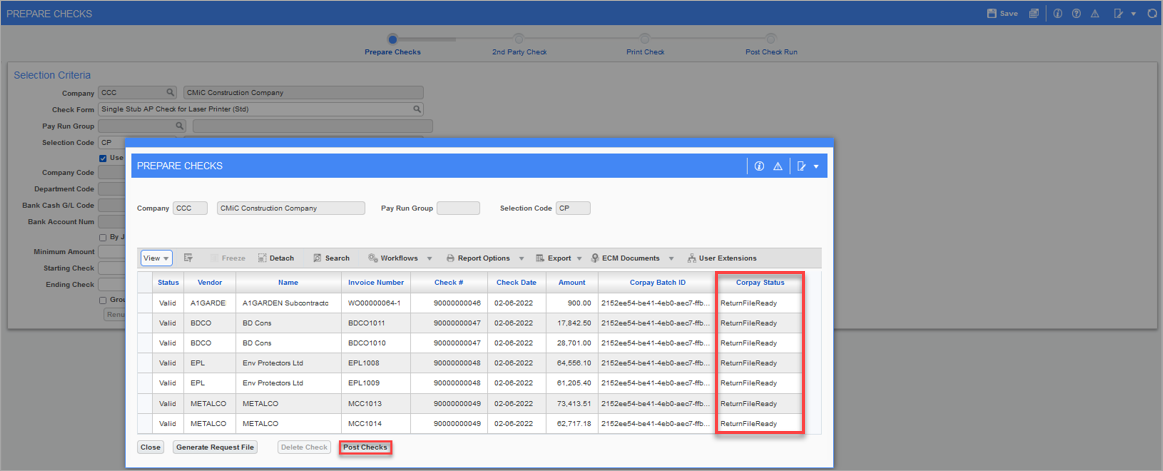
Pgm: APCHQPRE – Prepare Checks; standard Treeview path: Accounts Payable > Check > Print Checks - [Corpay] button pop-up
The [Post Checks] button is enabled in the Prepare Checks pop-up window when the Corpay Status column reads "ReturnFileReady". Click on the [Post Checks] button to launch a pop-up window for posting checks.

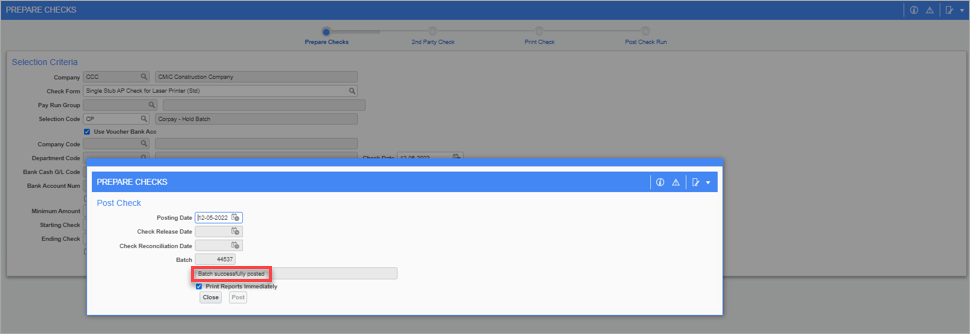
Pgm: APCHQPRE – Prepare Checks; standard Treeview path: Accounts Payable > Check > Print Checks - [Corpay] button pop-up - [Post Checks] button pop-up
Enter the posting date in the pop-up window and click on the [Post] button.
NOTE: The Check Release Date field will be enabled when the ‘Use Check Release Feature’ checkbox is checked on the AP Control File. Similarly, the Check Reconciliation Date field will be enabled when the ‘Automatically Populate Check Reconciliation Date’ checkbox is checked on the AP Control File. Both of these options are located on the Check tab of the AP Control File (standard Treeview path: Accounts Payable > Setup > Control File Options – Check tab).
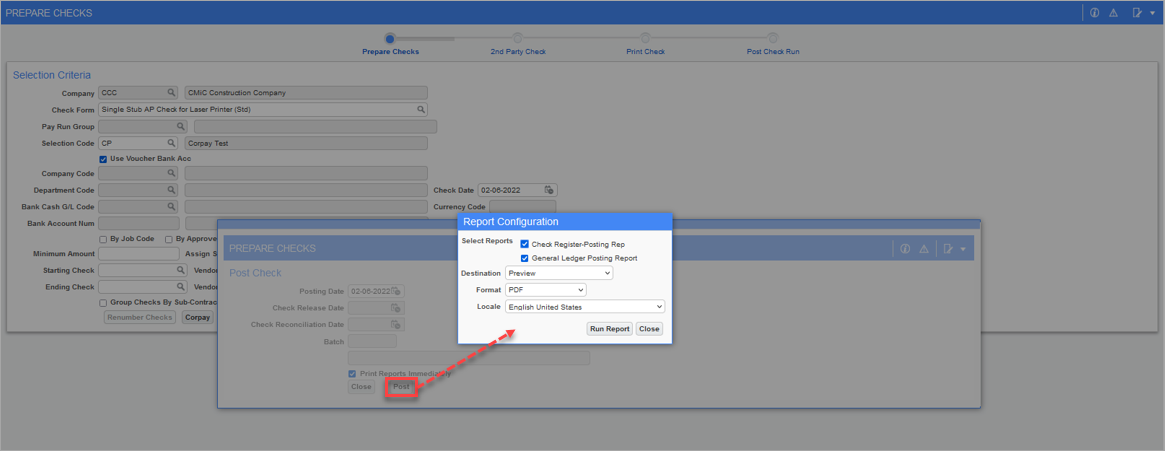
[Post Checks] button pop-up - Report Configuration
The Report Configuration pop-up will be launched. Indicate your report settings and click the [Run Report] button.
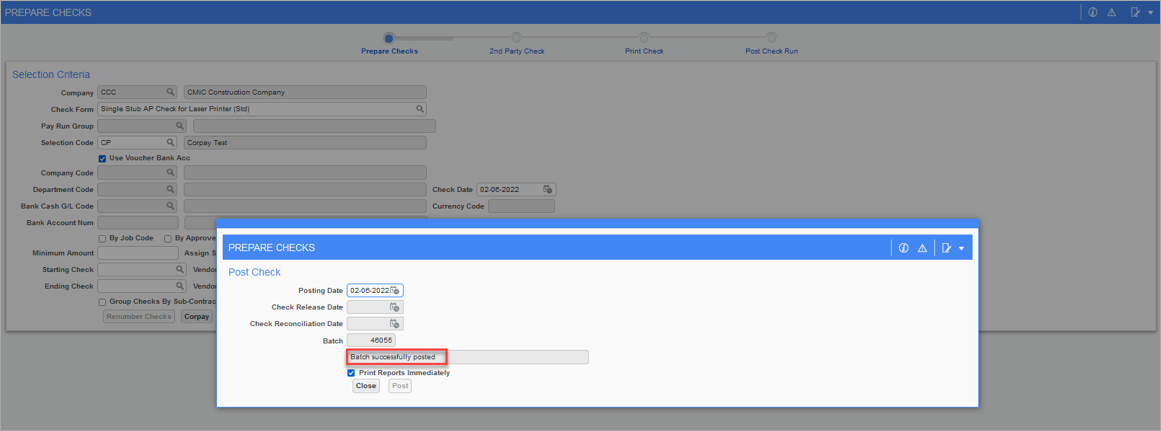
[Post Checks] button pop-up
A message will be displayed to indicate that the batch posted successfully and the batch number will be auto-populated.
Hold Batch and Cancel Batch
In AP Gateway payment approval, batch status can be set to "Hold Batch" and "Cancel Batch". Examples of these options are provided below.
Hold Batch Option
Payment Selection Code: CP
Prepare checks for the selection code and click on the Corpay button to launch a pop-up window to initiate the payment/request file generation process.

Pgm: APCHQPRE – Prepare Checks; standard Treeview path: Accounts Payable > Check > Print Checks - [Corpay] button pop-up - [Get Corpay Batch Status] button pop-up
Request file is generated and payment information is transferred to Corpay.
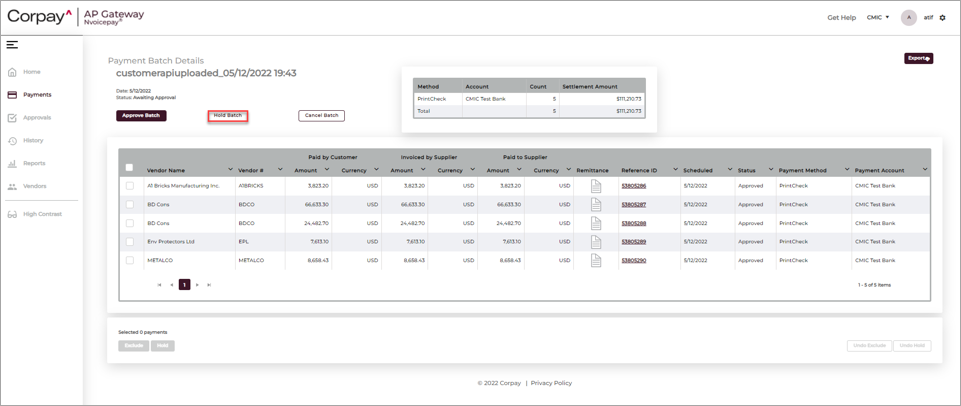
AP Gateway - Payments
Click on [Hold Batch] button to change payment status.

AP Gateway - Payments
After clicking the [Hold] button, the payment status is changed to "On Hold".
Pgm: APCHQPRE – Prepare Checks; standard Treeview path: Accounts Payable > Check > Print Checks - [Corpay] button pop-up - [Get Corpay Batch Status] button pop-up
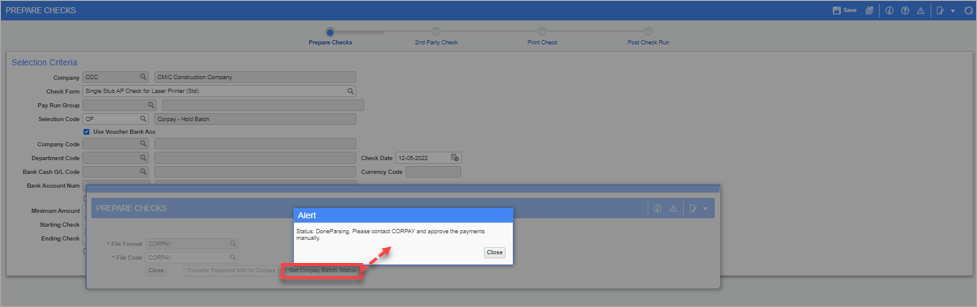
In the Prepare Checks pop-up window, click on [GetCorpay Batch Status] button. An alert message should be displayed to indicate that parsing has completed and that payments must be approved manually.
Pgm: APCHQPRE – Prepare Checks; standard Treeview path: Accounts Payable > Check > Print Checks - [Corpay] button pop-up
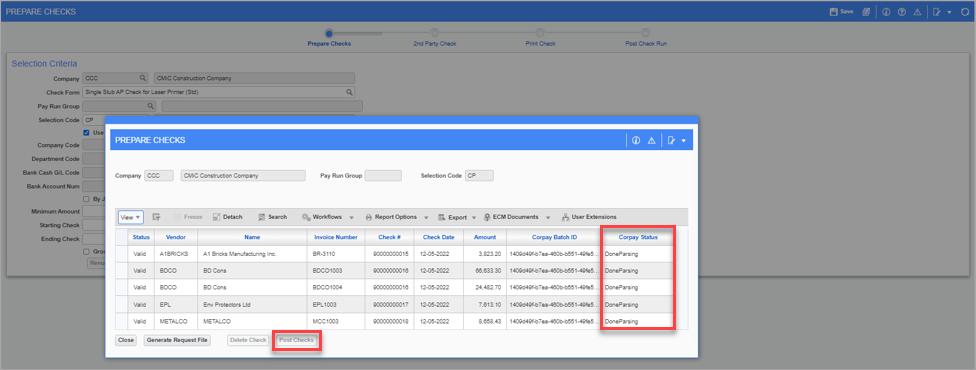
The Corpay Status column reads "DoneParsing" in the Prepare Checks pop-up window, which disables the [Post Checks] button as payments must be approved to post checks.
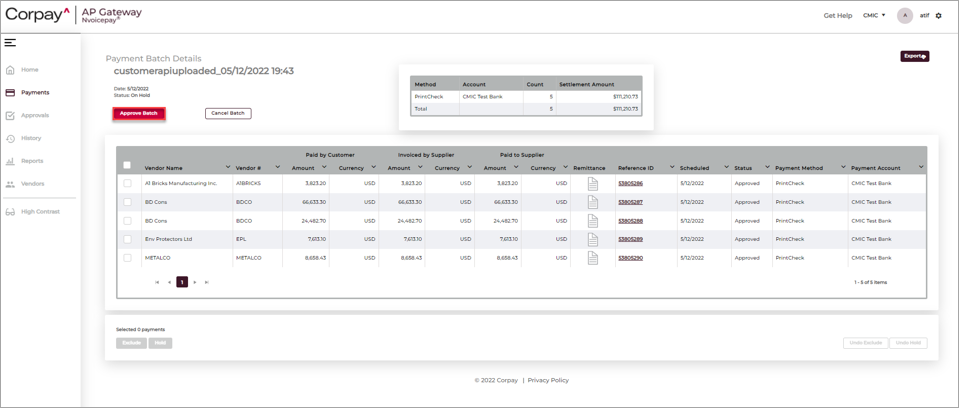
AP Gateway - Payments
In AP Gateway, click on the [Approve Batch] button to approve the payment batch which is on hold.

AP Gateway - Payments
Once the batch is approved, the status is changed to "Approved".

Pgm: APCHQPRE – Prepare Checks; standard Treeview path: Accounts Payable > Check > Print Checks - [Corpay] button pop-up - [Get Corpay Batch Status] button pop-up
In the Prepare Checks pop-up window, click the [Get Corpay Batch Status] button. An alert message should indicate that the Corpay batch status has been updated to "ReturnFileReady" and the invoice payments have been paid successfully.
Pgm: APCHQPRE – Prepare Checks; standard Treeview path: Accounts Payable > Check > Print Checks - [Corpay] button pop-up
The [Post Checks] button is enabled in the Prepare Checks pop-up window when the Corpay Status column reads "ReturnFileReady". Click on the [Post Checks] button to begin the check posting process.
[Post Checks] button pop-up
A message will be displayed to indicate that the batch posted successfully and the batch number will be auto-populated.
Cancel Batch Option
NOTE: Since the Cancel Batch option sets the batch as voided, users must take manual action in the CMiC application and cancel payments as required.
Payment Selection Code: CP
Prepare checks for the selection code and click on the Corpay button to launch a pop-up window to initiate the payment/request file generation process.

Pgm: APCHQPRE – Prepare Checks; standard Treeview path: Accounts Payable > Check > Print Checks - [Corpay] button pop-up - [Get Corpay Batch Status] button pop-up
The Corpay Status column reads "DoneParsing" in the Prepare Checks pop-up window.
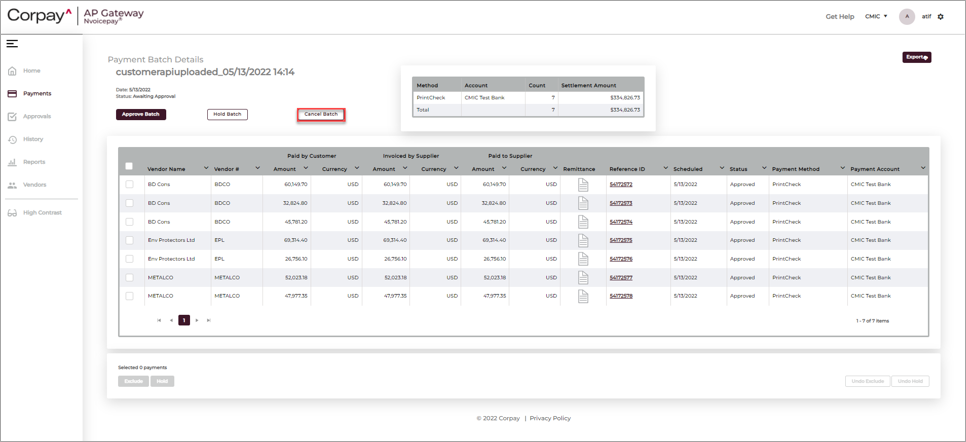
AP Gateway - Payments
In AP Gateway, click on [Cancel Batch] button to void the payment.

AP Gateway - Payments
The status is changed to "Void Complete".
Pgm: APCHQPRE – Prepare Checks; standard Treeview path: Accounts Payable > Check > Print Checks - [Corpay] button pop-up - [Get Corpay Batch Status] button pop-up
In the Prepare Checks pop-up window, click the [Get Corpay Batch Status] button. An alert message should indicate that the Corpay batch status has been updated to "ReturnFileReady".
The [Post Checks] button is enabled in the Prepare Checks pop-up window when the Corpay Status column reads "ReturnFileReady". Click on the [Post Checks] button to begin the check posting process.